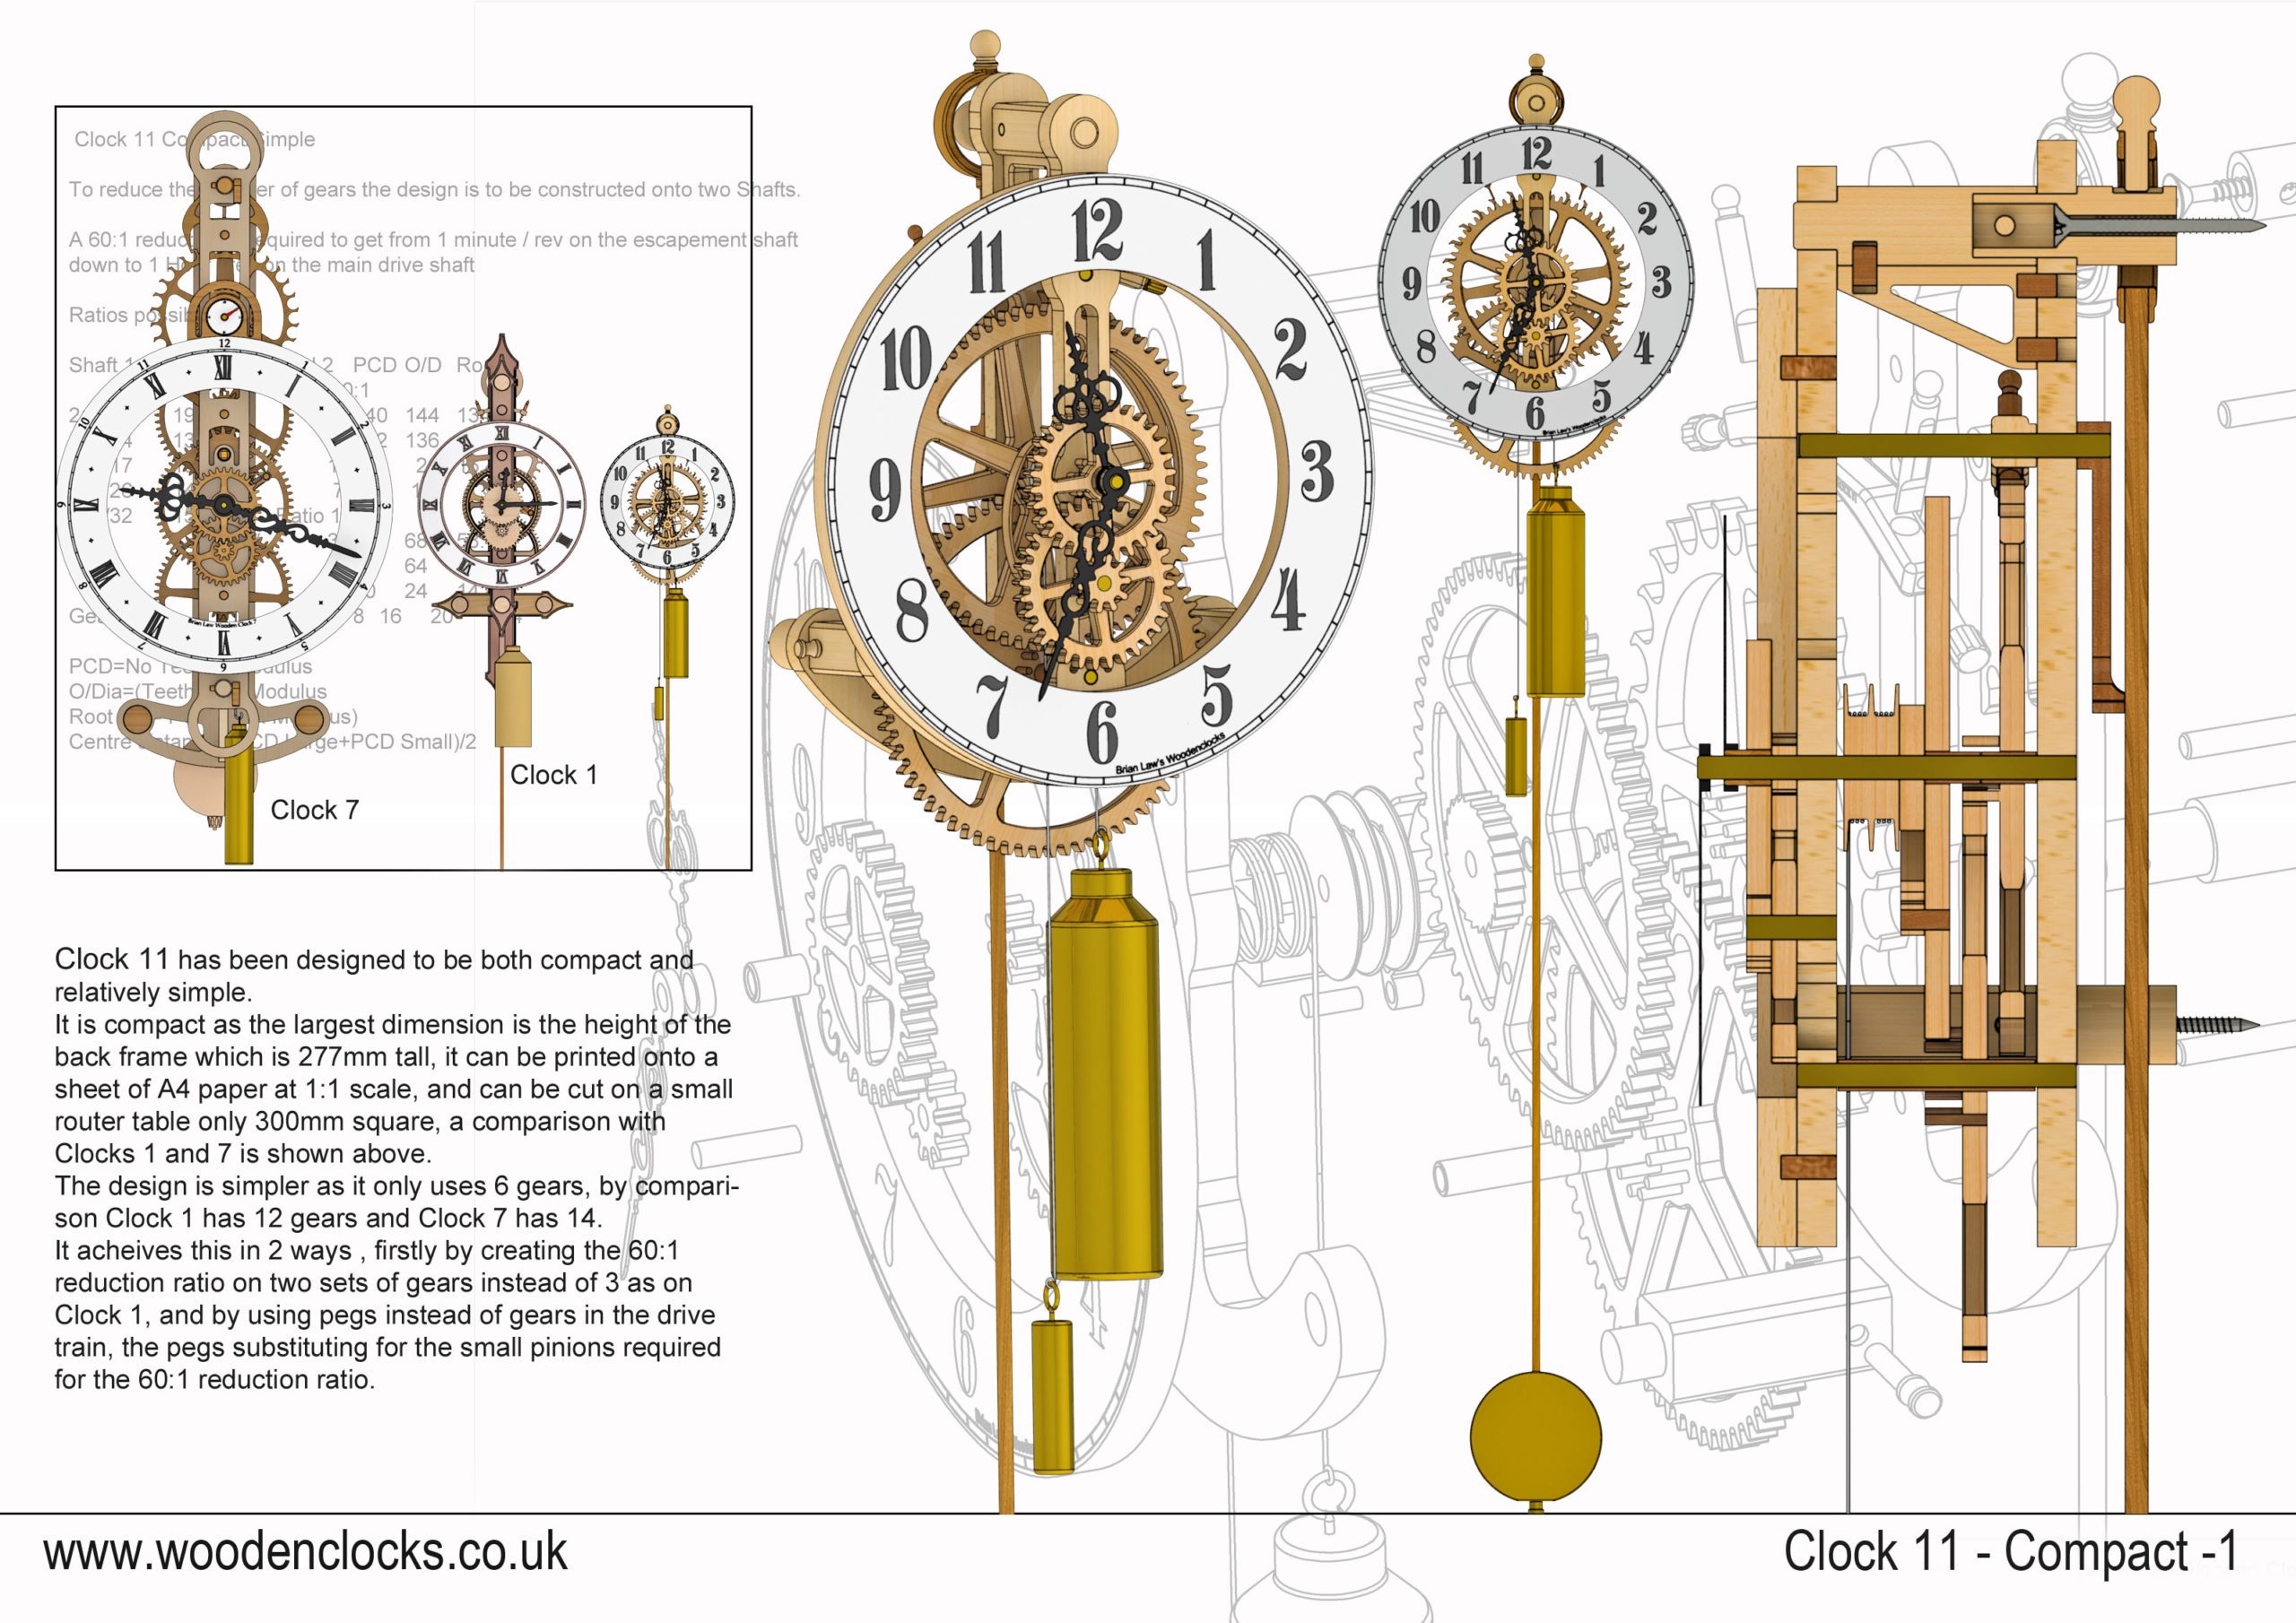
Clock 11 has been designed to be both compact and relatively simple. It is compact as the largest dimension is the height of the back frame which is 277 mm tall, it can be printed onto a sheet of A4 paper at 1:1 scale, and can be cut on a small router table only 300 mm square, a comparison with Clocks 1 and 7 is shown in the illustrations opposite.
The design is simpler as it only uses 6 gears, by comparison Clock 1 has 12 gears and Clock 7 has 14.It achieves this in 2 ways , firstly by creating the 60:1 reduction ratio on two sets of gears instead of 3 as on Clock 1, and by using pegs instead of gears in the drive train, the pegs substituting for the small pinions required for the 60:1 reduction ratio.
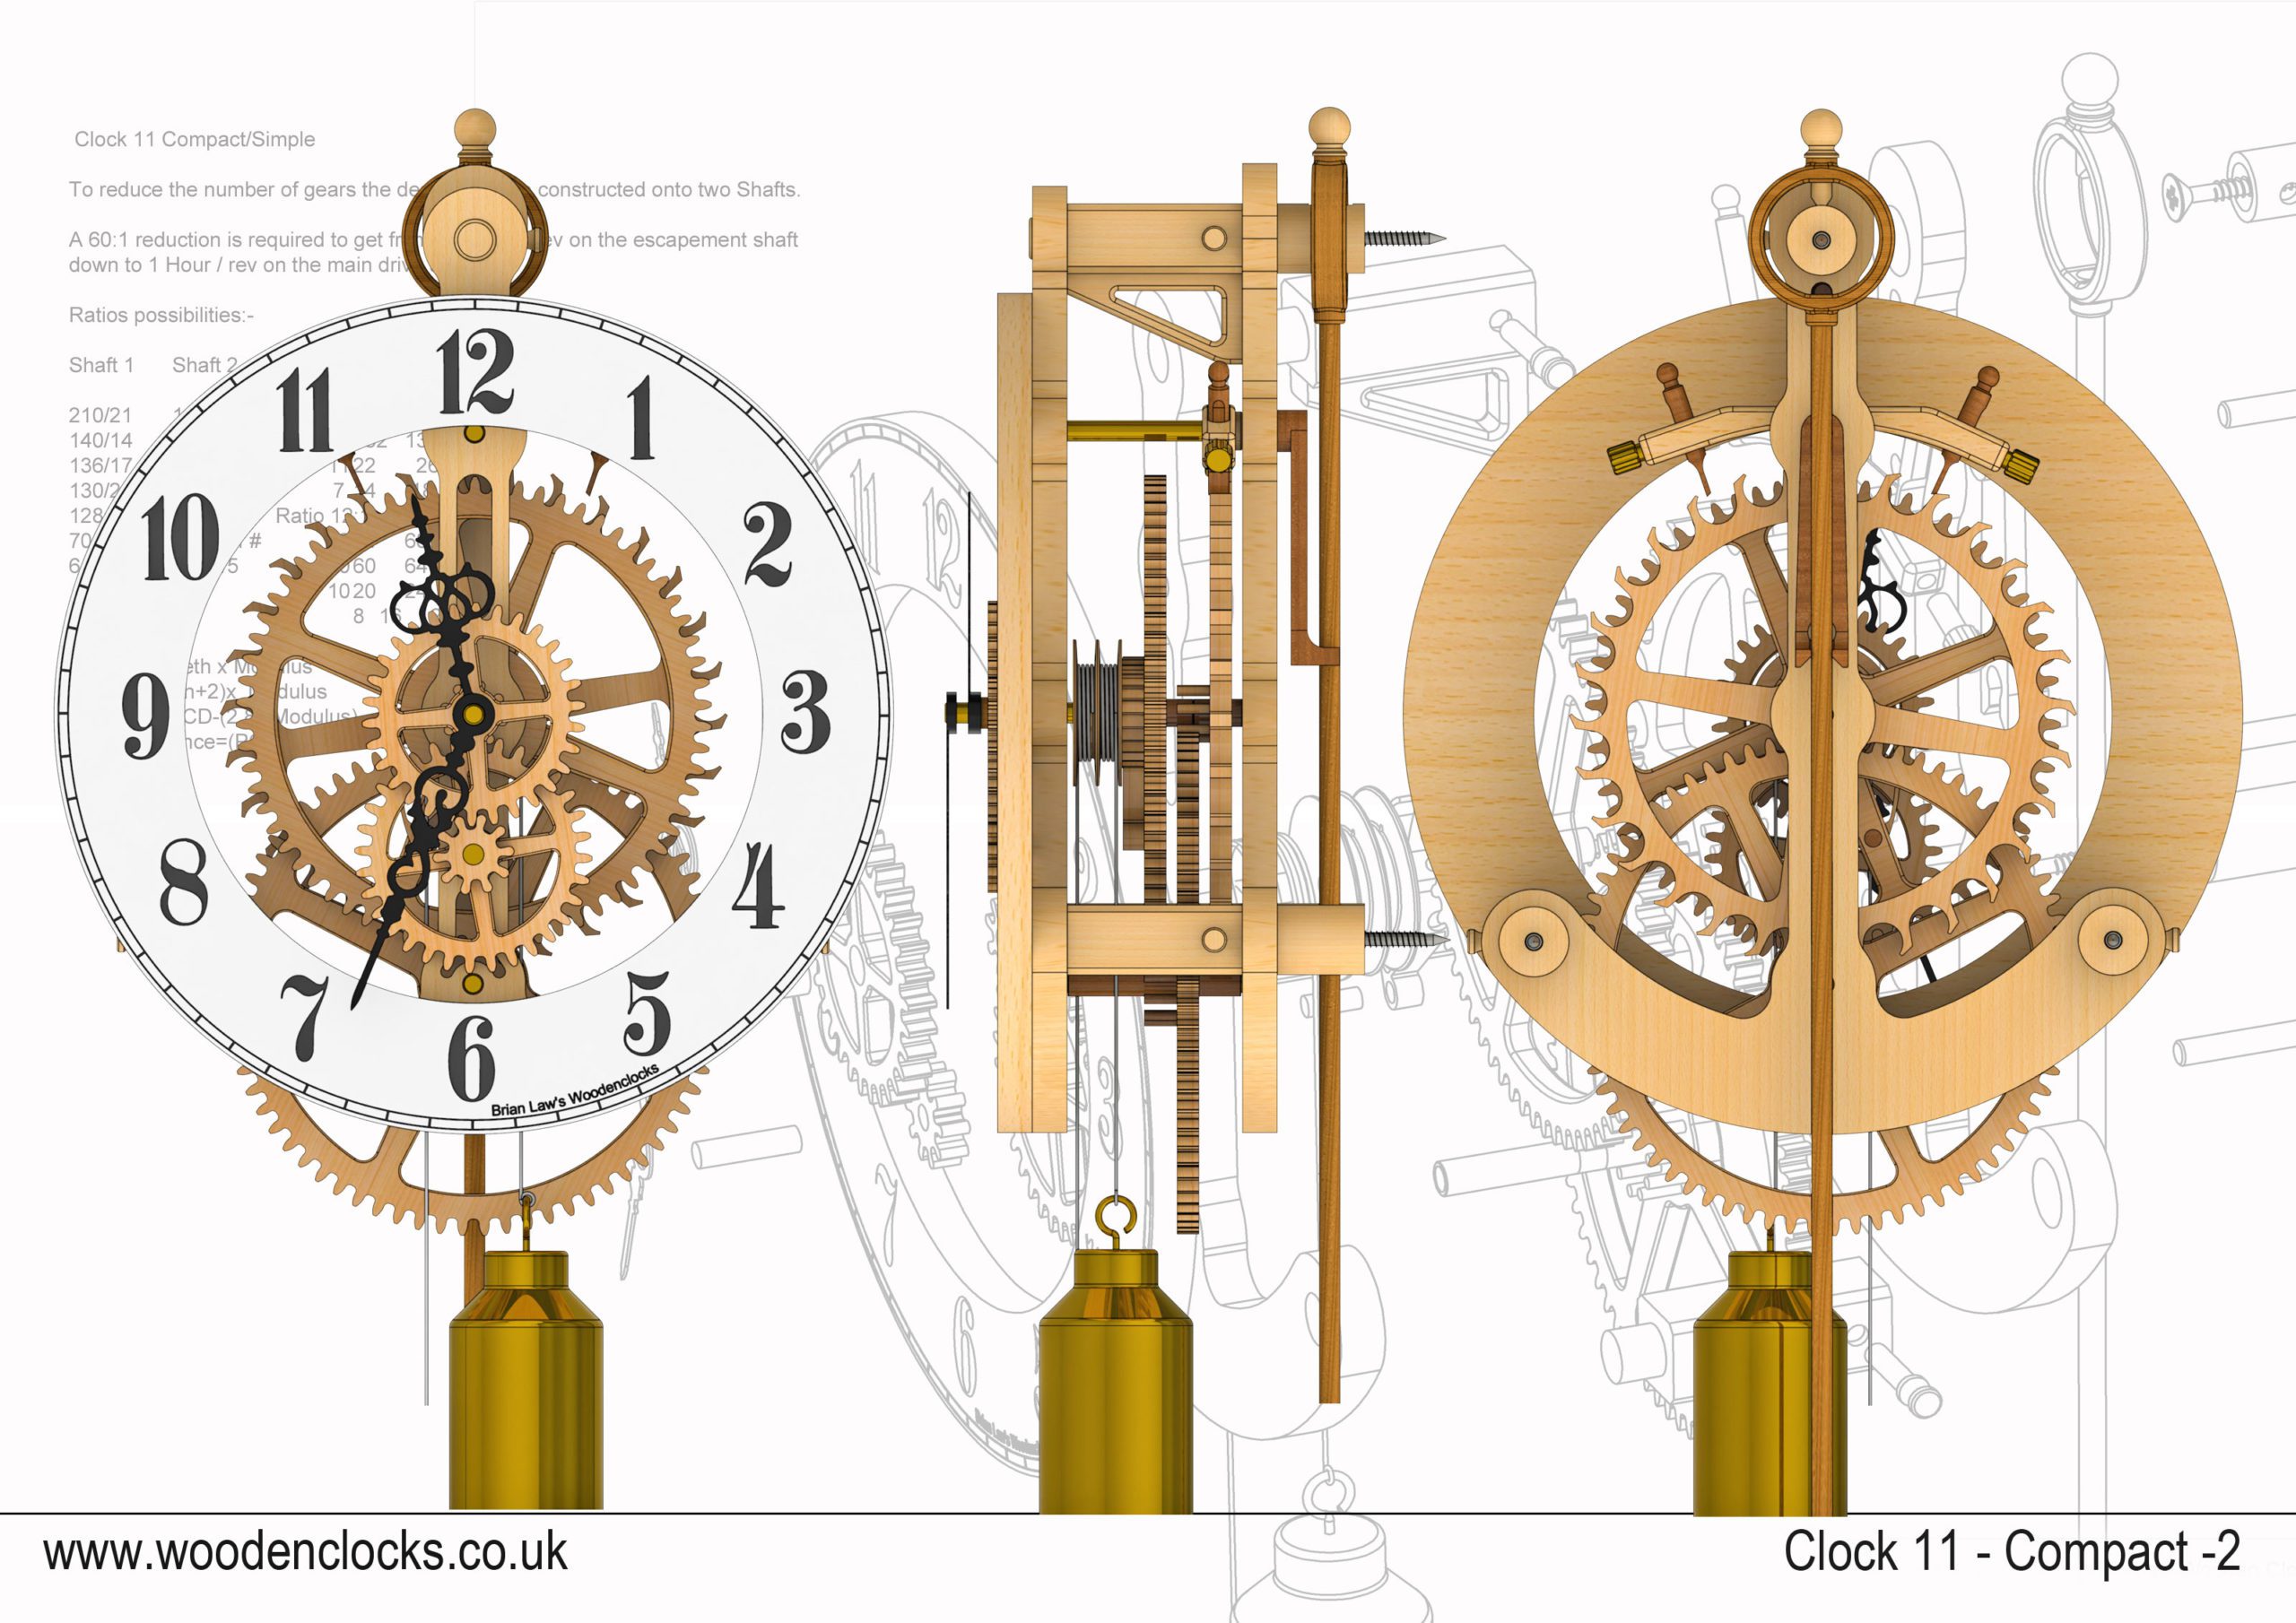
A further change to reduce the number of gears was the introduction of a pull cord that is wound opposite to the weight, so by pulling down on this cord the weight is lifted back up.
Following the trend started in Clock 9 the 2D and 3D data is offered to aid in your construction of the clock.
The design was mainly done in metric, with all the shaft sizes given in millimetres,but the plans are detailed in both millimetres and inches.
DXF, DWG 2D files, and the IGS and STP files that can be used with your CNC machine can be downloaded here for $26. You also get the unrestricted version of the PDF files that can be printed at full size.
Drawings for this clock in PDF format can be downloaded here. These free files are restricted so that you can only view them on screen but not print them. Clicking here will download the PDF file directly to your browser, may take a few moments so please be patient.
A sample from the DXF/DWG files is shown here. The actual files purchased above are included on one large sheet so that they may be directly loaded into your CAM program.
To print only a single item of the drawing to scale using Adobe Acrobat Reader, do the following:
Go to Edit, then click on Take a snapshot, move the cursor to the top left of the item you want to print and hold down the left mouse button whilst you drag a box around the item. The inside of the box turns blue and you can now go to File and then click on Print. This brings up the print dialogue, make sure Selected graphic is selected and that the Page scaling is set to None and the click on OK. As long as your printer is connected you will have printed the item at size. Do this for each item you want to cut out.
We use cookies to ensure that we give you the best experience on our website. If you continue to use this site we will assume that you are happy with it.