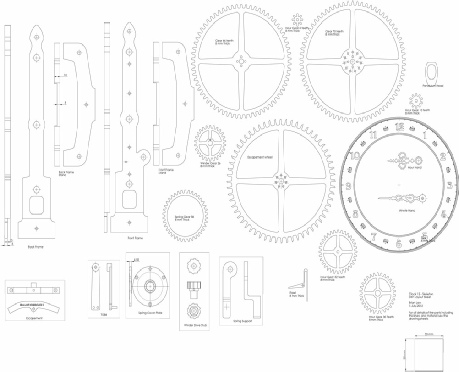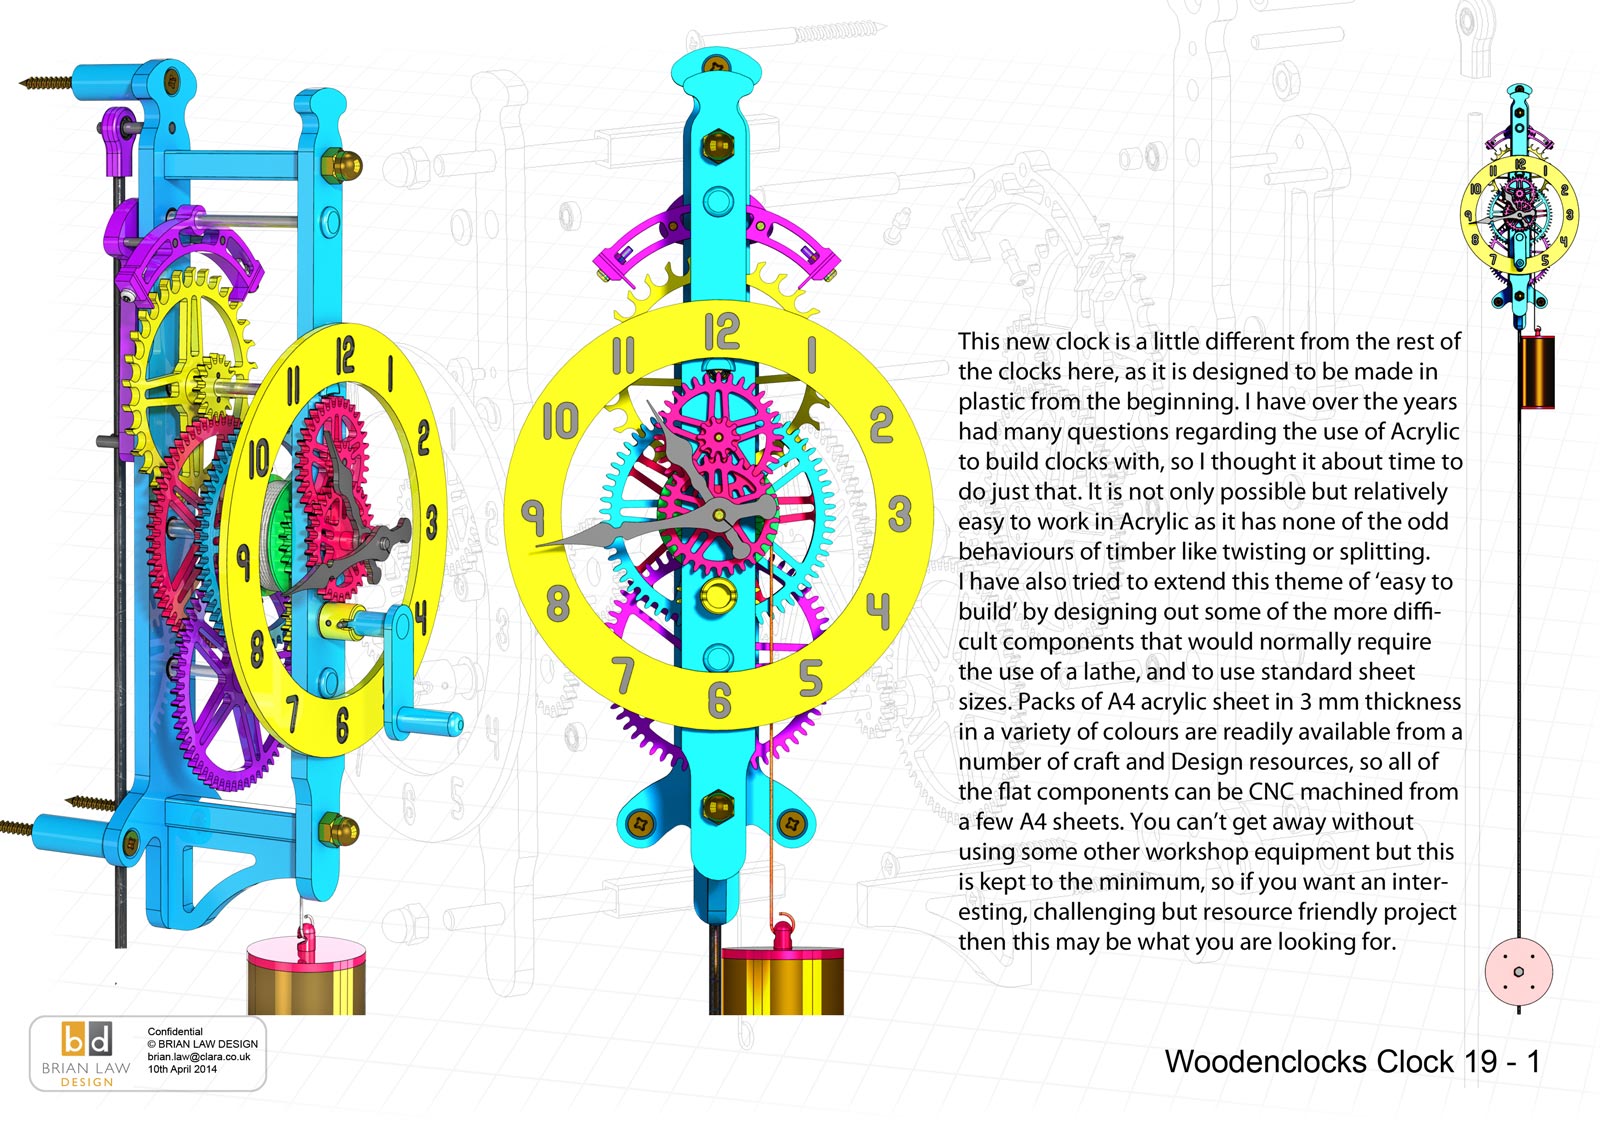

Clock 19 This new clock is a little different from the rest of the clocks here, as it is designed to be made in plastic from the beginning. I have over the years had many questions regarding the use of Acrylic to build clocks with, so I thought it about time to do just that. It is not only possible but relatively easy to work in Acrylic as it has none of the odd behaviours of timber like twisting or splitting.
I have also tried to reduce the number of parts in the clock that require the use of a lathe, and to use standard sheet sizes. Packs of A4 acrylic sheet in 3 mm thickness in a variety of colours are readily available from a number of craft and Design resources, so all of the flat components can be CNC machined from a few A4 sheets. You can’t get away without using some other workshop equipment but this is kept to the minimum, so if you want an interesting, challenging but resource friendly project then this may be what you are looking for.
In an attempt to design the clock so that it didn’t need a lathe to be used in its construction a few of the parts that would normally be made on a lathe were designed to be built in layers so that the layers could be cut by CNC and then built up using pins and solvent adhesive, typically the drum can be built this  way.
way.
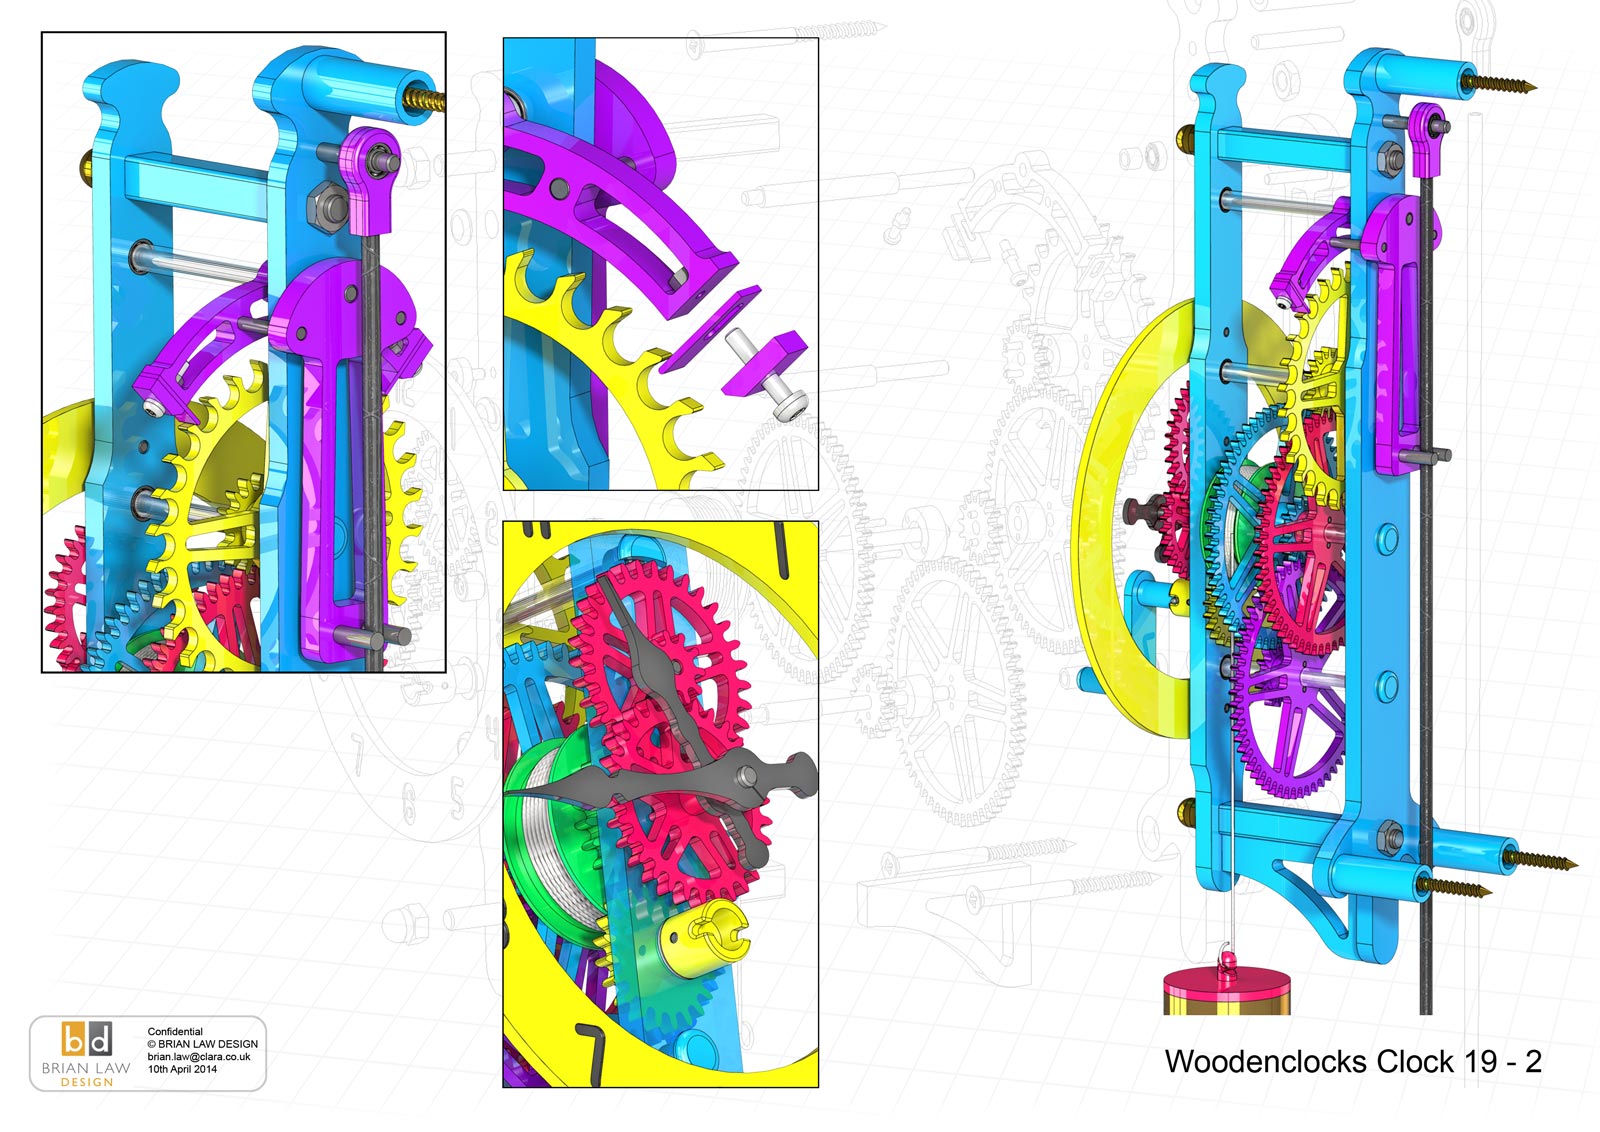
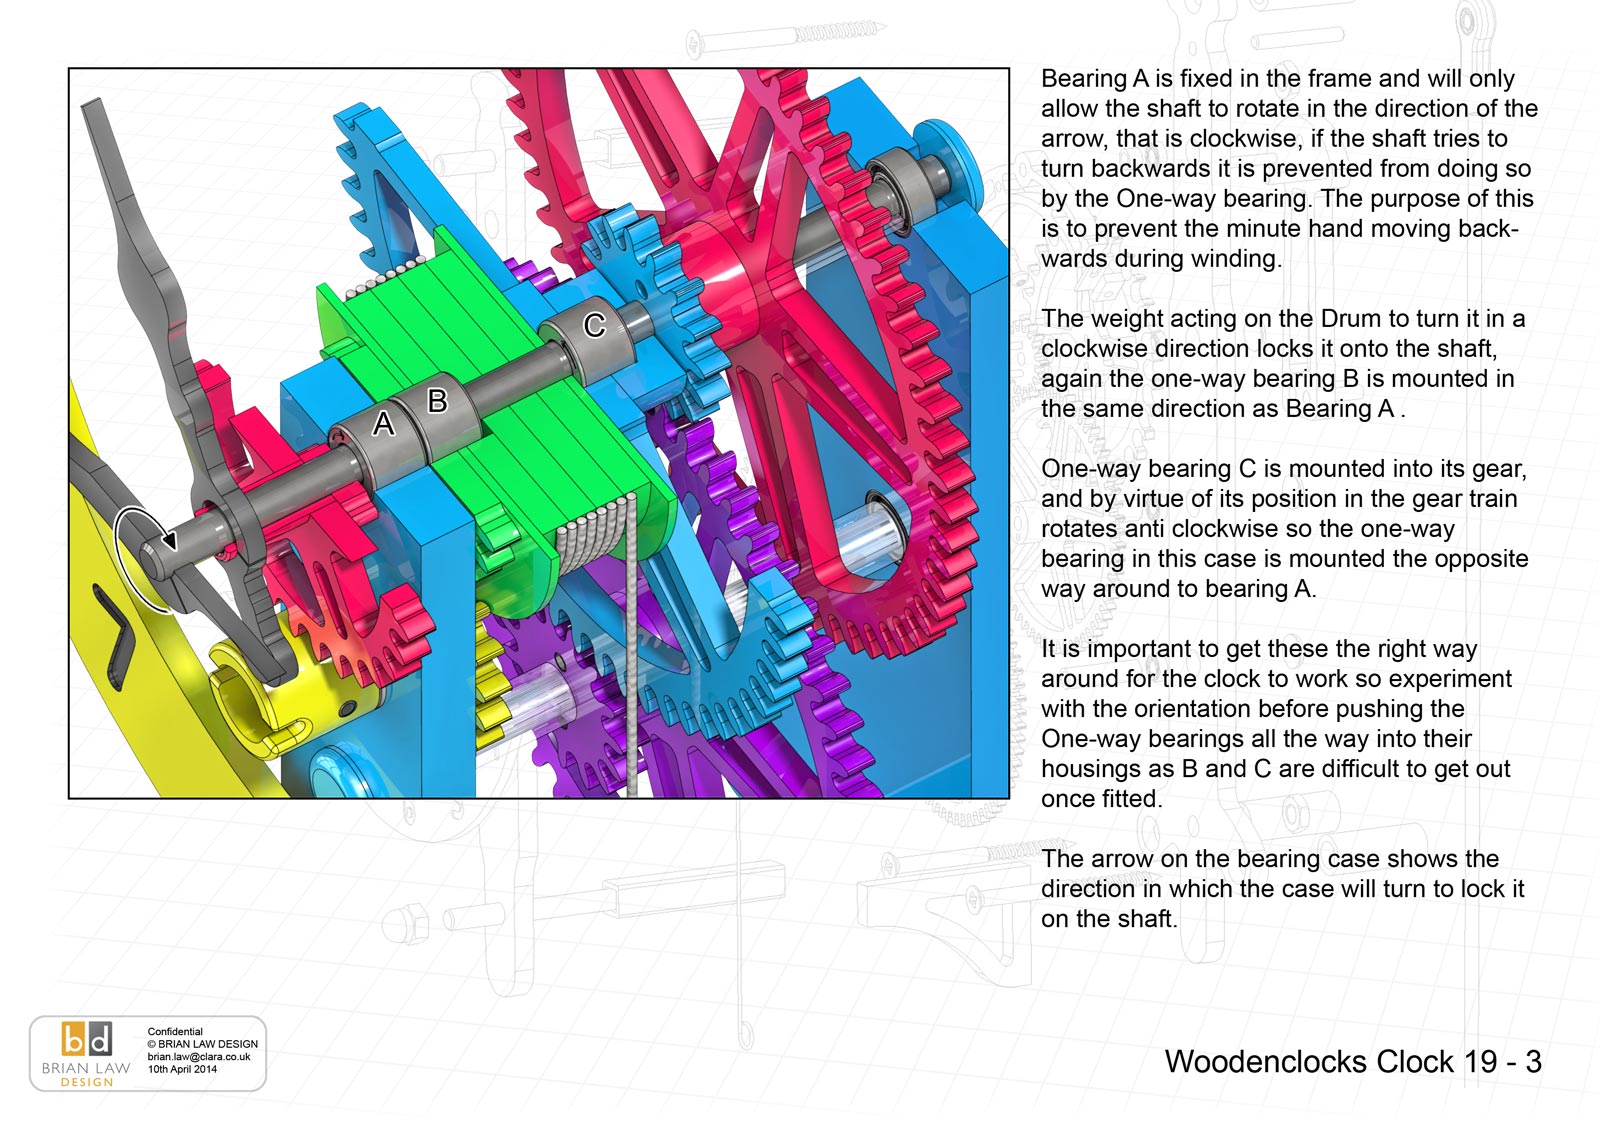
Another of the new design features introduced on this clock is the use of One Way Bearings to facilitate winding. This has been necessary because of the ratchet feature normally employed on the other clocks would be very week on this size of clock so one way bearings are used to control the way that the shafts  rotate so that the clock can be wound without disengaging the gear train. The only problem with this is to get your head around how the one way bearing works, I have described how to orientate these bearings correctly in a couple of places but it would be a good idea to play around with these bearings before finally fitting them, so you get a better understanding of the action.
I have used miniature ball bearings to support all the shafts to reduce friction and ensure that the spring drive can run efficiently.
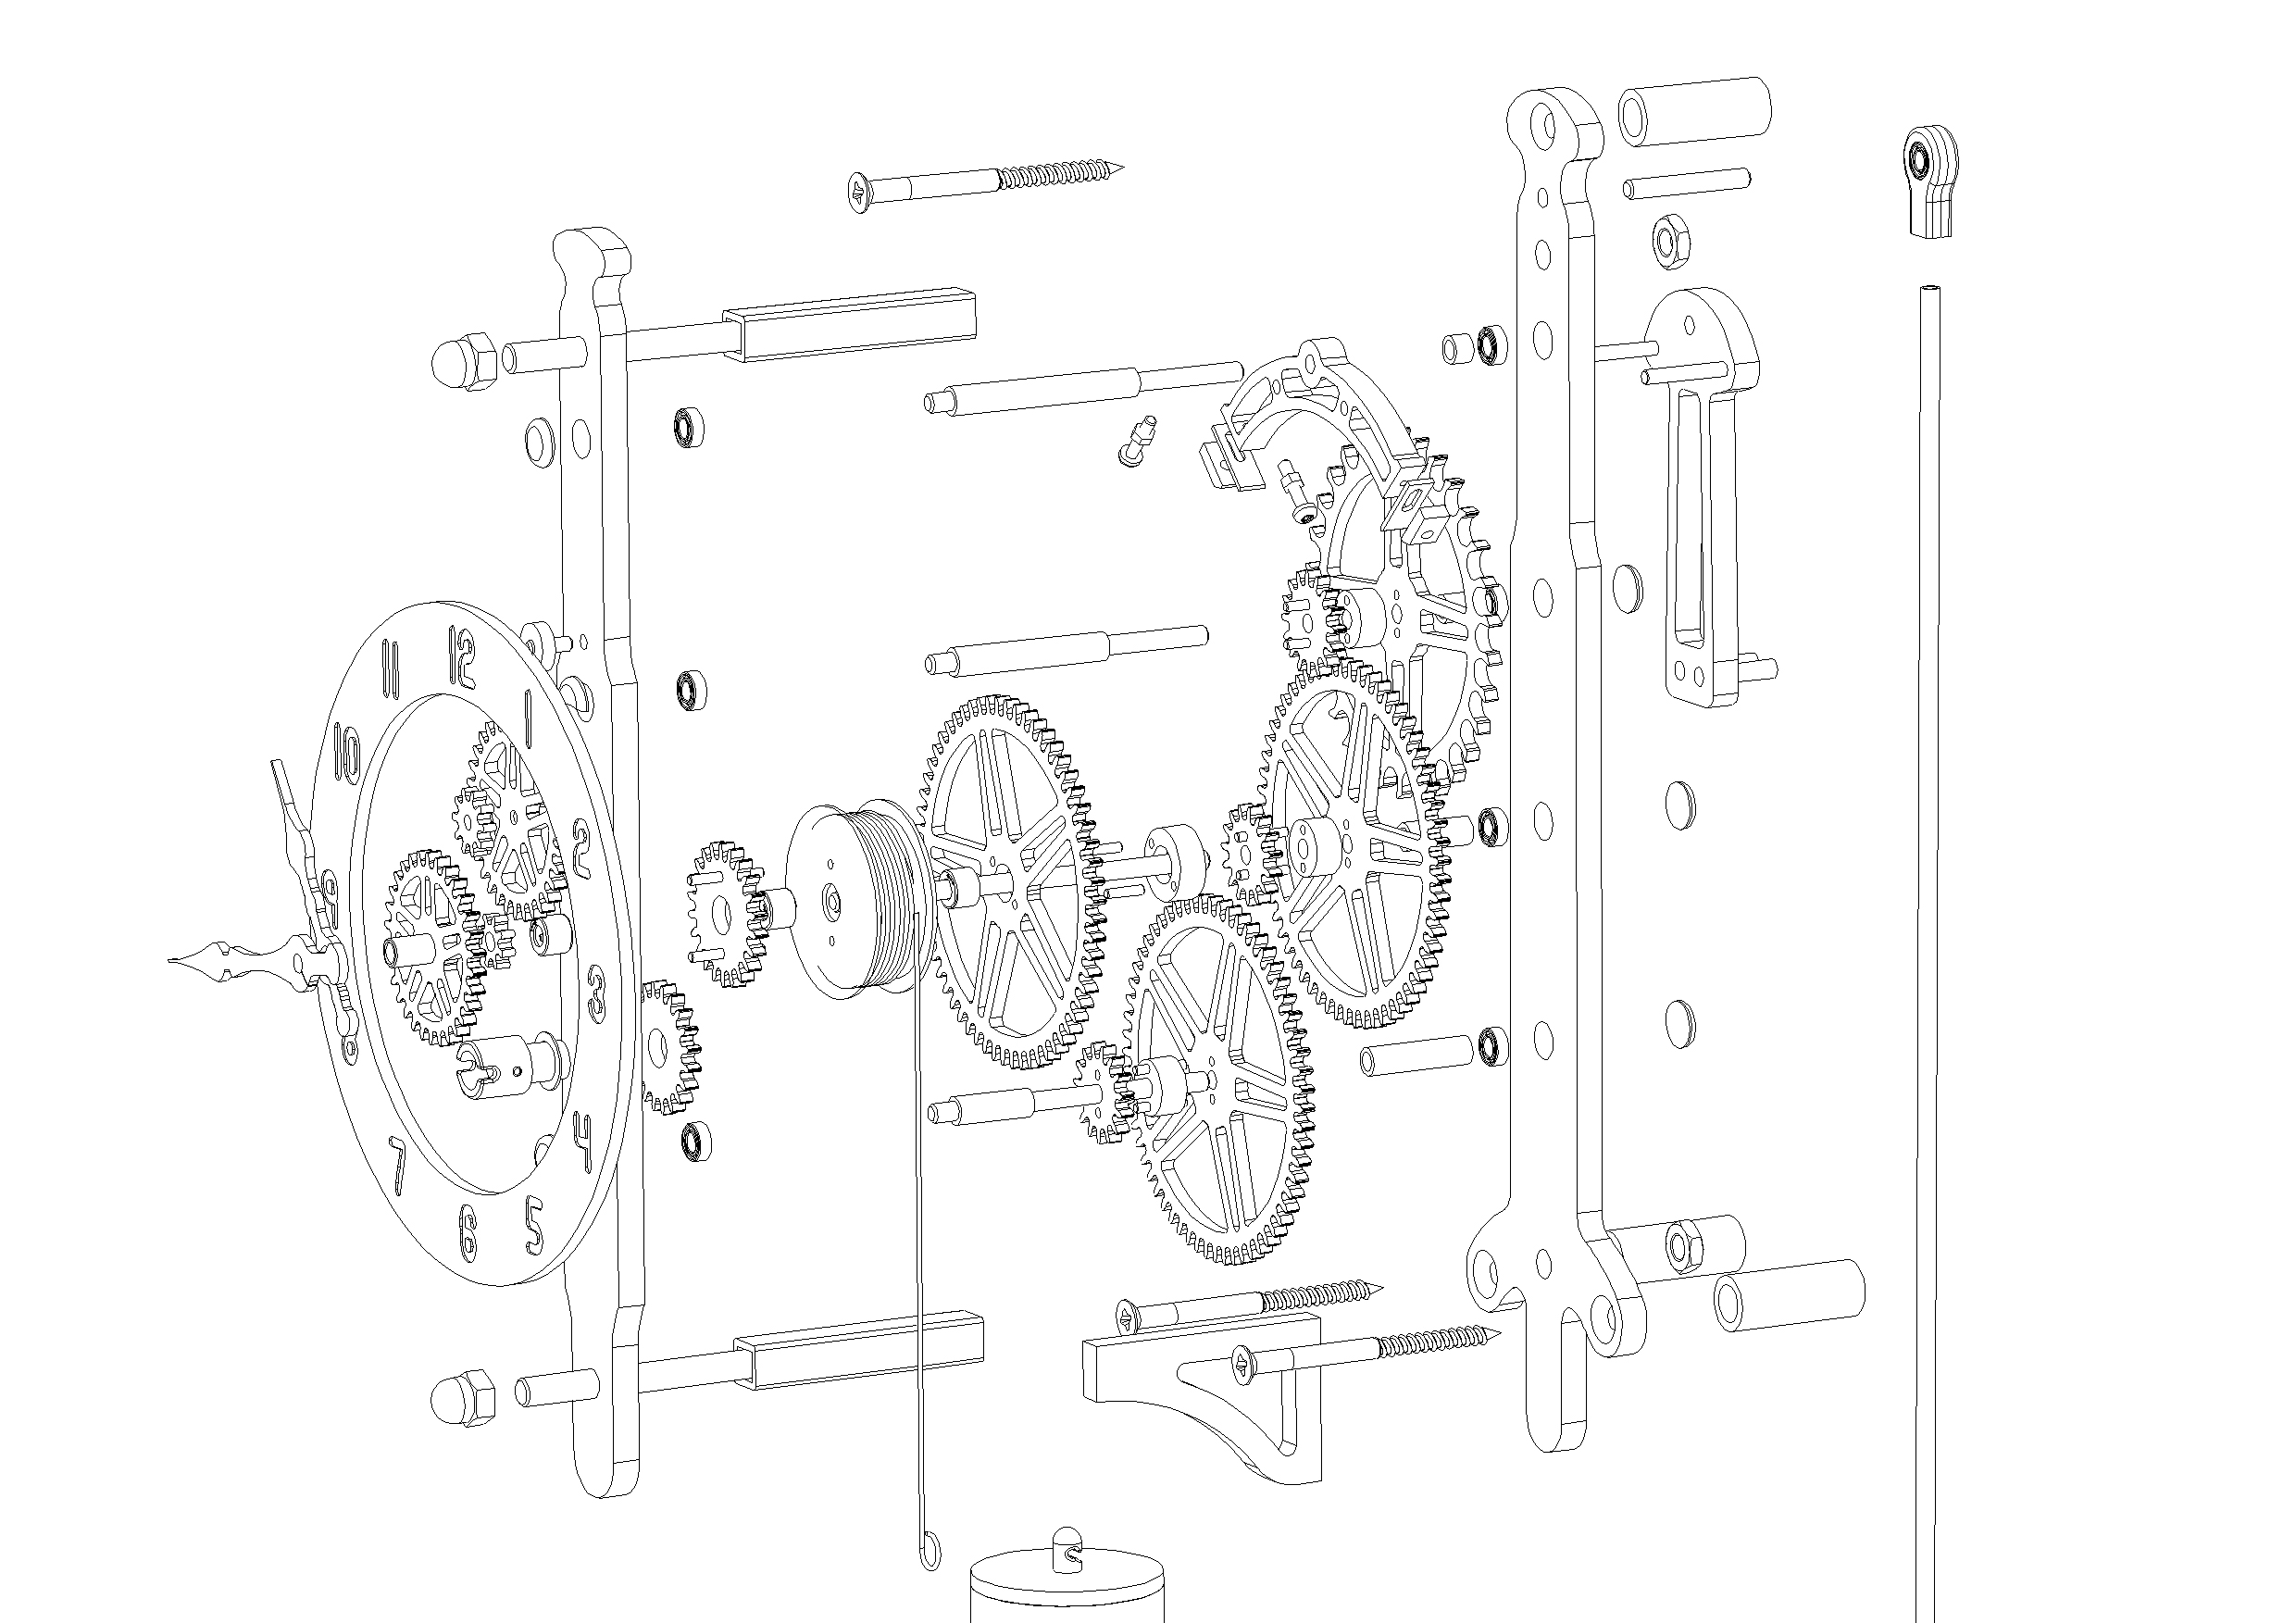
You can view the Detail drawings of the clock and the renders showing in detail the construction along with the instructions for assembly. The free files are restricted and are not suitable for actually making the clock with but all the drawings and renders along with the DXF and DWG files for using with CNC machining can be purchased from the download page.
Finally I should in fairness point out that this clock can be a challenge, it is easier than the others because you can get away without using a lathe, but you still need some kit ( see my article on this subject in the Blog) and a measure of skill using tools.