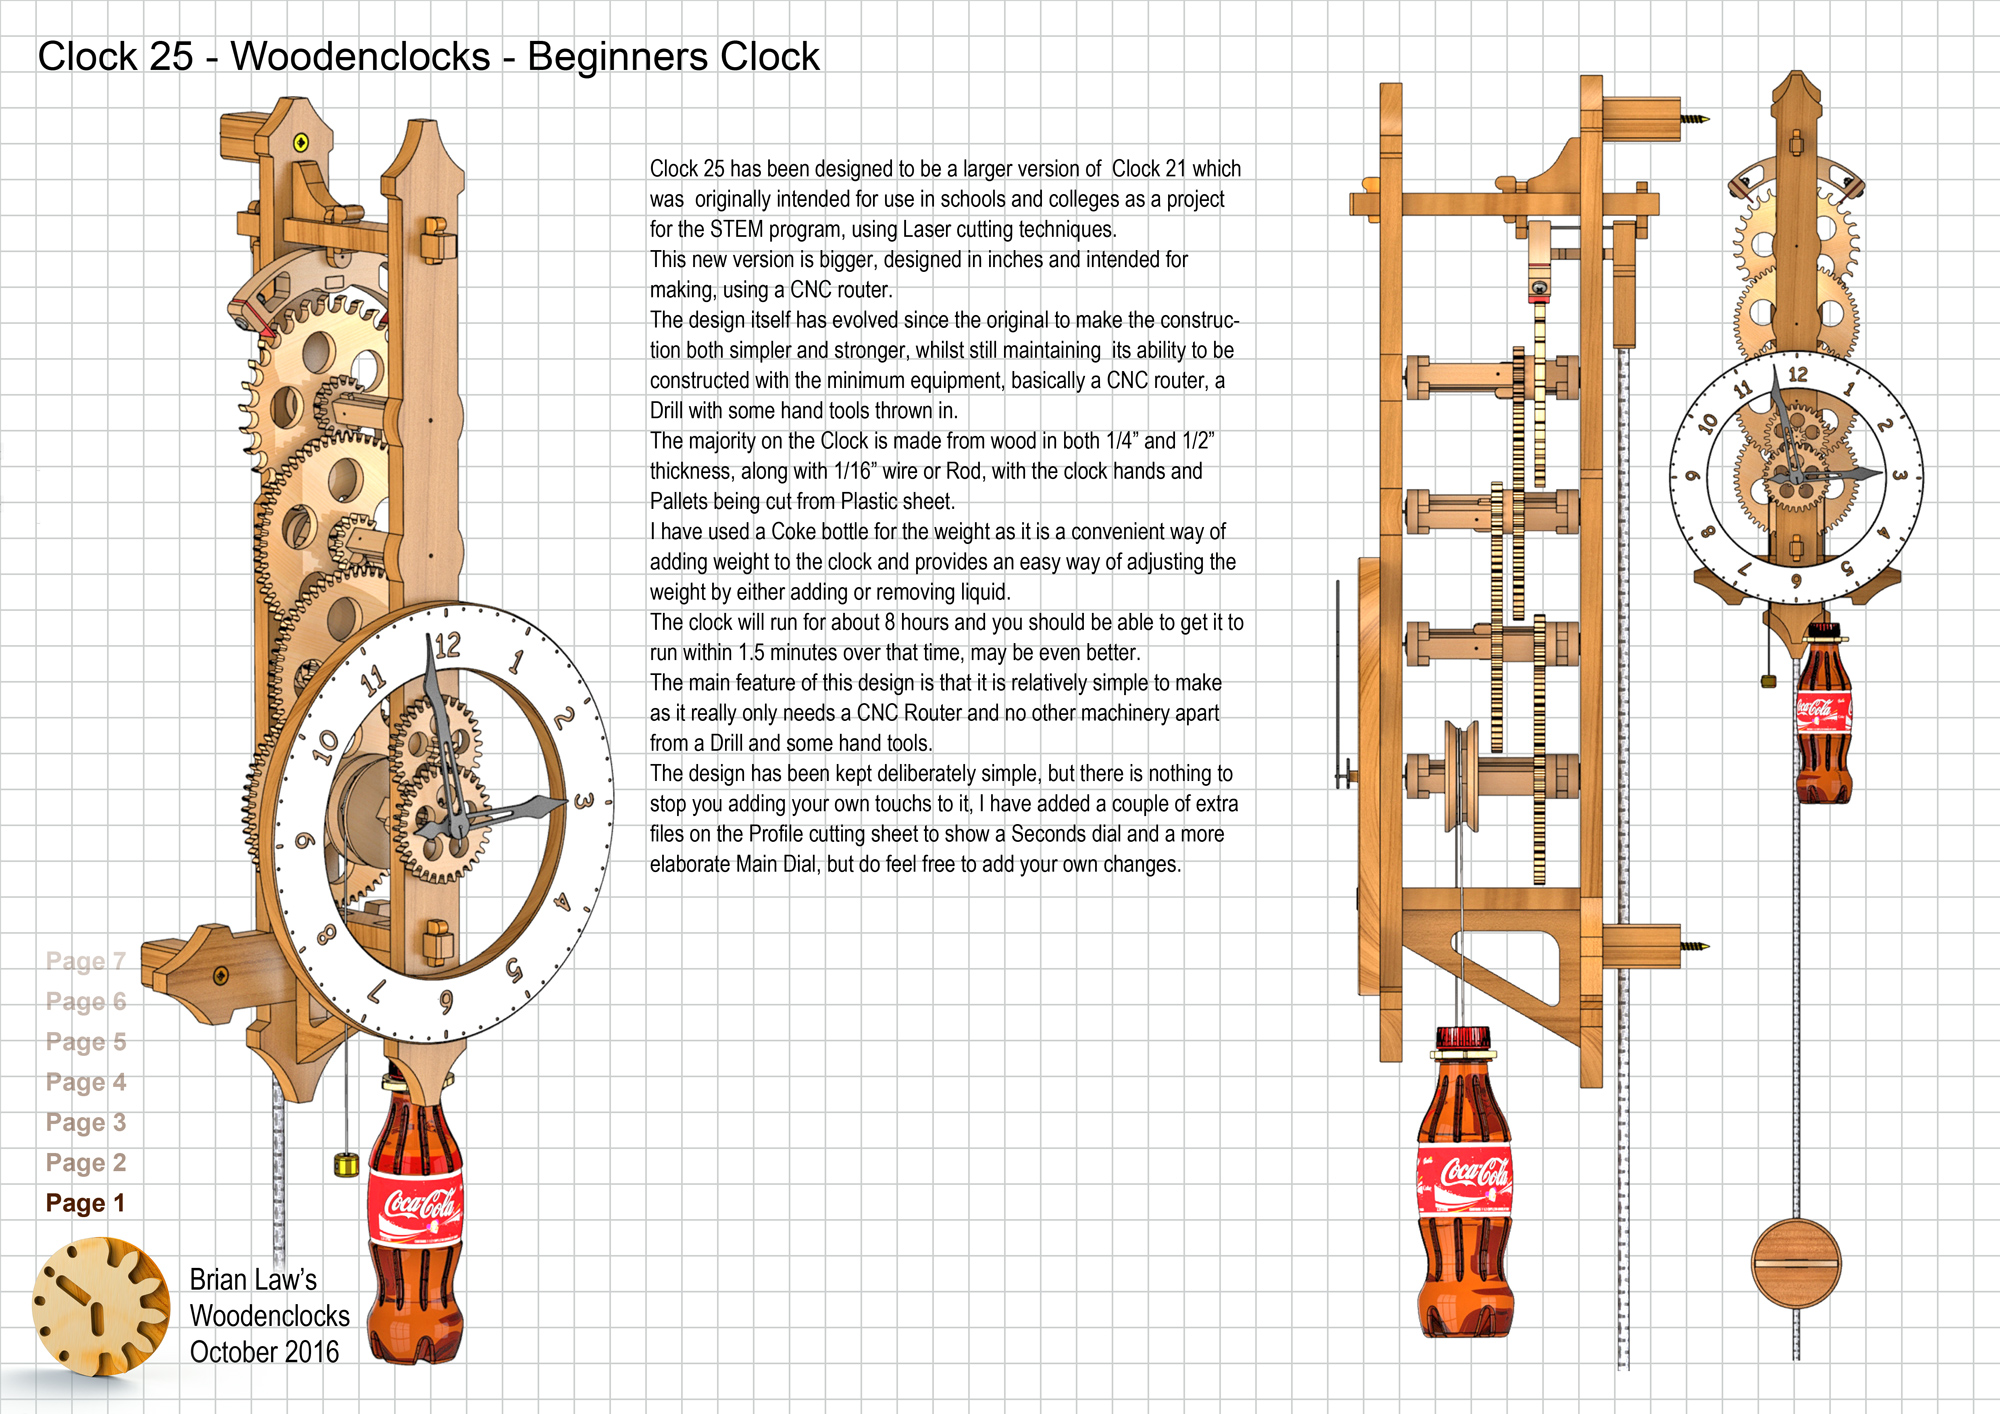

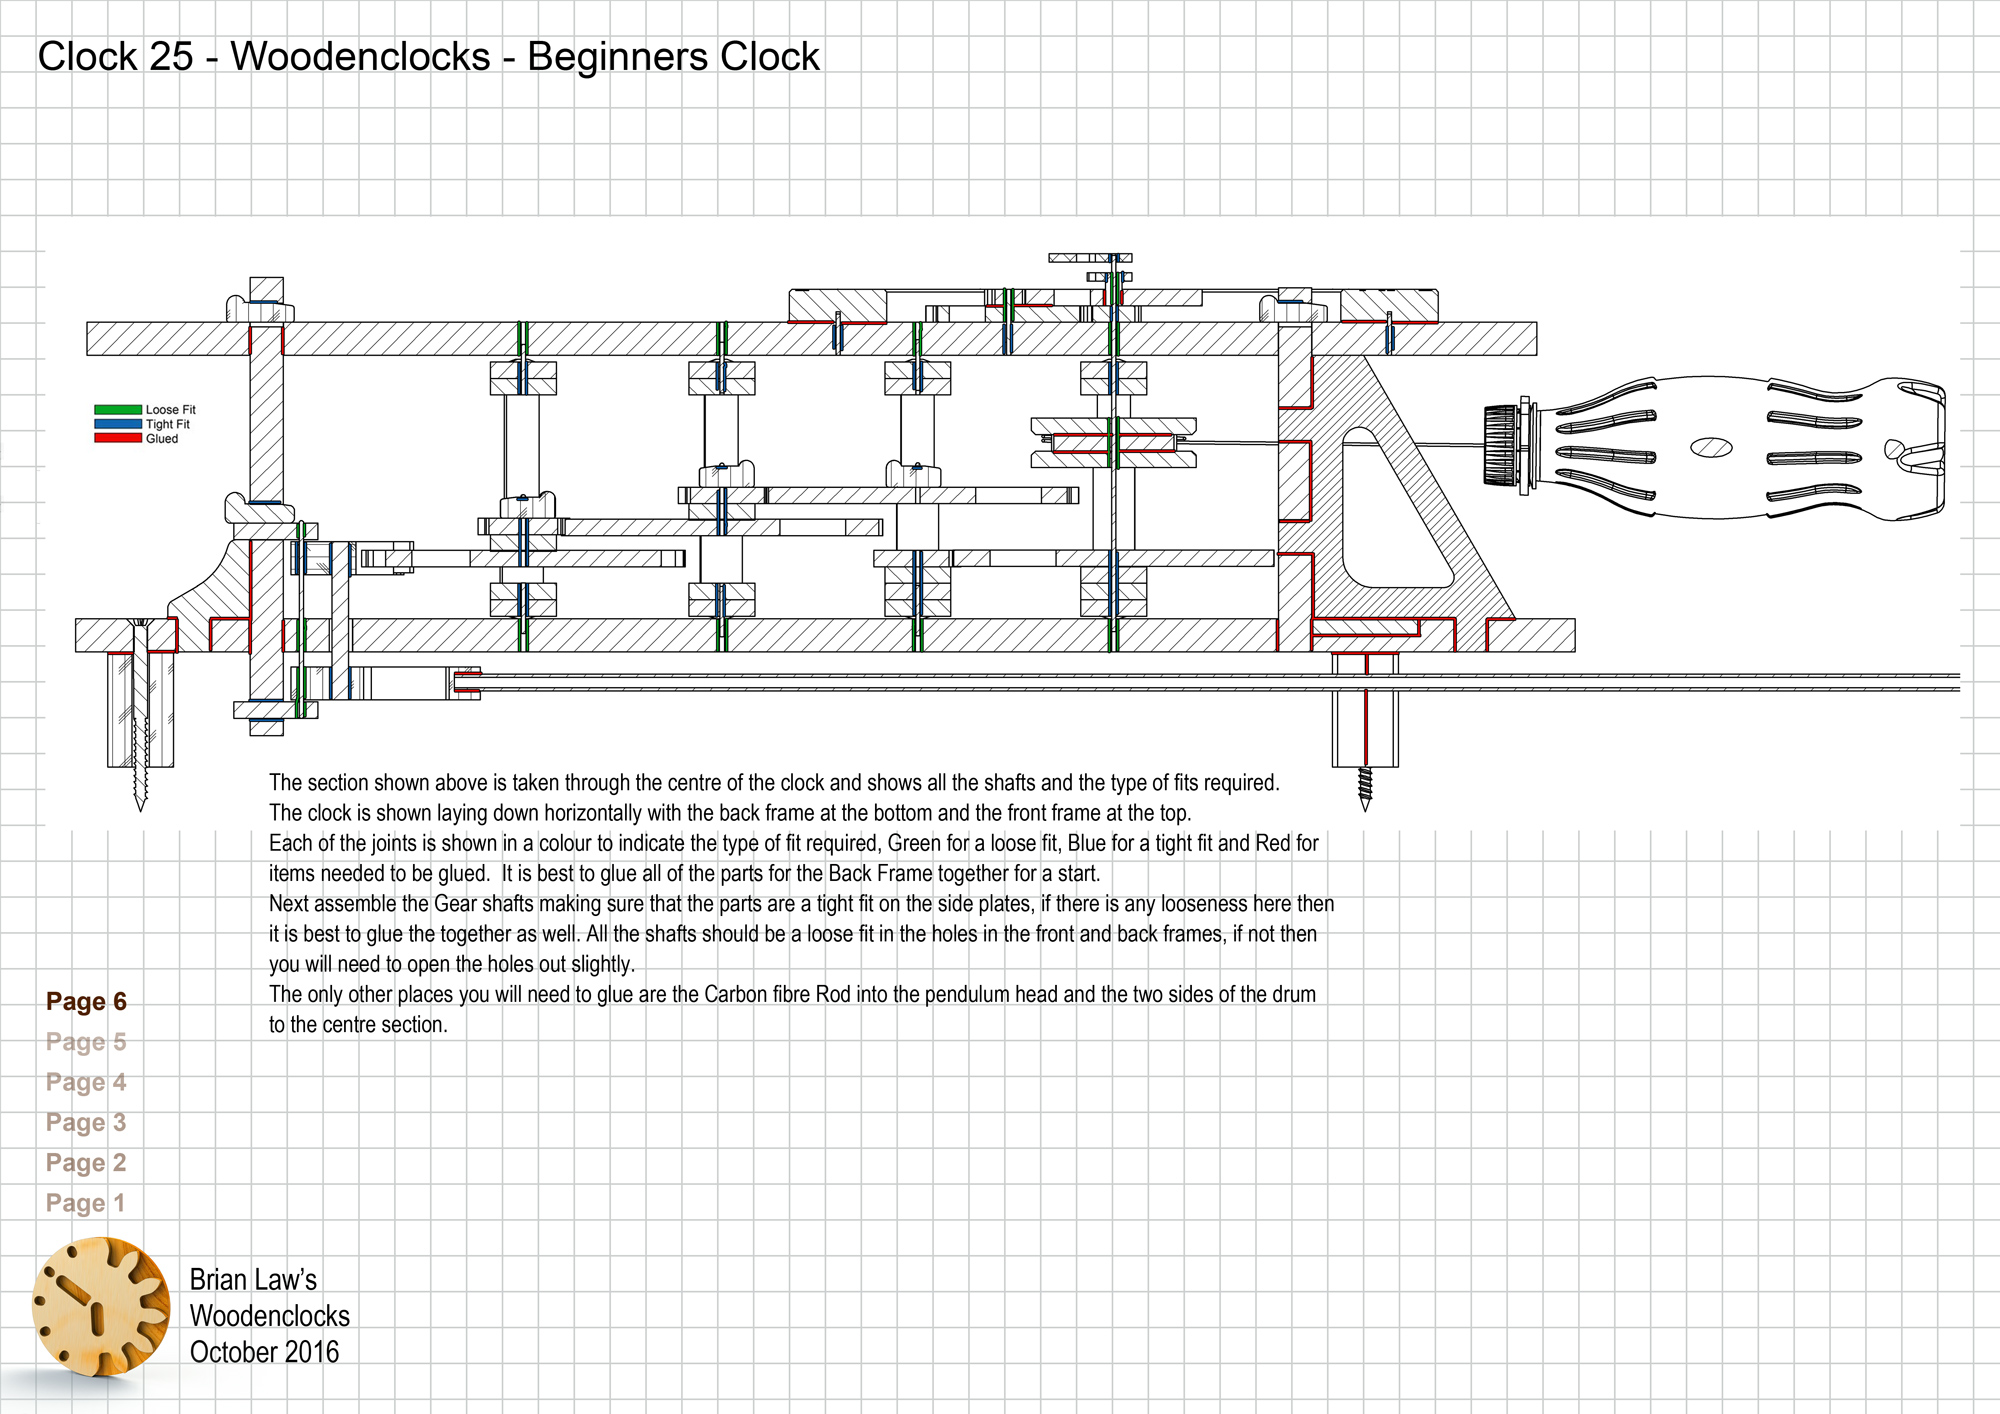

Clock 25 has been designed to be a larger version of Clock 21 which was originally intended for use in schools and colleges as a project for the STEM program, using Laser cutting techniques. This new version is bigger, designed in inches and intended for making, with a CNC router. The design itself has evolved since the original to make the construction both simpler and stronger. It still maintains its ability to be constructed with the minimum equipment, basically a CNC router, a Drill and with some hand tools.
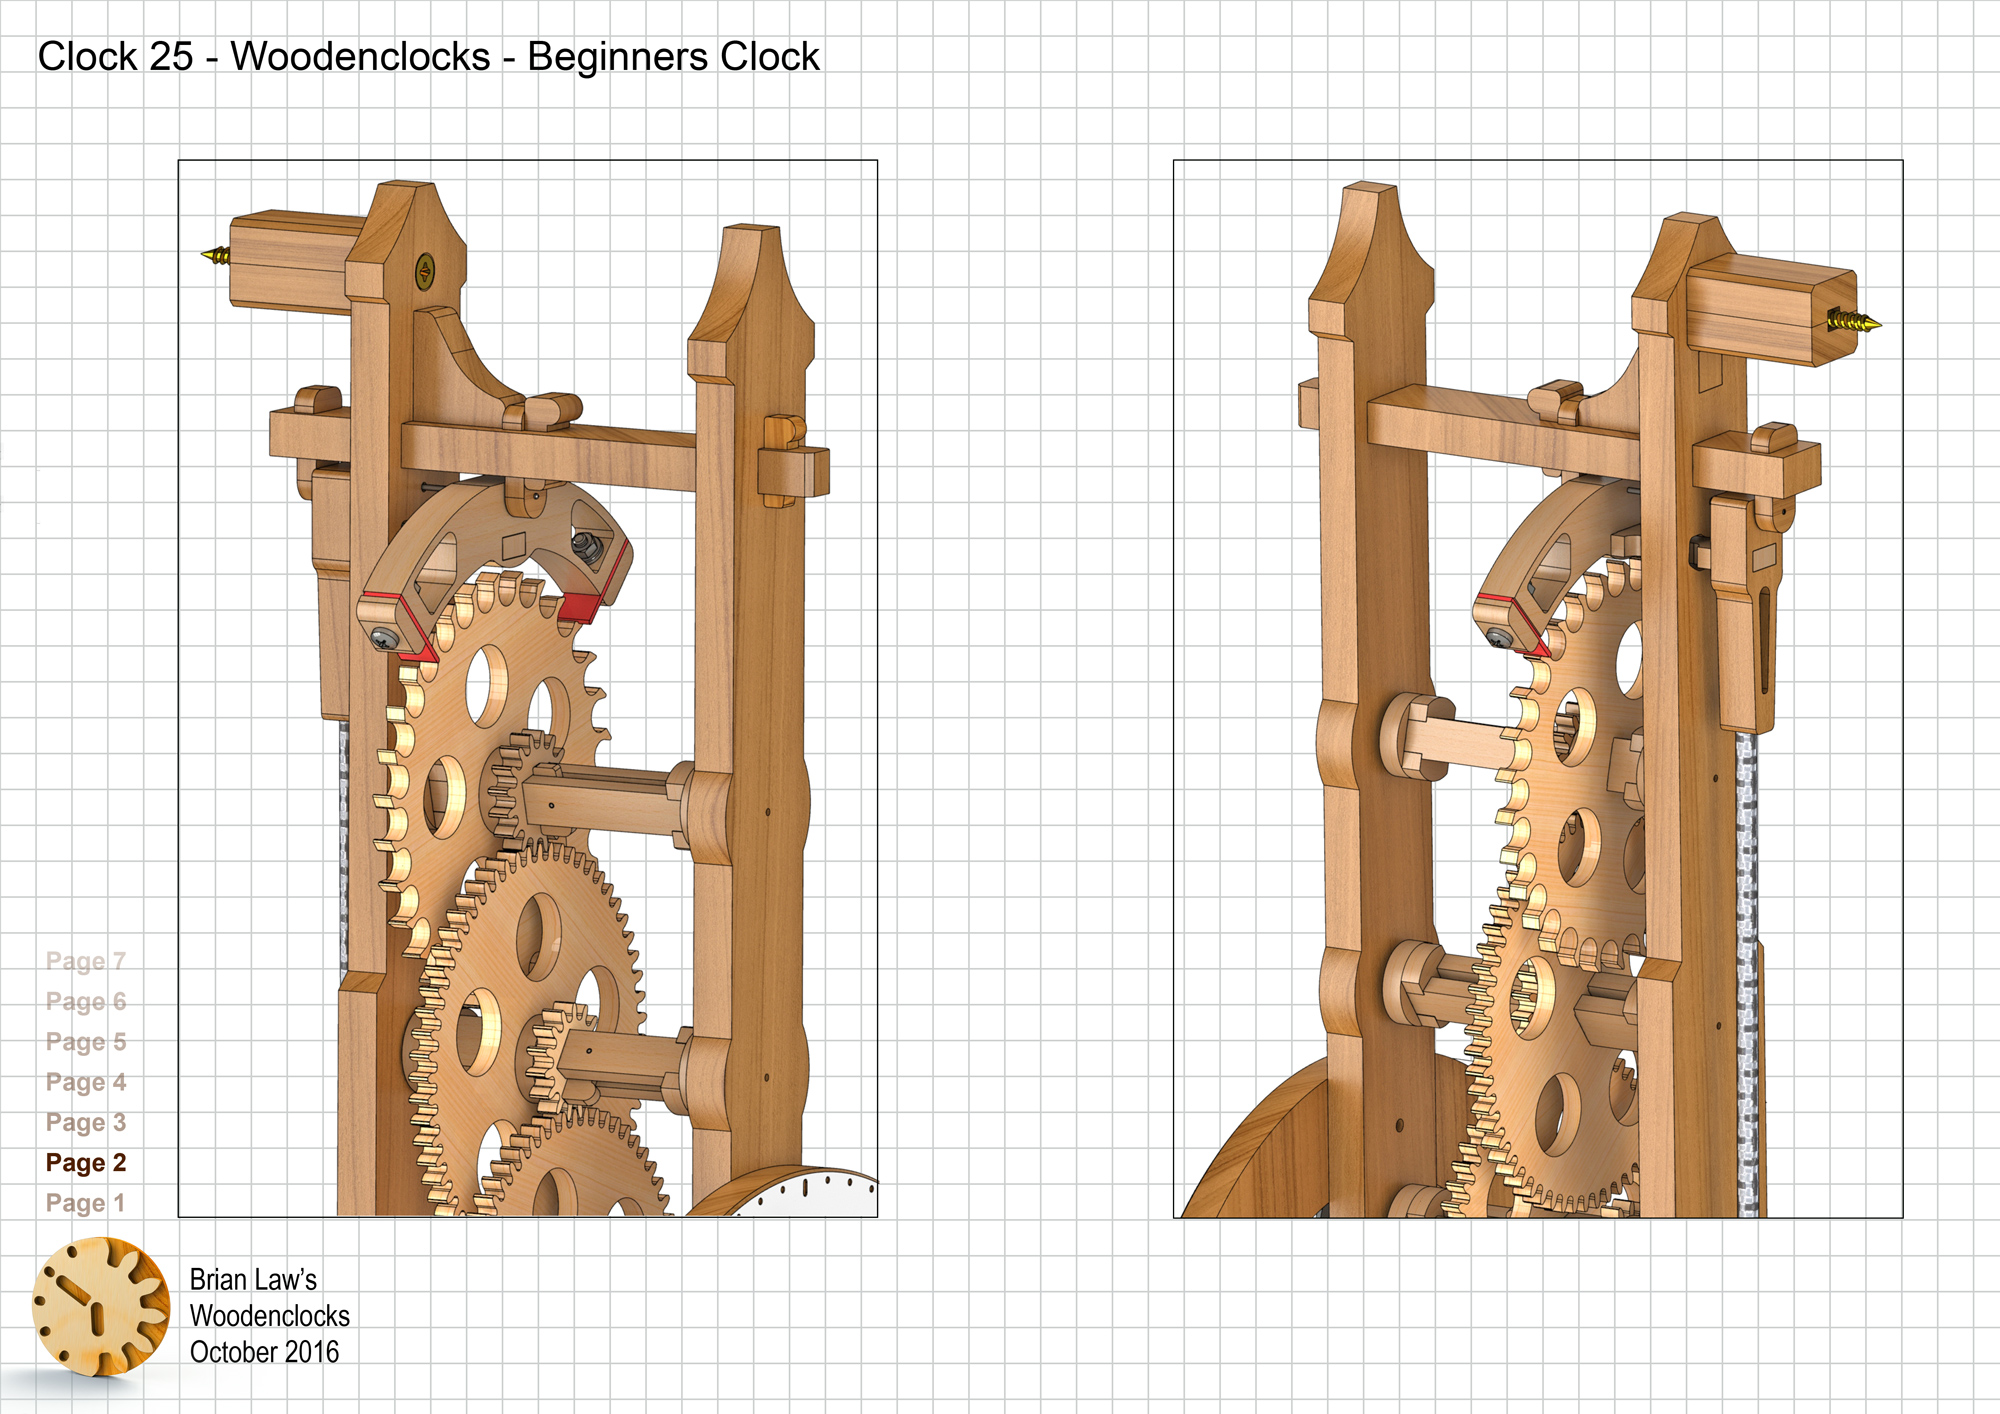
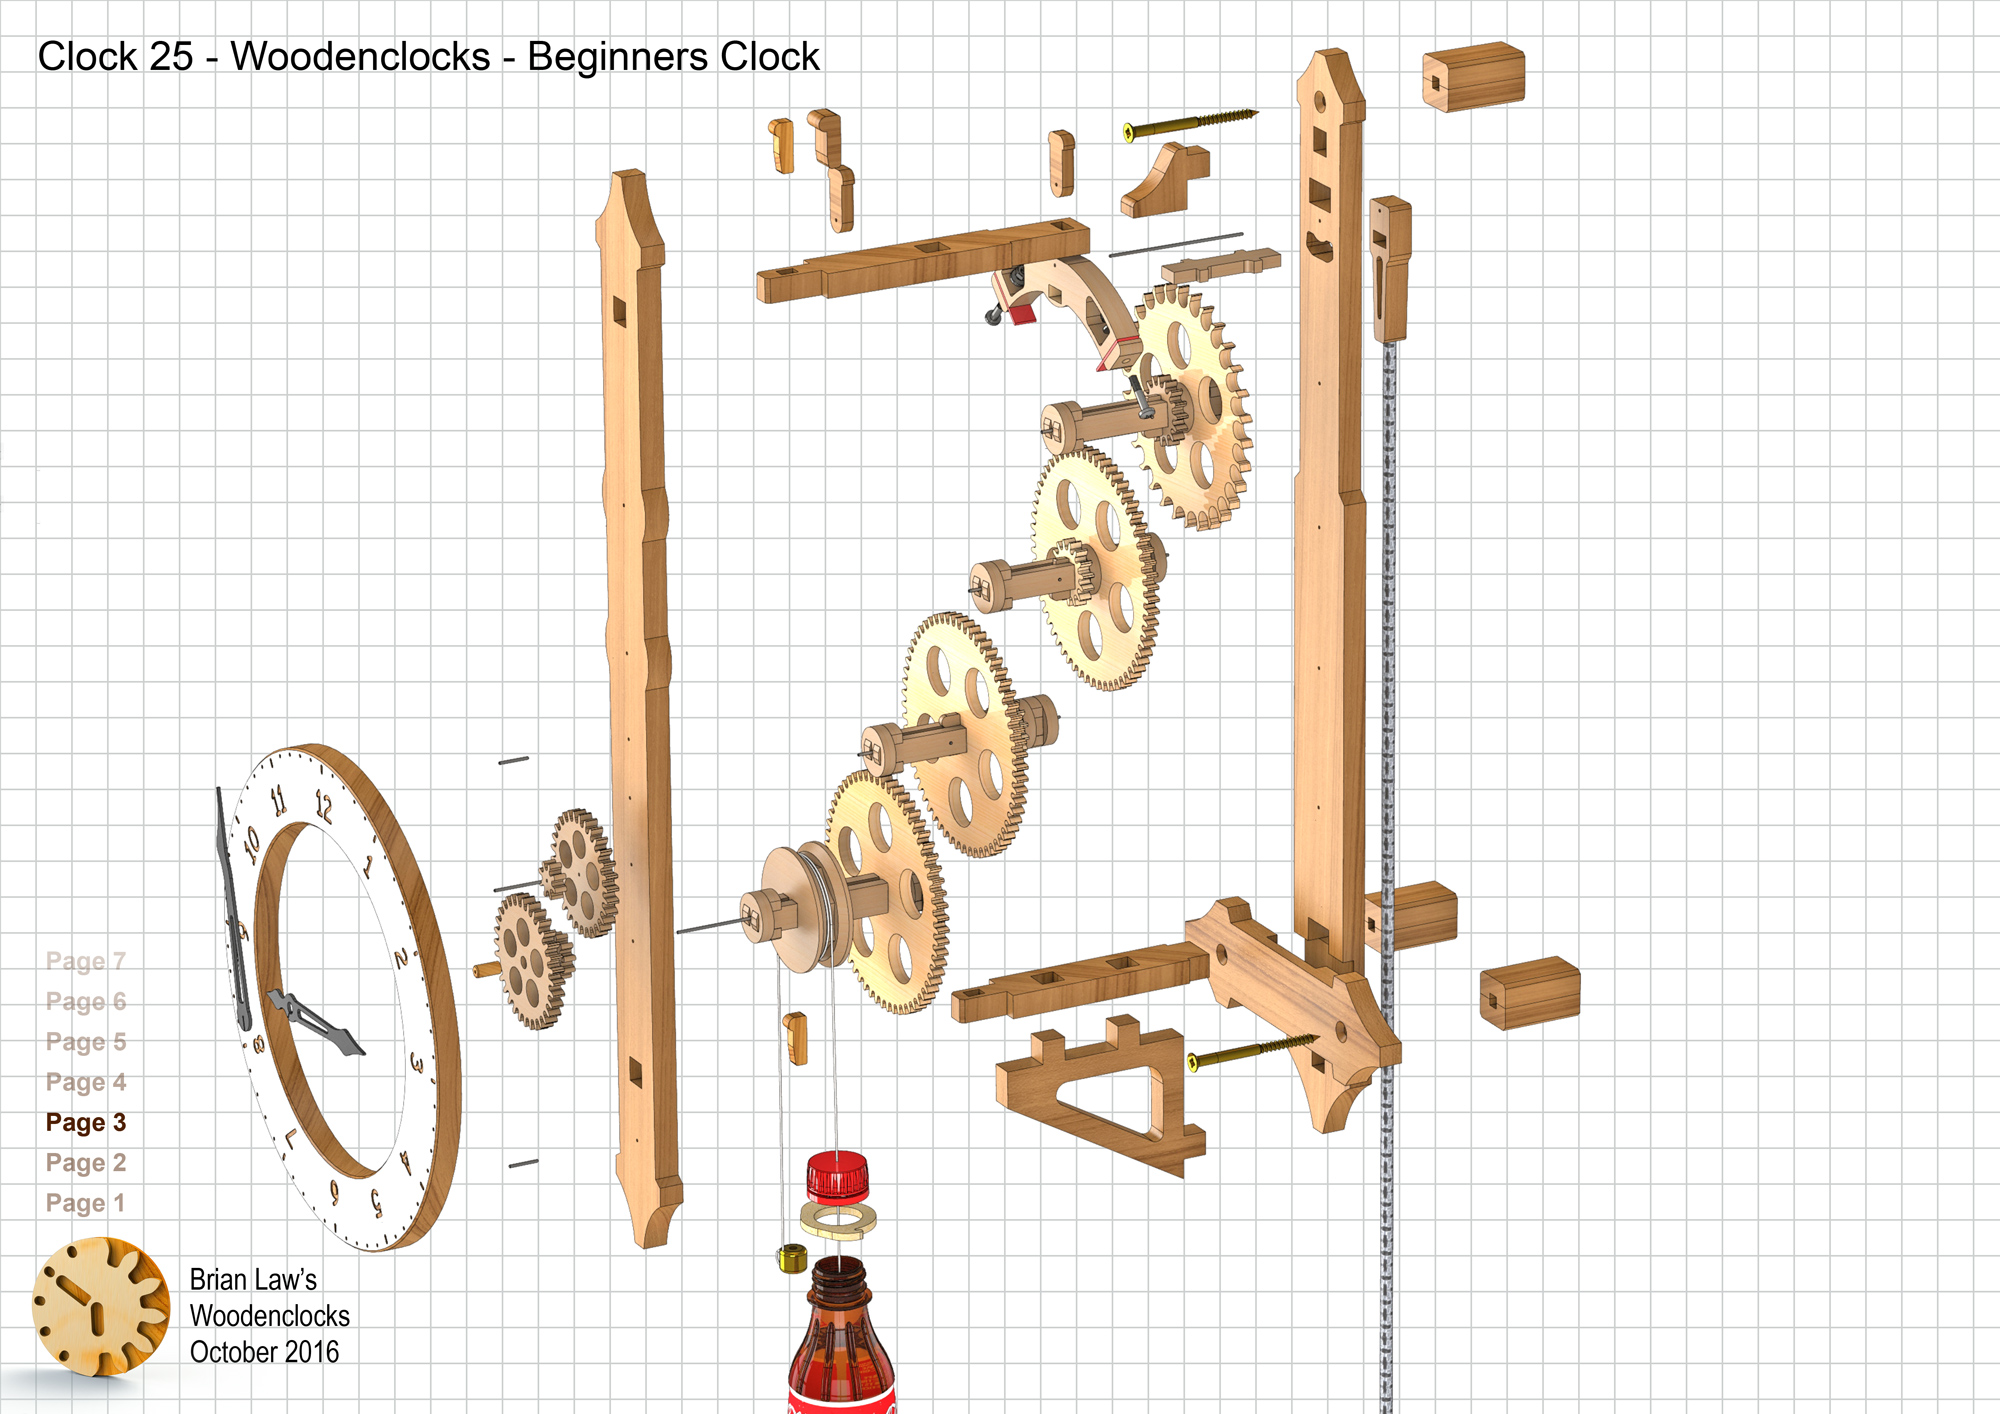
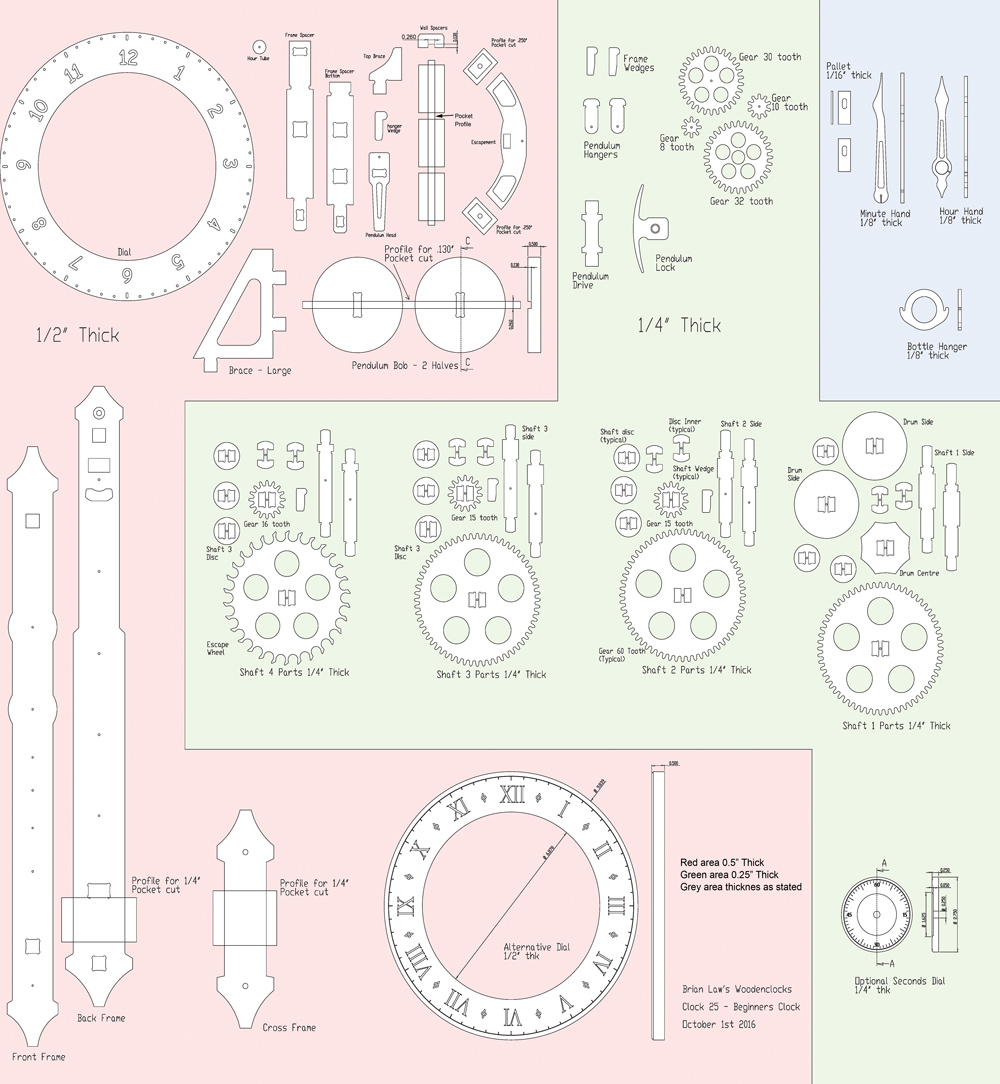
The majority on the Clock is made from wood, in both 1/4” and 1/2” thickness, along with Ø1/16” wire or Rod, with the clock hands and Pallets being cut from Plastic sheet.
I have used a Coke bottle for the weight as it is a convenient way of adding weight to the clock and provides an easy way of adjusting that weight by either adding or removing liquid.
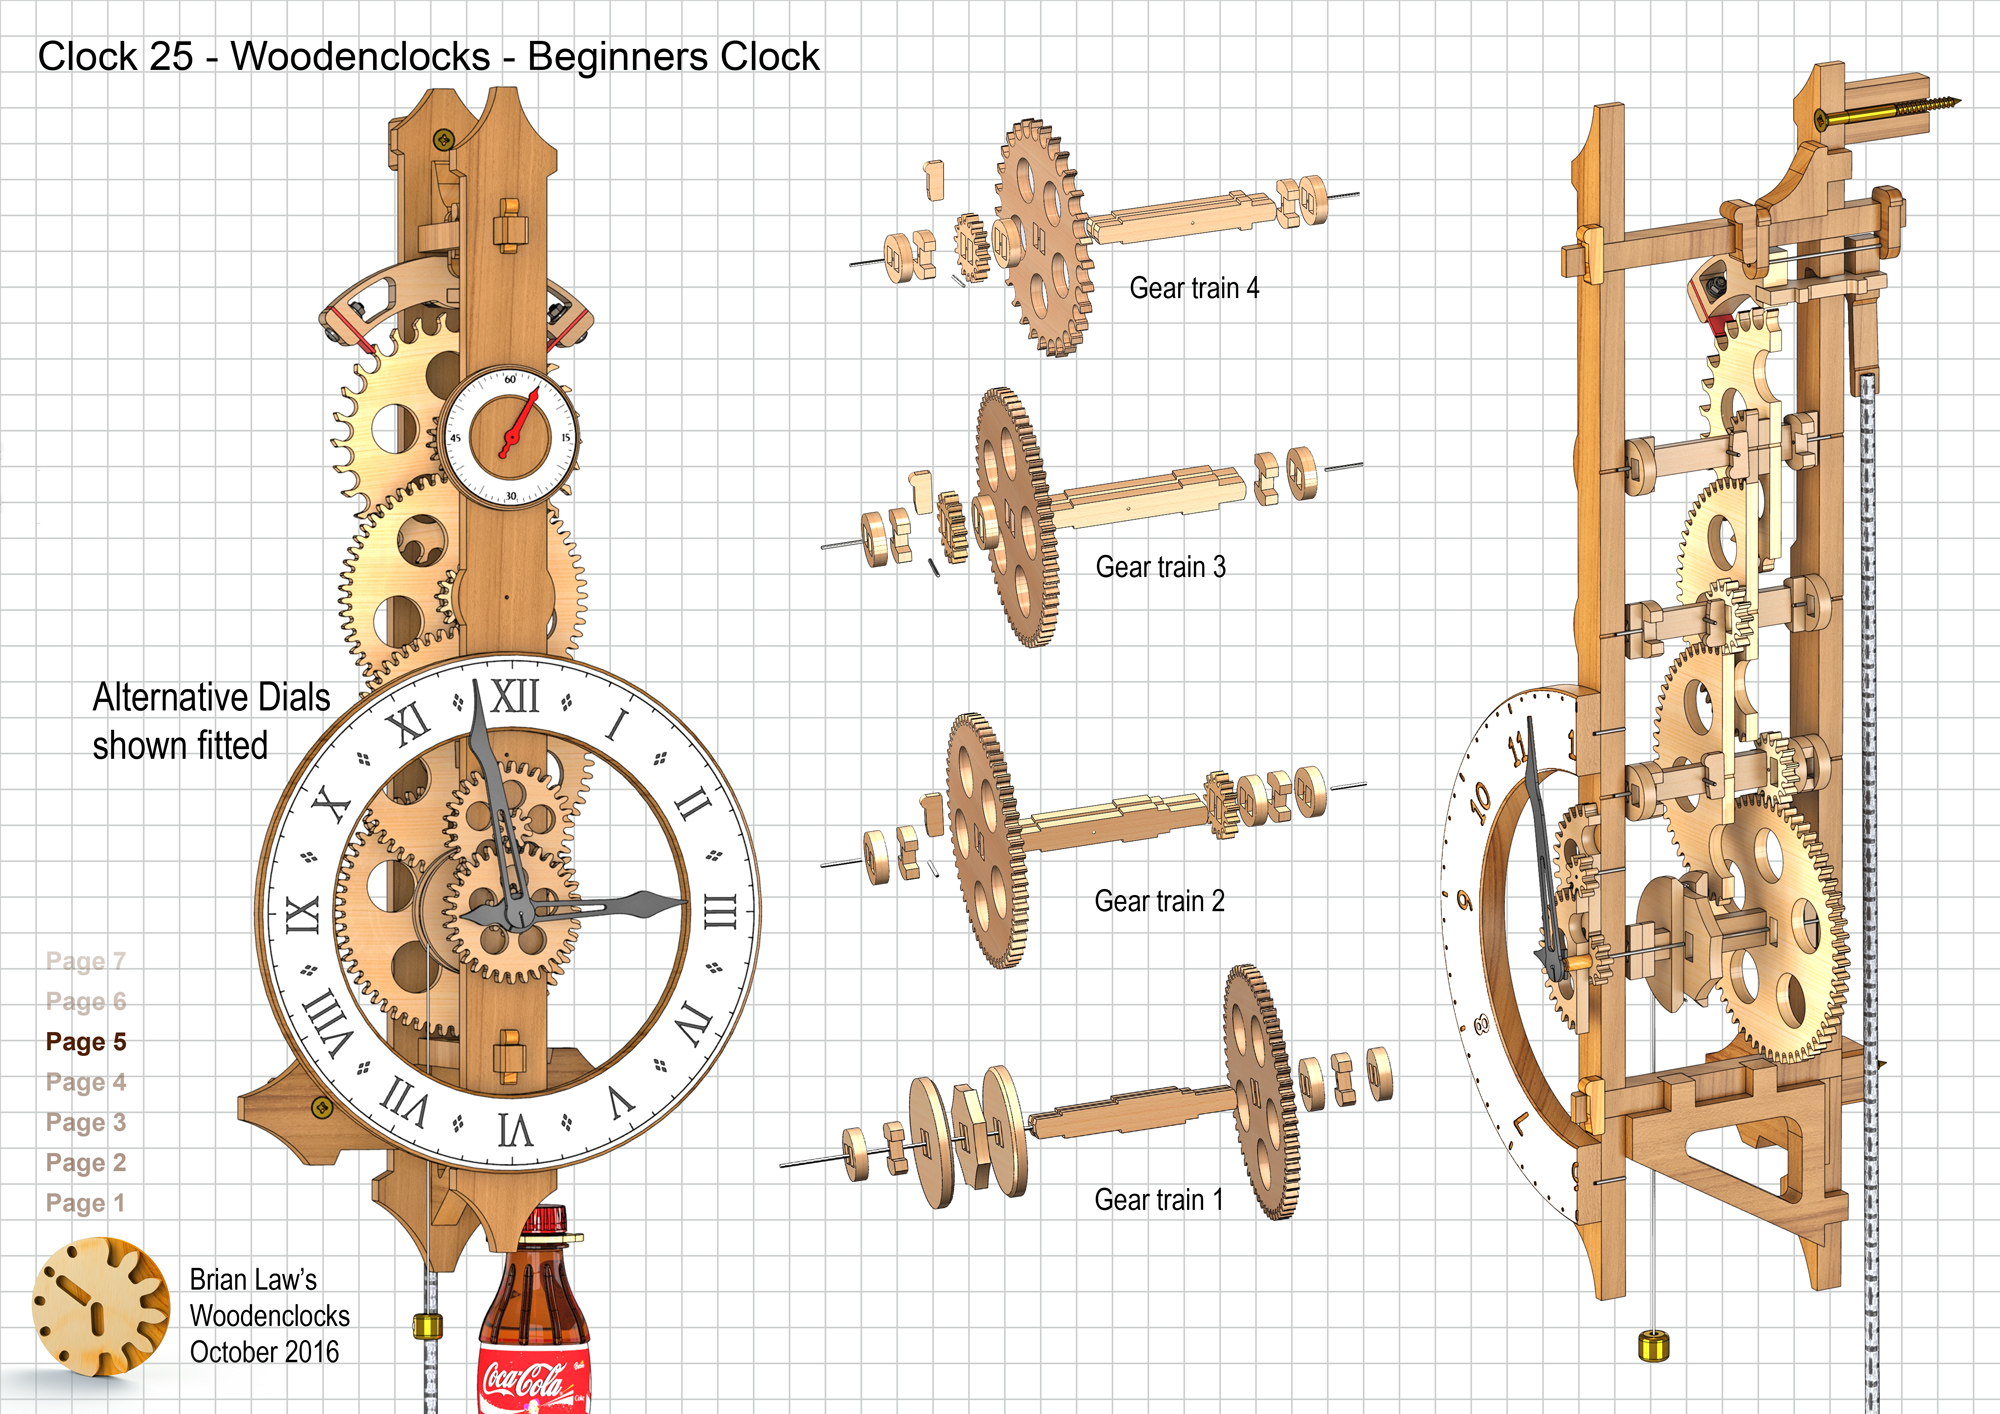
The clock will run for about 8 hours and you should be able to get it to run within 2 minutes over that time, may be even better. The main feature of this design is that it is relatively simple to make as it really only needs a CNC Router and no other machinery apart from a Drill and some hand tools. The design has been kept deliberately simple, but there is nothing to stop you adding your own touch’s to it, I have added a couple of extra files on the Profile cutting sheet to show a Seconds dial and a more elaborate Main Dial, but do feel free to add your own changes.
Runs for nearly 8 hours on single cord drop when the centre of the dial is 60 inches from the floor.
Main weight 14 ounces
Counter weight ¾ ounce
Overall Height 23”
You can view the Detail drawings of the clock and the renders showing in detail the construction of the clock. The free files are restricted and are not suitable for actually making the clock with but all the drawings and renders along with the DXF files for using with CNC machining can be purchased from the download page.
If you want to cut out parts on a scroll saw you can use the the PDF file included with the purchased downloads to do this. This PDF is one big sheet of all the parts so you will need to follow the PDF printing instructions below.
DXF, DWG 2D files, and the IGS and STP files that can be used with your CNC machine can be downloaded here for $26. You also get the unrestricted version of the PDF files that can be printed at full size.
Drawings for this clock in PDF format can be downloaded here. These free files are restricted so that you can only view them on screen but not print them. Clicking here will download the PDF file directly to your browser, may take a few moments so please be patient.
To view
the assembly instructions for the clock
click here.
Details
of the materials and equipment
needed to build this clock.
A sample from the DXF/DWG files is shown here. The actual files purchased above are included on one large sheet so that they may be directly loaded into your CAM program.
To print only a single item of the drawing to scale using Adobe Acrobat Reader, do the following:
Go to Edit, then click on Take a snapshot, move the cursor to the top left of the item you want to print and hold down the left mouse button whilst you drag a box around the item. The inside of the box turns blue and you can now go to File and then click on Print. This brings up the print dialogue, make sure Selected graphic is selected and that the Page scaling is set to None and the click on OK. As long as your printer is connected you will have printed the item at size. Do this for each item you want to cut out.