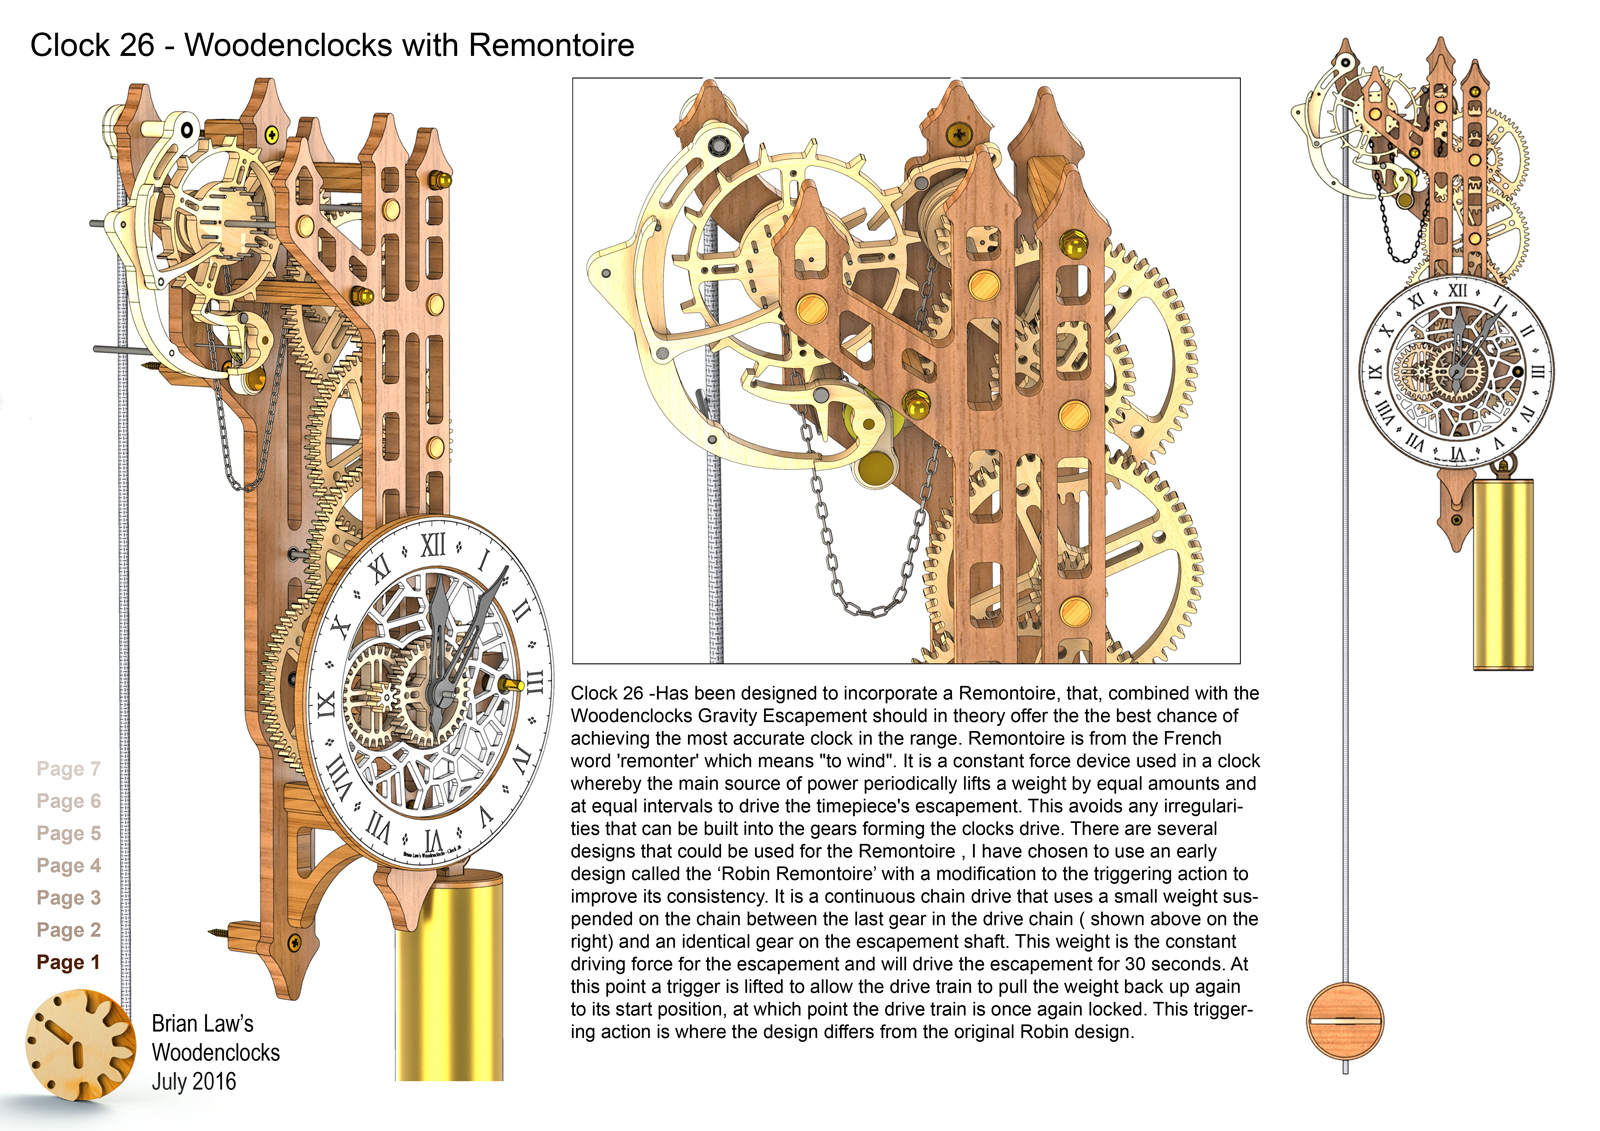

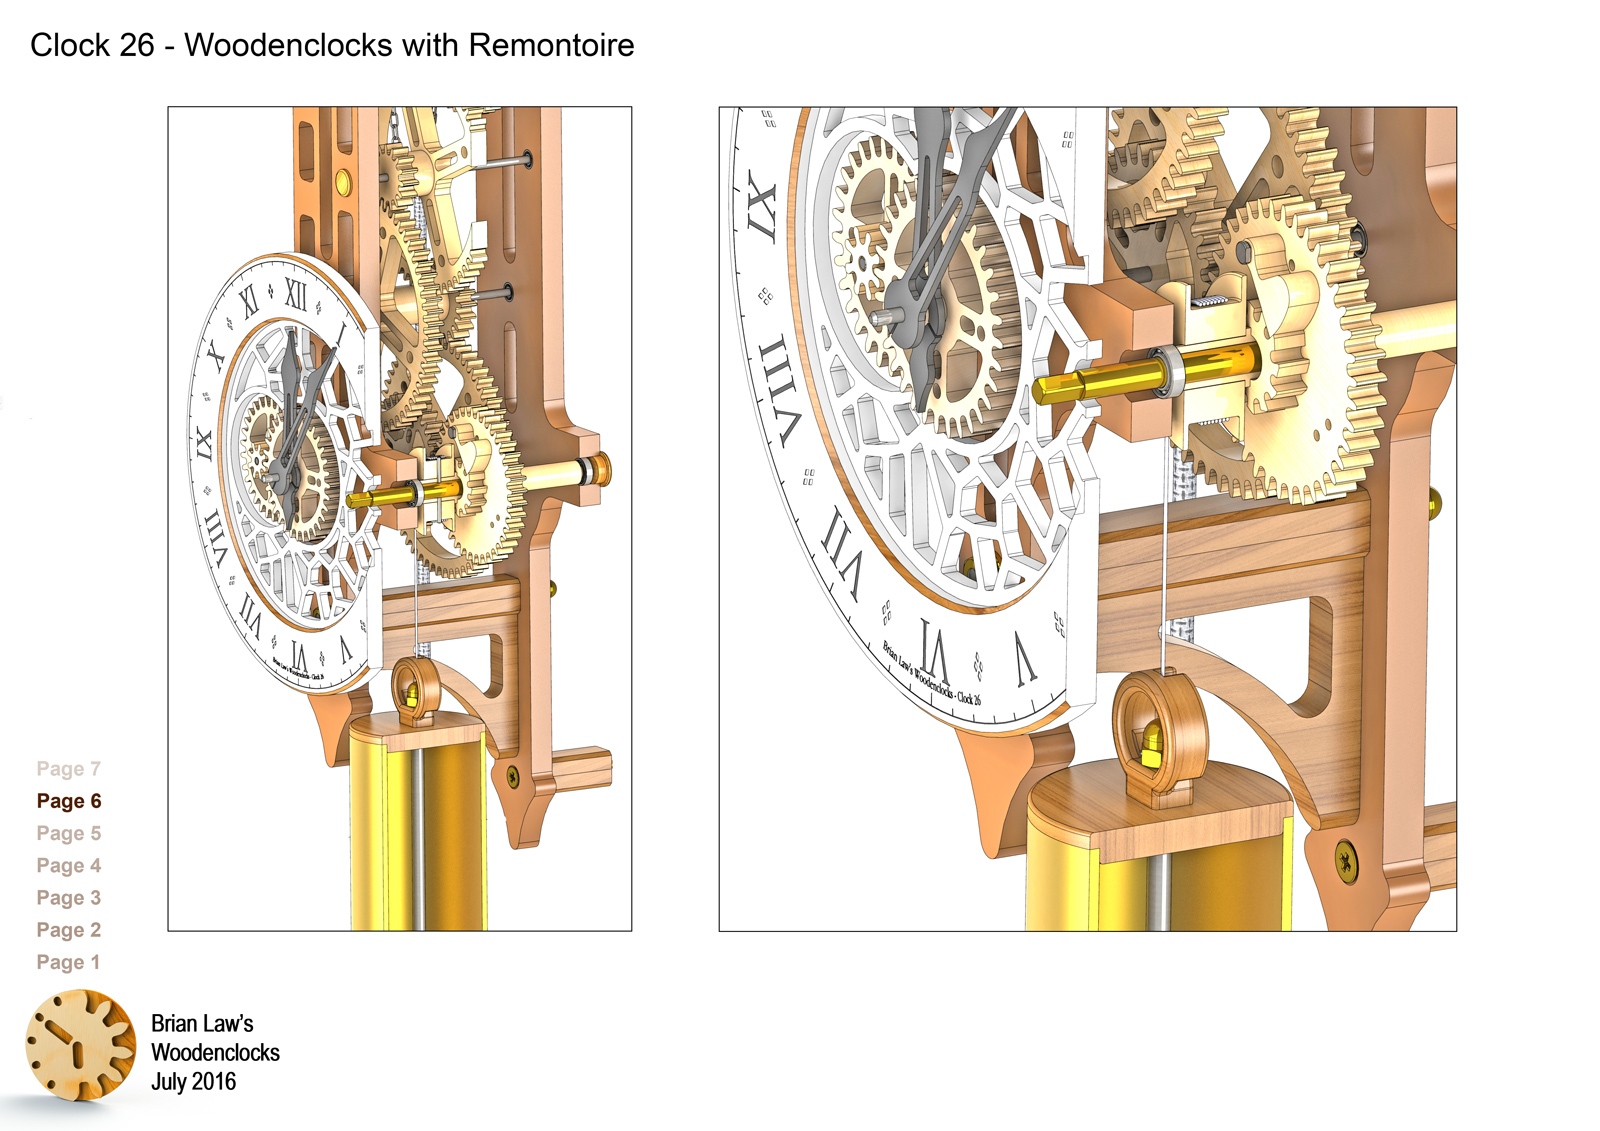
Clock 26 – Has been designed to incorporate a Remontoire, that, combined with the Woodenclocks Gravity Escapement should, in theory, offer the best chance of achieving the most accurate clock in the range. Remontoire is from the French word ‘remonter’ which means “to wind”. It is a constant force device used in a clock whereby the main source of power periodically lifts a weight by equal amounts and at equal intervals to drive the clock’s escapement. This avoids any irregularities that can be built into the gears forming the clocks drive. There are several designs that could be used for the Remontoire, I have chosen to use an early design called the ‘Robin Remontoire’ with a modification to the triggering action to improve its consistency. It is a continuous chain drive that uses a small weight suspended on the chain between the last gear in the drive chain and an identical gear on the escapement shaft. This weight is the constant driving force for the escapement and will drive it for 30 seconds. At this point, a trigger is lifted to allow the drive train to pull the weight back up again to its start position, at which point the drive train is once again locked. This triggering action is where the design differs from the original Robin design.
I should point out at this point that this clock is the most difficult to build as it involves getting several interacting mechanisms to work in harmony, so if you have little experience building clocks then it’s probably best to try one of the other designs.
The clock has taken me longer than usual to develop because of this complexity, so I have tried to add more detailed instructions for this build.
I have used 3D printing extensively to develop the parts for the clock, sometimes many iterations to optimise features of the design, most of the parts were eventually replaced with wooden ones, but some are still visible on the prototype.
In the end, It has been worthwhile, as it is now running continuously for very nearly 13 hours for a single cord drop. It’s early days yet to properly assess the accuracy but it looks to be running within 8 seconds over 12 hours, which is definitely the best I have ever achieved.
The main features of the clock are:
● Runs for nearly 13 hours on single cord drop when the centre of the dial is 1530 mm from the floor.
● Main weight 2.5 kg.
● Escapement weight 31 gramme’s.
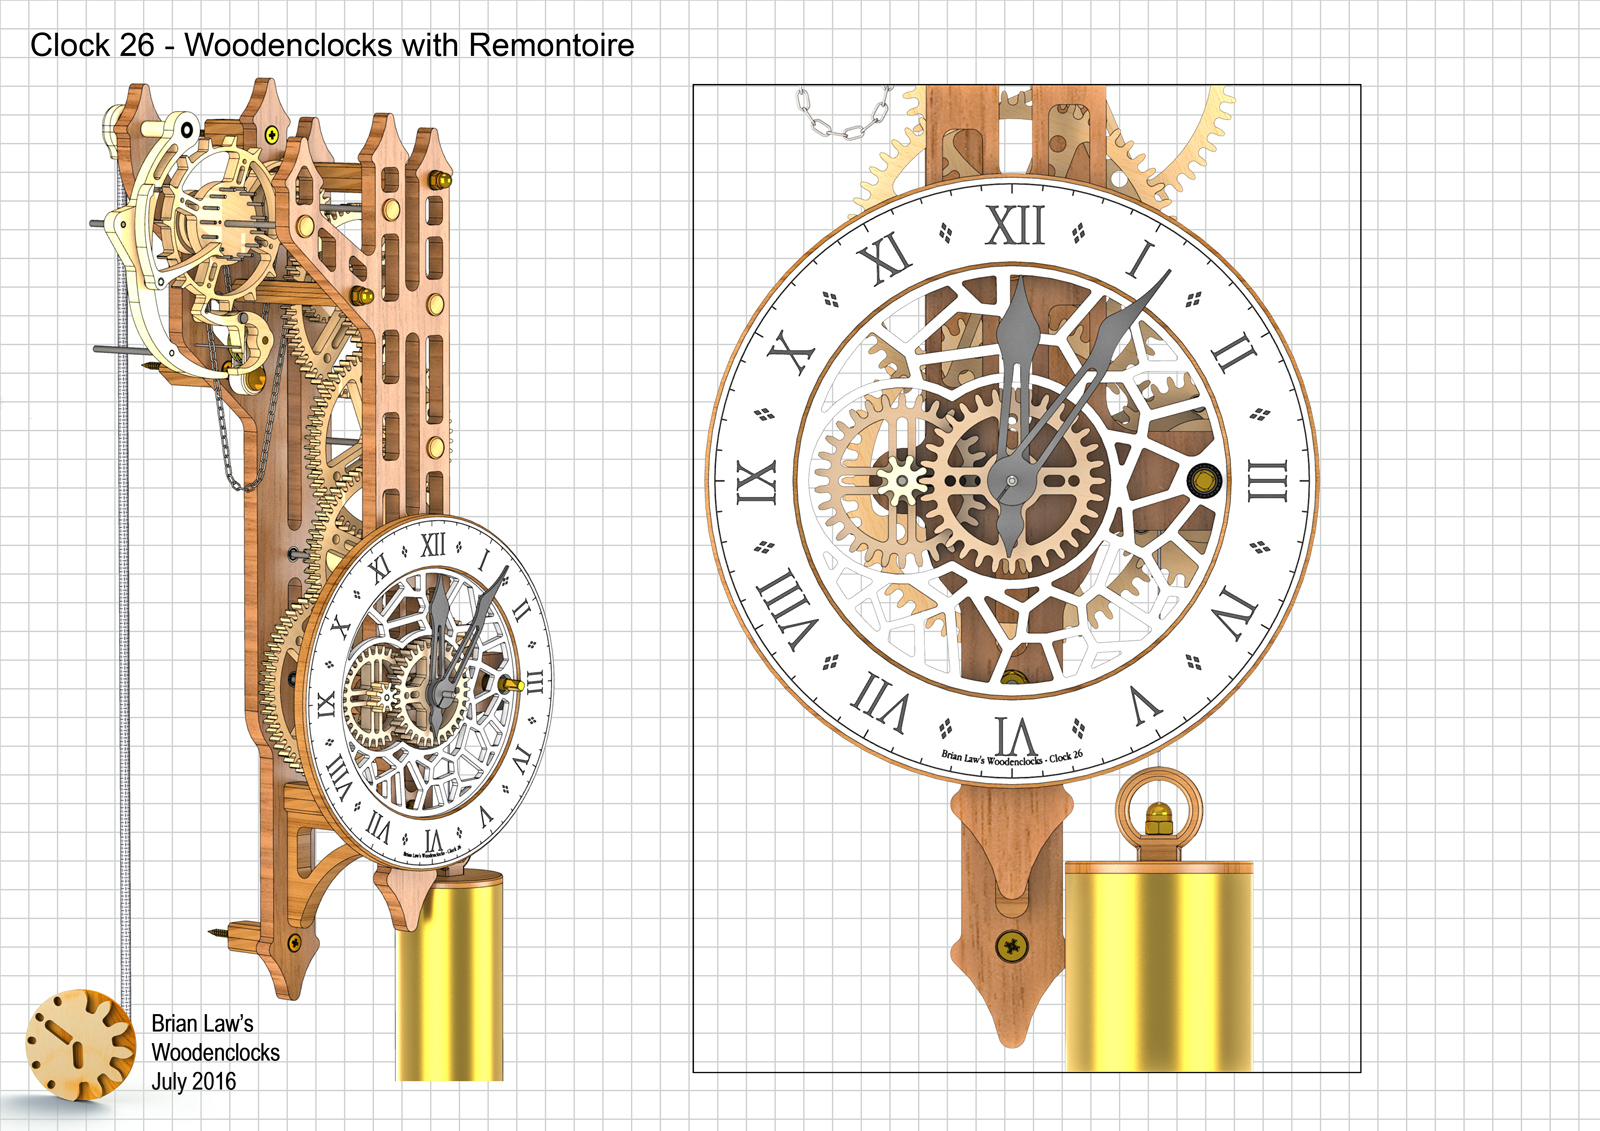
● Overall Height 590 mm
● Minute hand moves every 30 seconds (I thought this was going to be odd but, in the end, it seems quite natural).
● Uses a gravity assisted ratchet to reduce both the noise and the effort needed to wind.
● You can add a simple pulley to get it to run 24 hours but I would advise anchoring the cord to the wall, not the clock frame as you have to double the weight to get it to work with the pulley and 5 kg hanging from the clock is not advised.
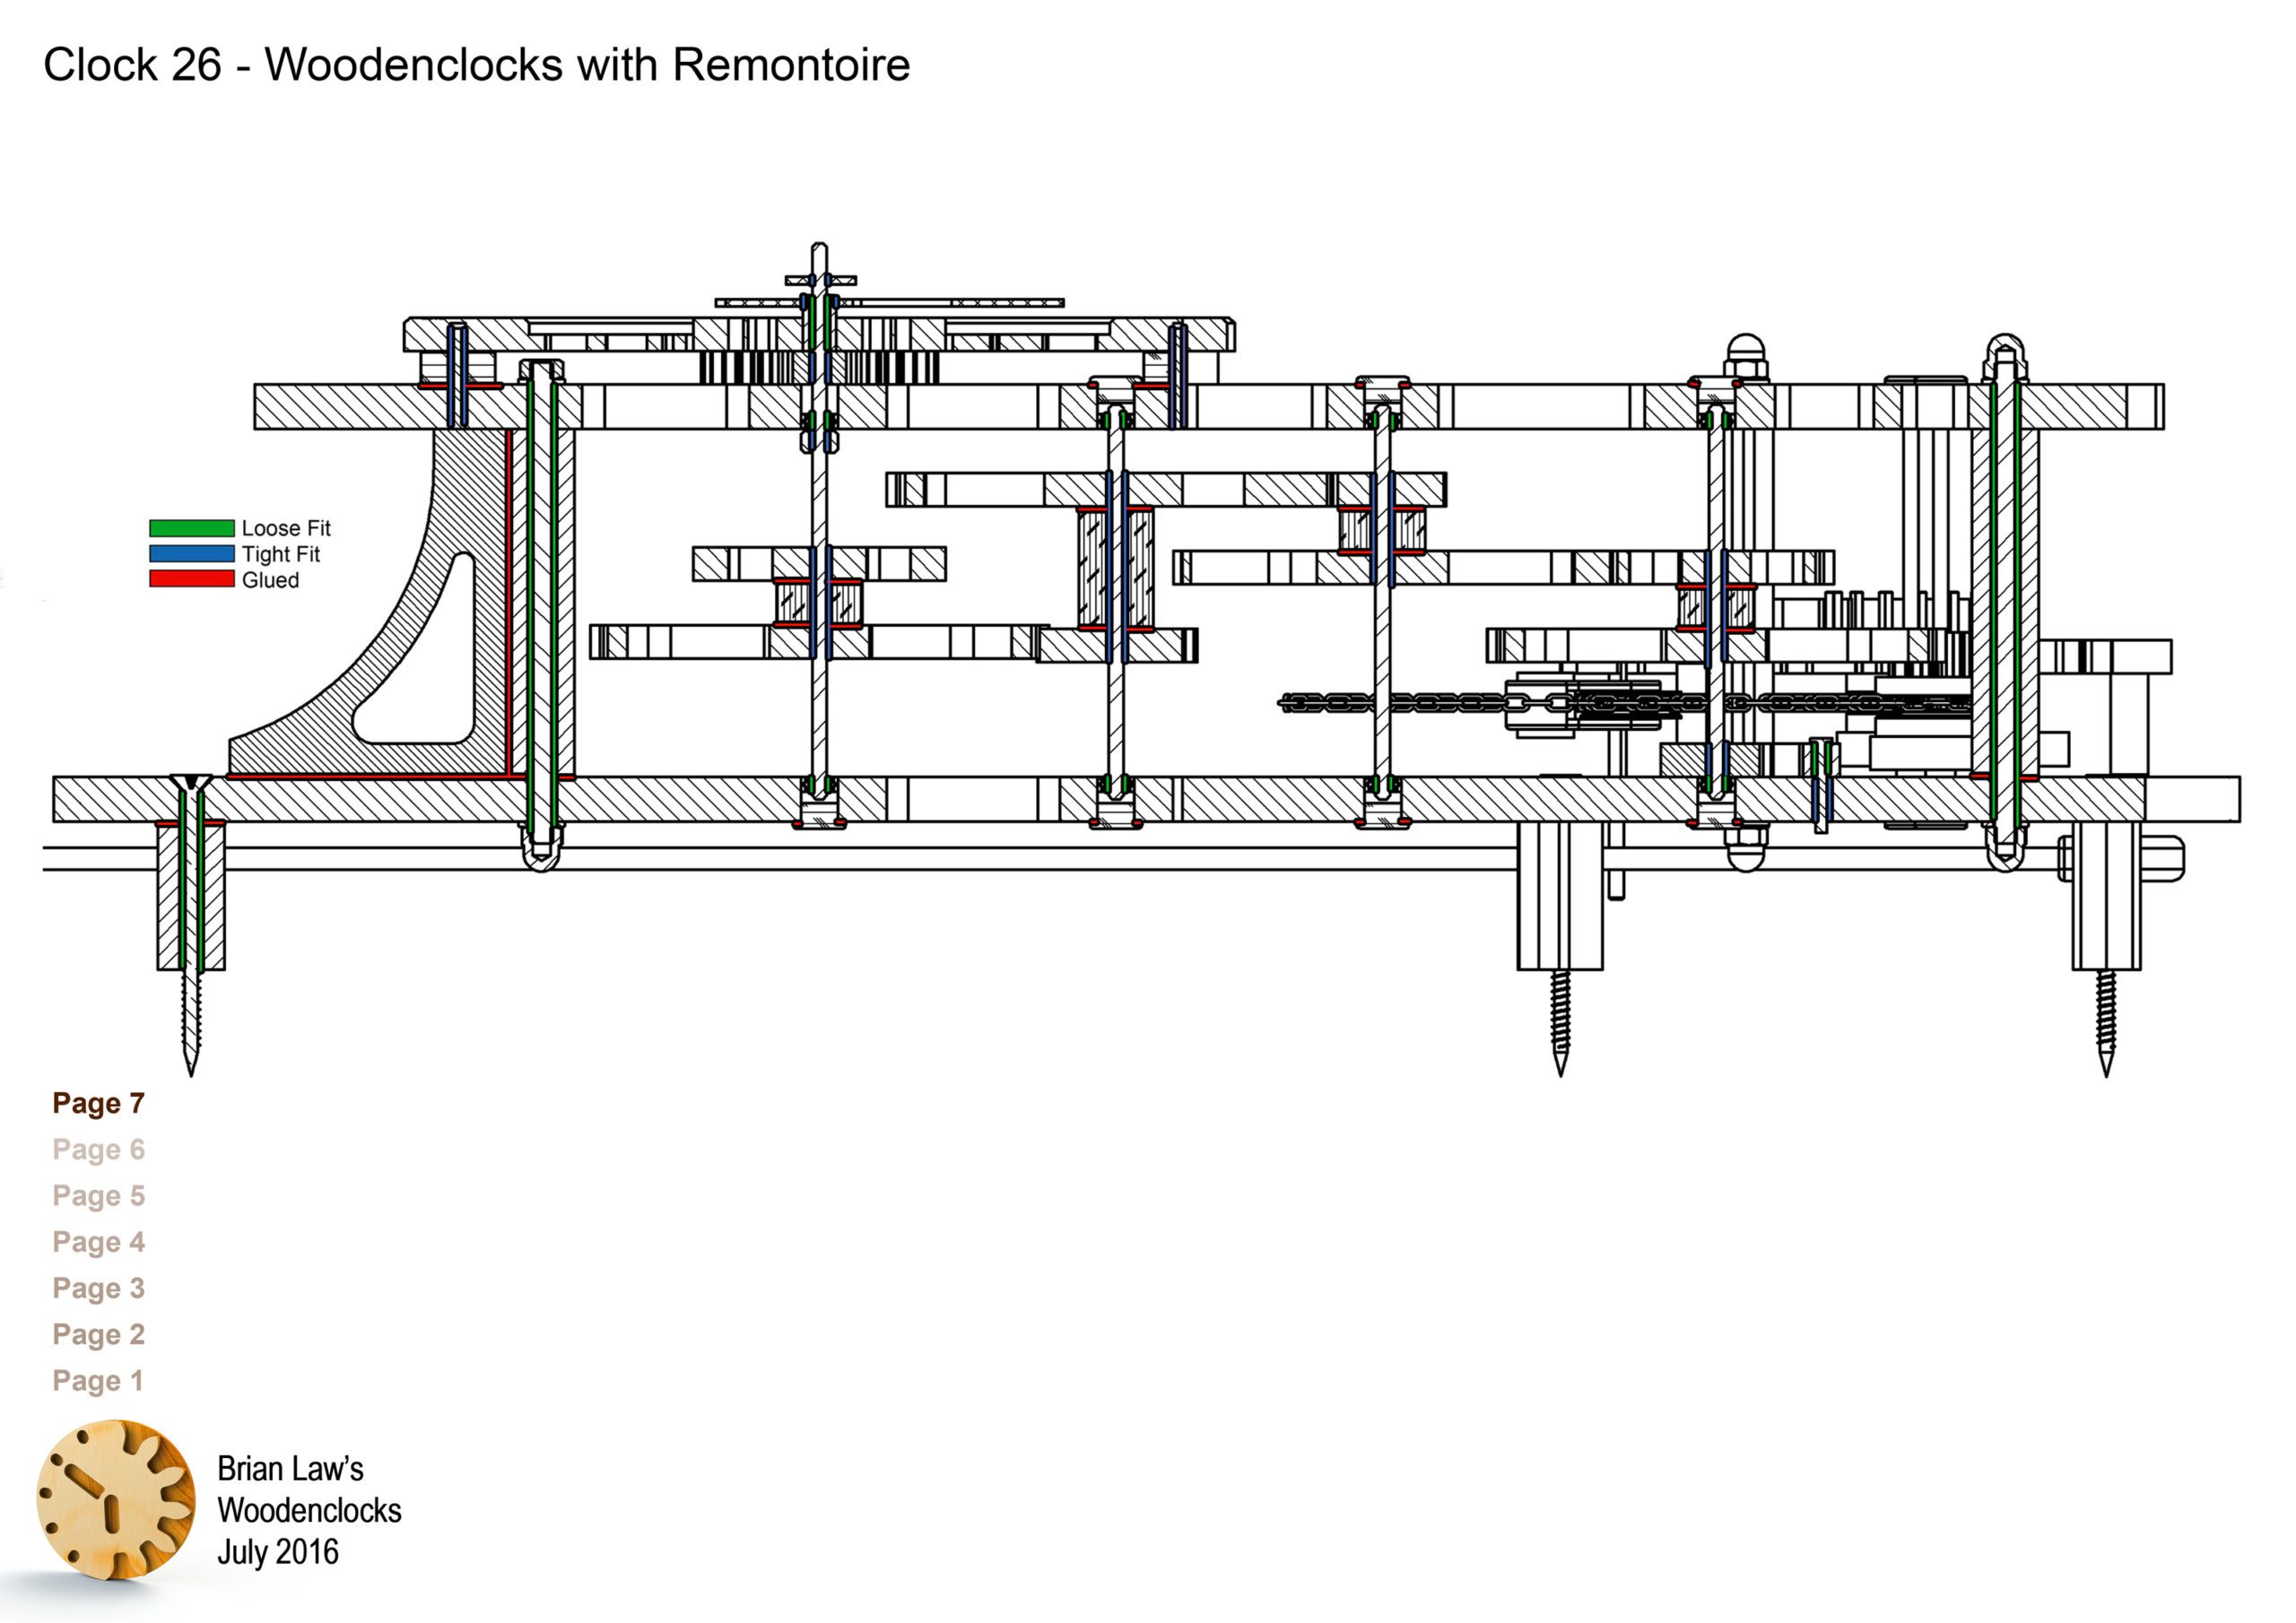
You can view the Detail drawings of the clock and the renders showing in detail the construction of the clock. The free files are restricted and are not suitable for actually making the clock with but all the drawings and renders along with the DXF and DWG files for using with CNC machining can be purchased from the download page.
DXF, DWG 2D files, and the IGS and STP files that can be used with your CNC machine can be downloaded here for $26. You also get the unrestricted version of the PDF files that can be printed at full size.
Drawings for this clock in PDF format can be downloaded here. These free files are restricted so that you can only view them on screen but not print them. Clicking here will download the PDF file directly to your browser, may take a few moments so please be patient.
To view
the assembly instructions for the clock
click here.
Details
of the materials and equipment
needed to build this clock.
A sample from the DXF/DWG files is shown here. The actual files purchased above are included on one large sheet so that they may be directly loaded into your CAM program.
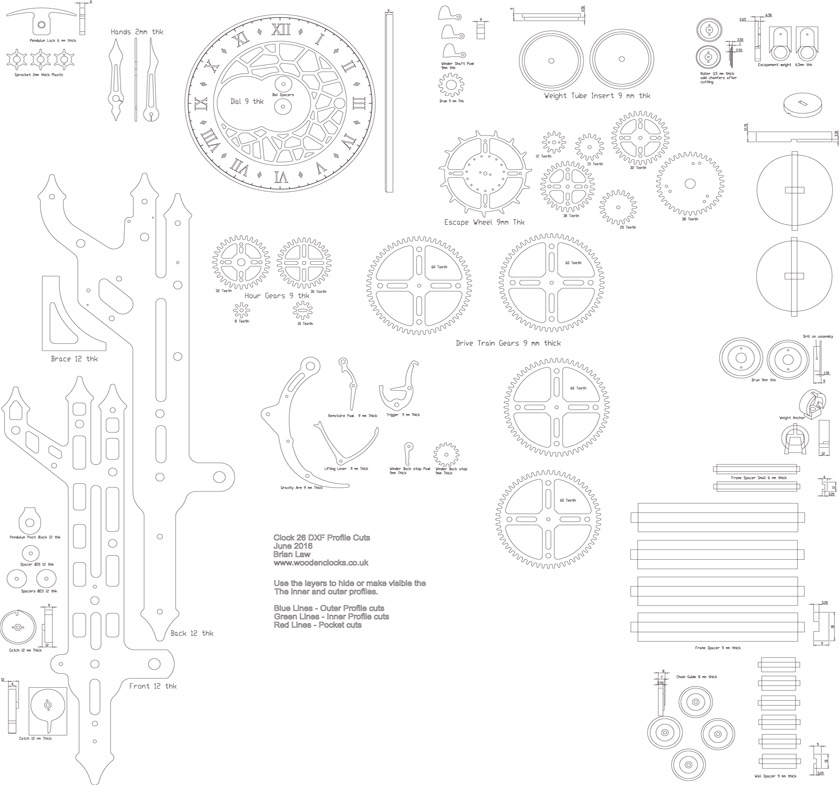
To print only a single item of the drawing to scale using Adobe Acrobat Reader, do the following:
Go to Edit, then click on Take a snapshot, move the cursor to the top left of the item you want to print and hold down the left mouse button whilst you drag a box around the item. The inside of the box turns blue and you can now go to File and then click on Print. This brings up the print dialogue, make sure Selected graphic is selected and that the Page scaling is set to None and the click on OK. As long as your printer is connected you will have printed the item at size. Do this for each item you want to cut out.