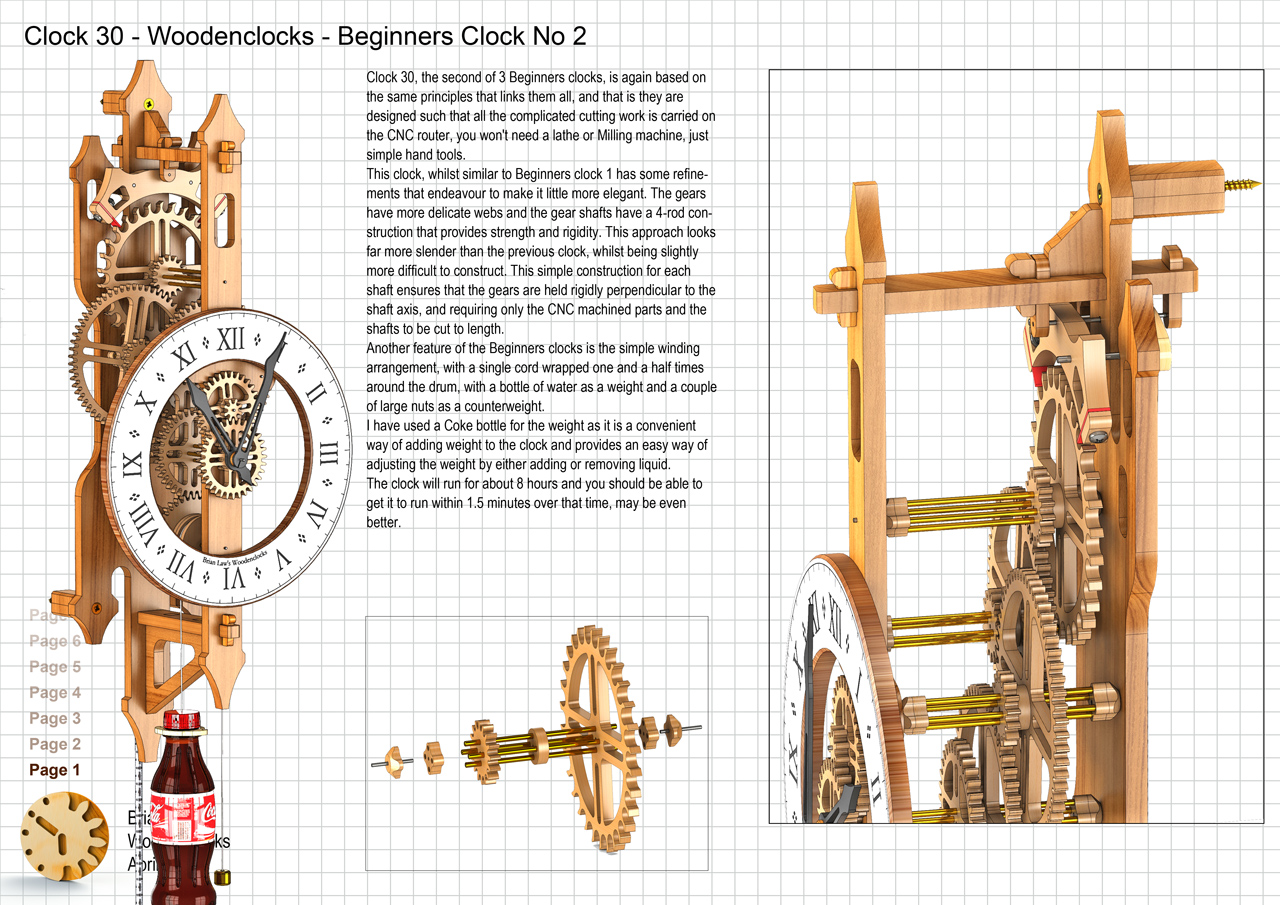
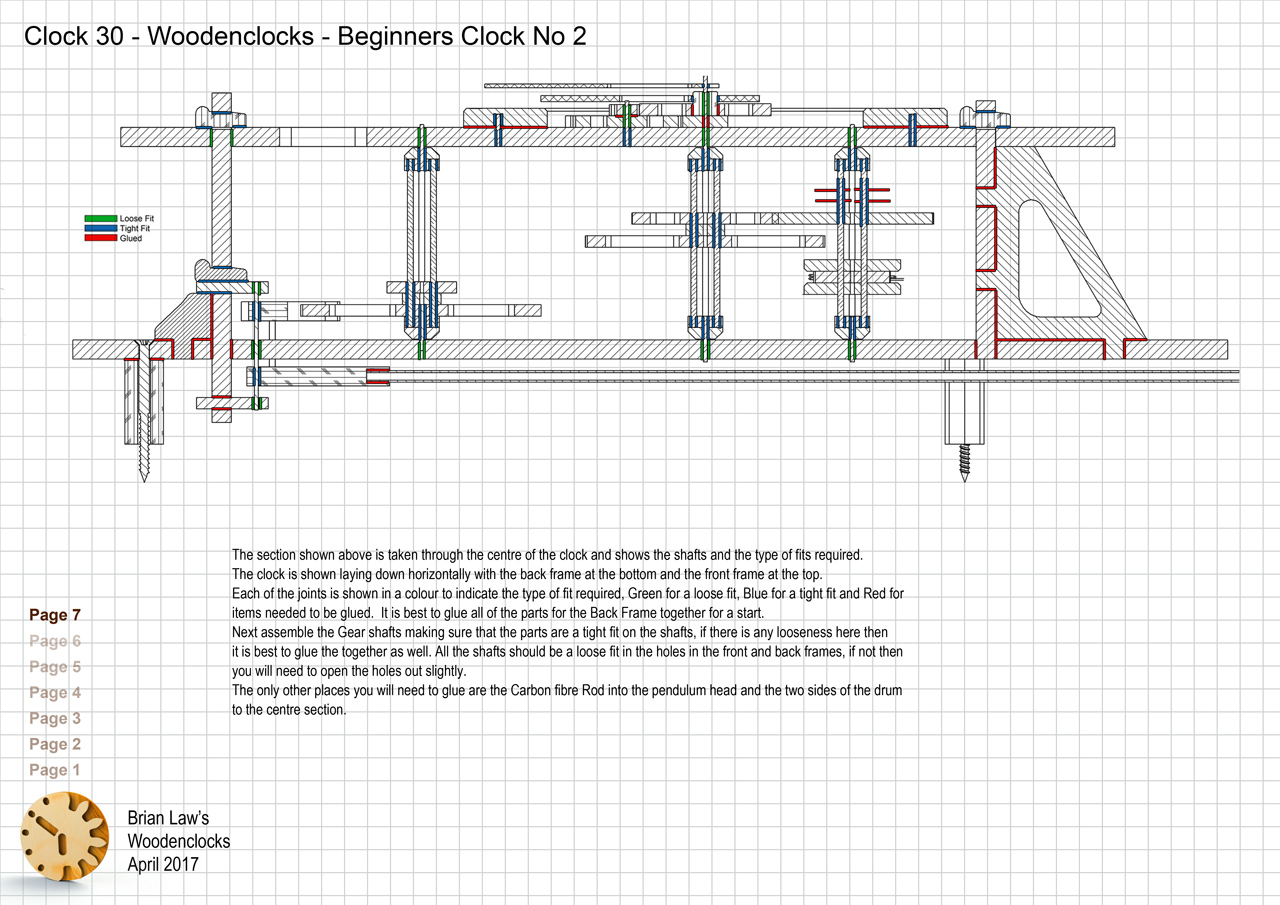
Clock 30, the second of 3 Beginners clocks, is again based on the same principles that links them all, and that is they are designed such that all the complicated cutting work is carried on the CNC router, you won’t need a lathe or Milling machine, just simple hand tools.Just one exception to this is you would be advised to at least have a Drill stand so that you can accurately drill holes’ square to the wooden surface so that the shafts that fit into the holes don’t see any unnecessary friction due to angular misalignment.
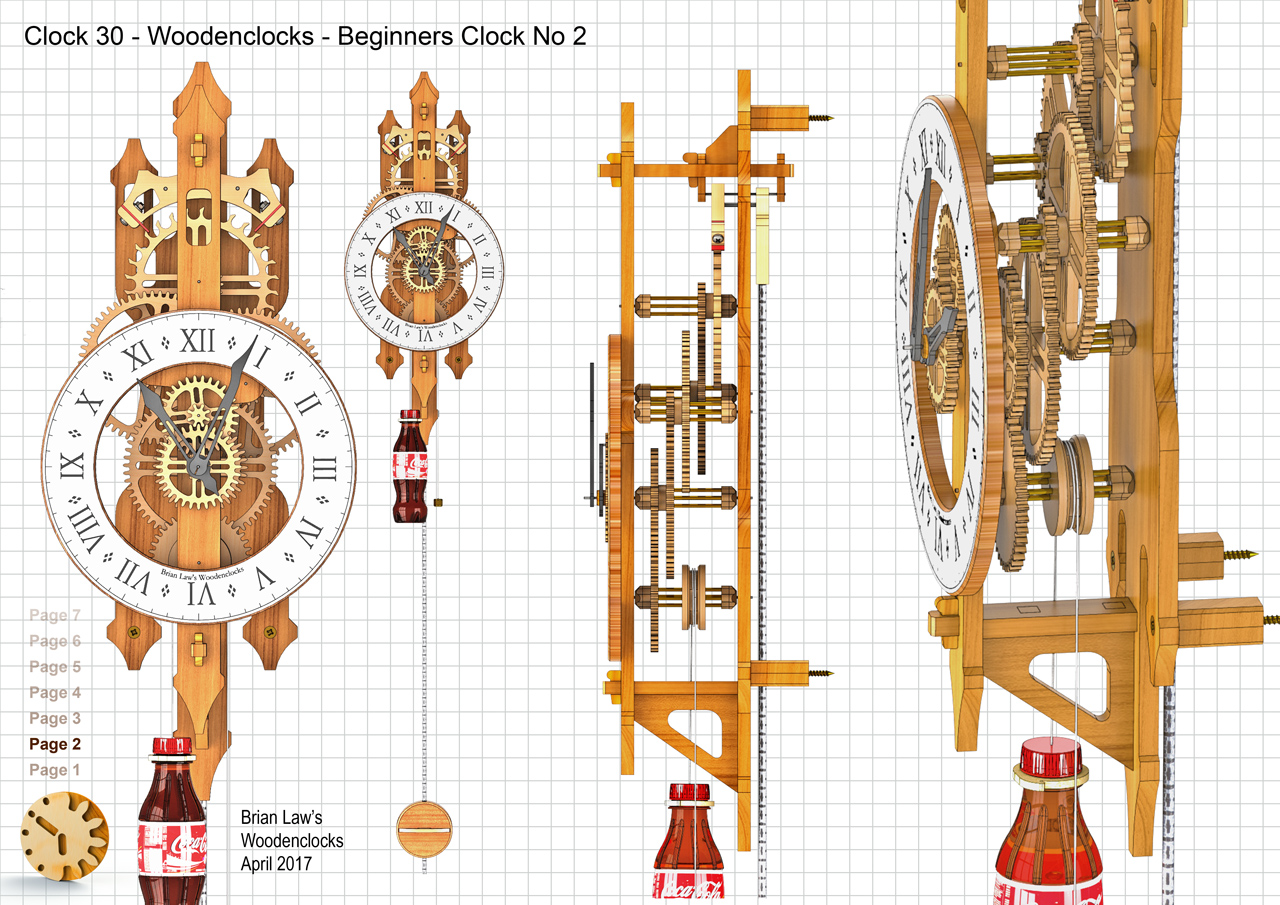
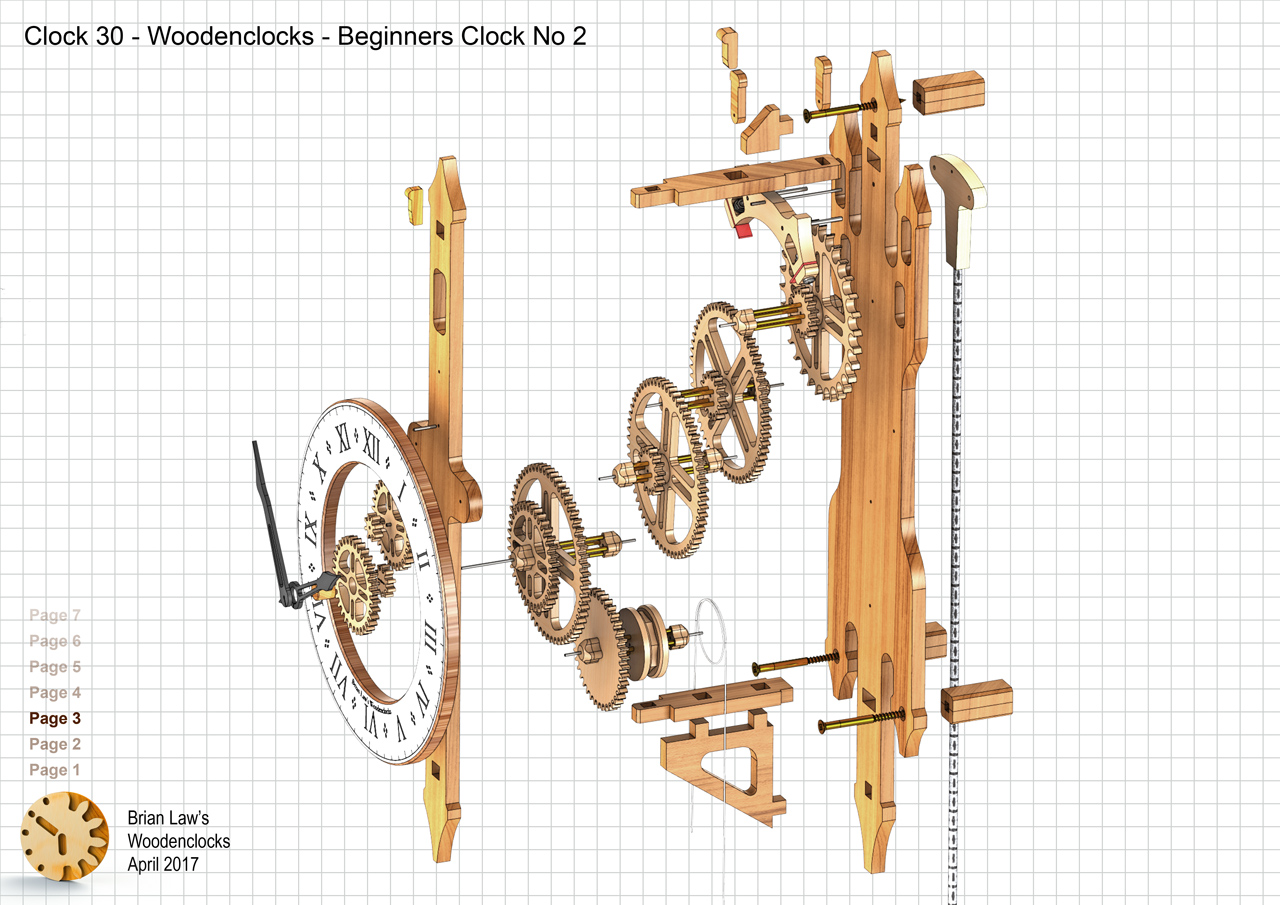
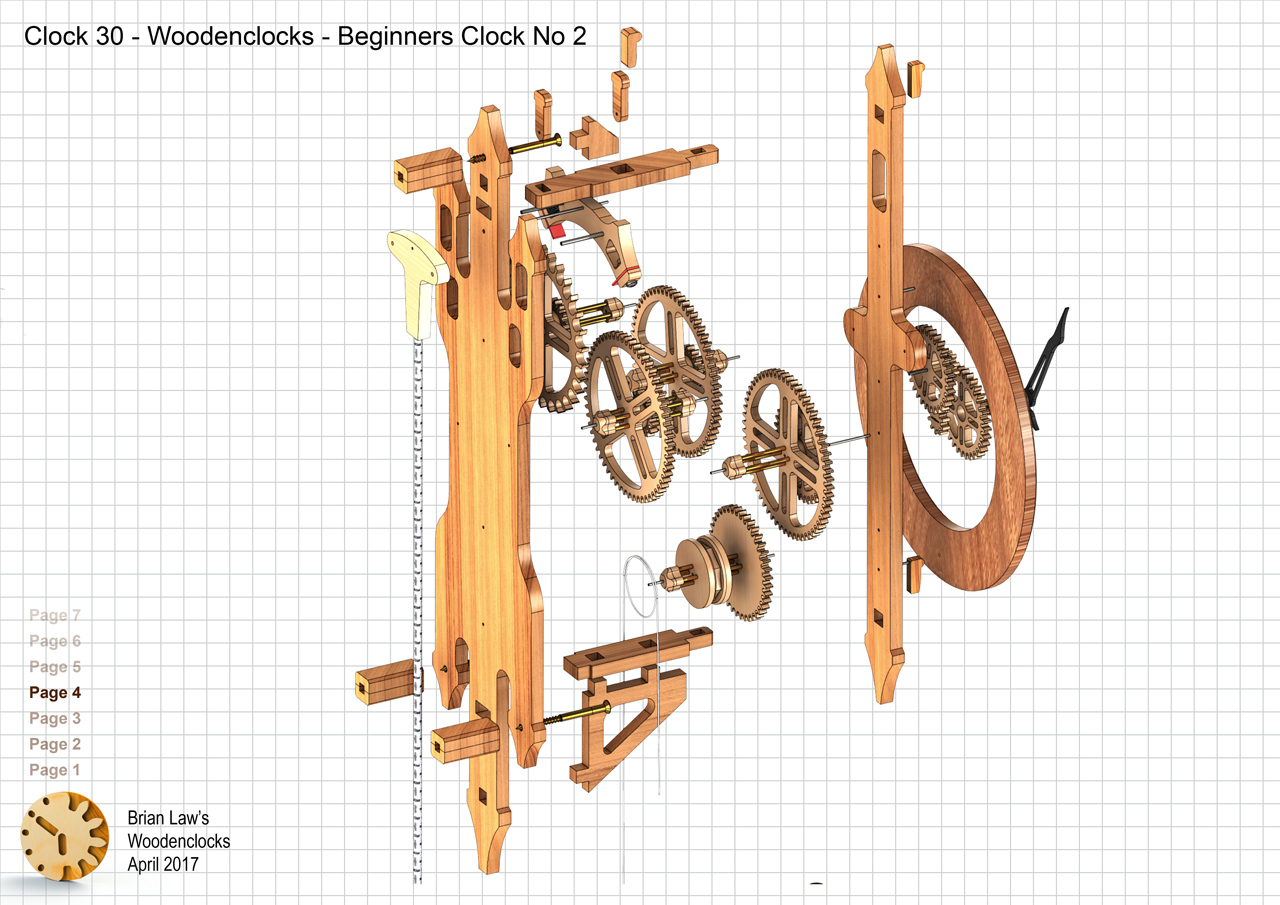
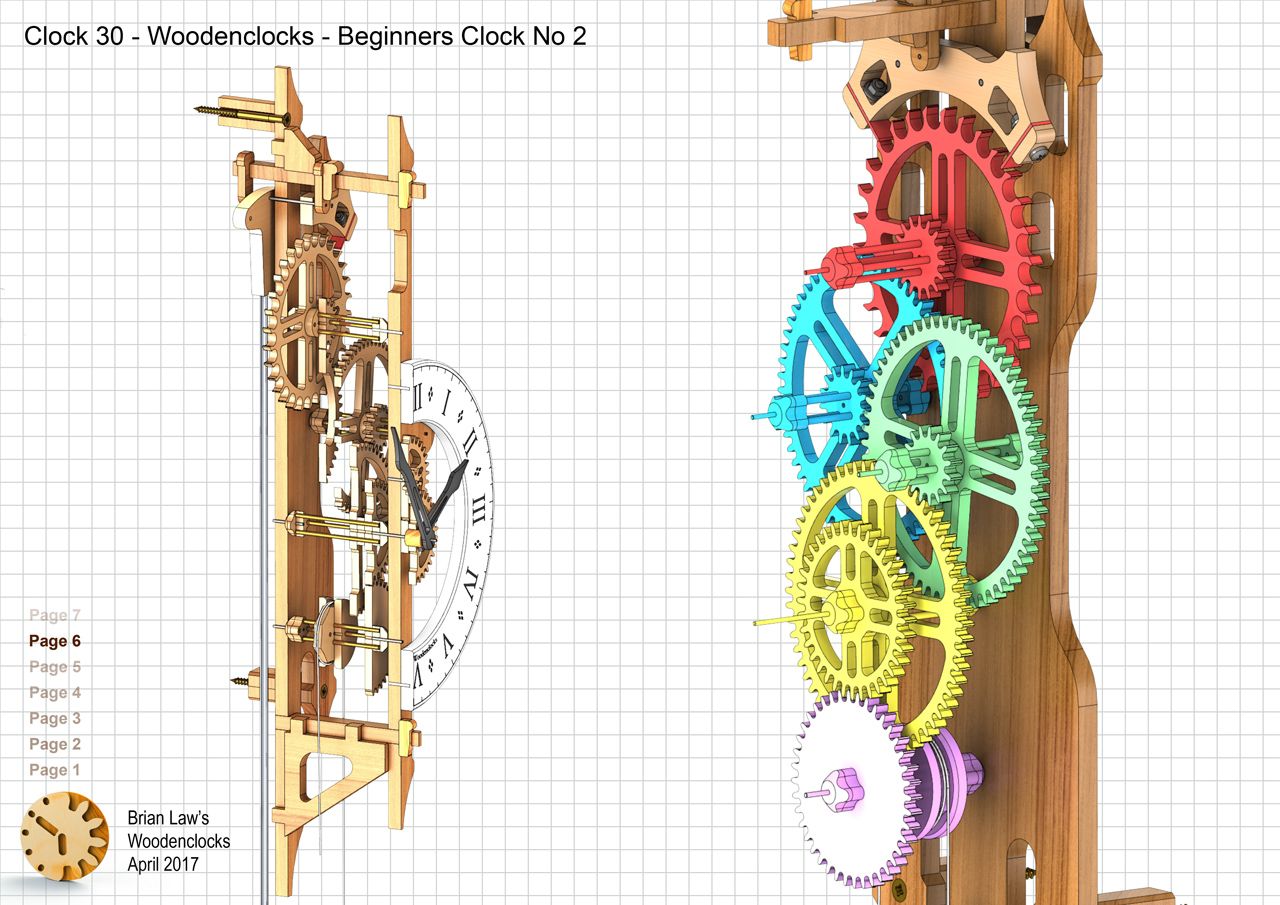
This clock, whilst similar to Beginners clock 1 has some refinements that endeavour to make it little more refined. The gears themselves have more delicate webs and the gear shafts have a 4-rod construction that provides strength and rigidity. This approach looks more refined than the Clock 25, whilst being slightly more difficult to construct.
Another feature of the Beginners clocks is the simple winding arrangement, with a single cord wrapped one and a half times around the drum, with a bottle of water as a weight and a couple of large nuts as a counterweight.
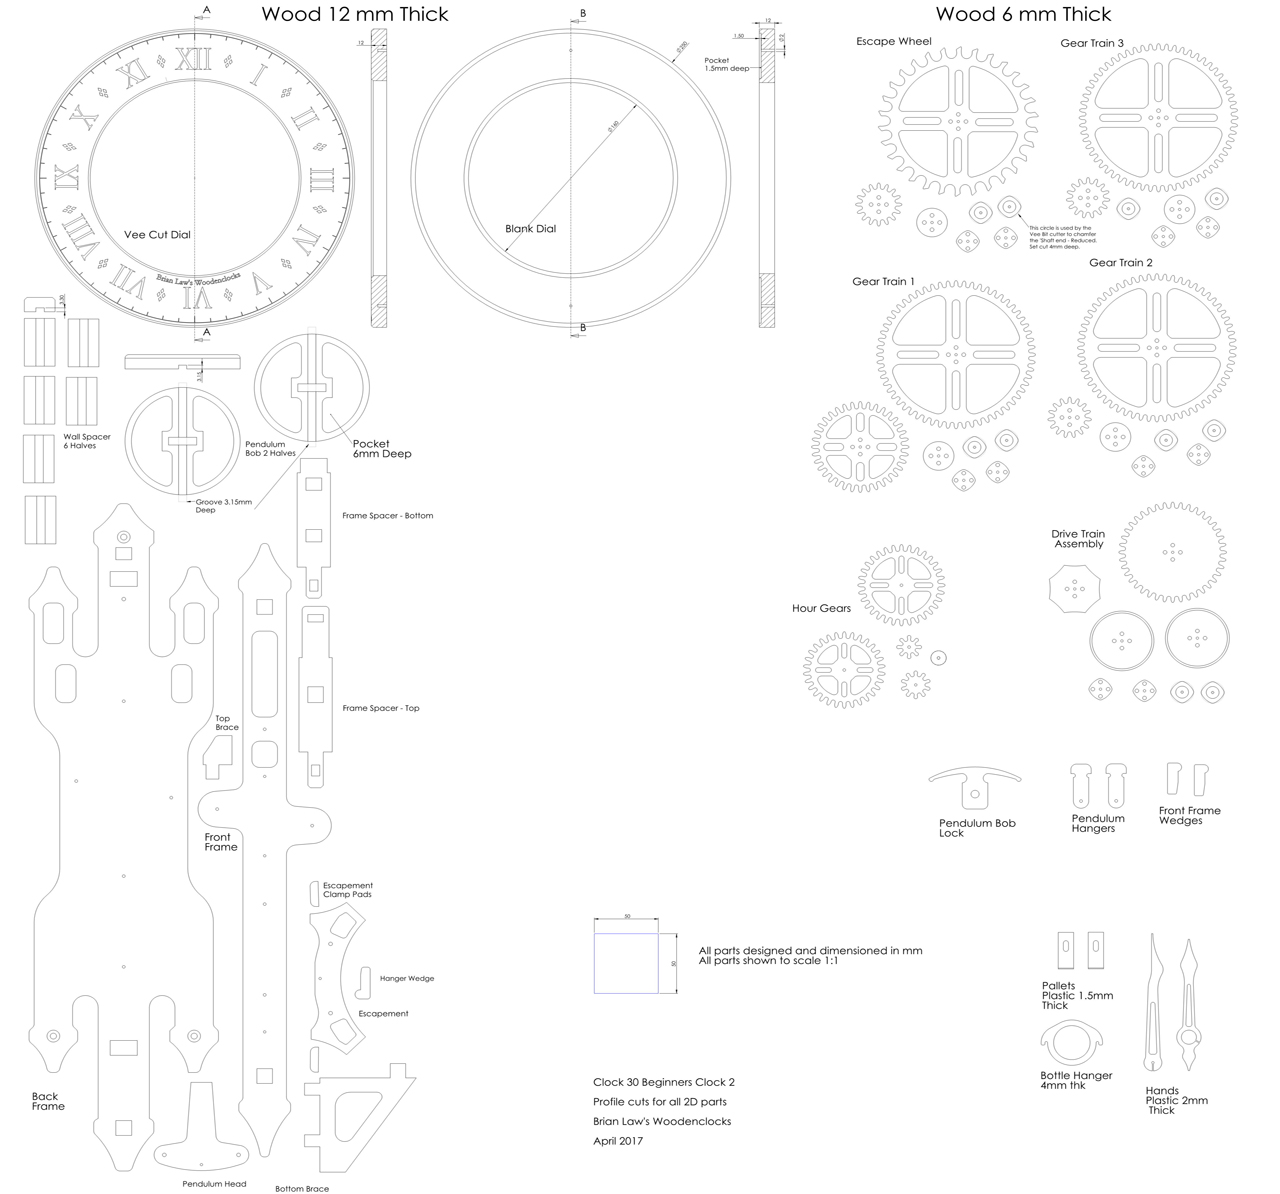
The Dial has been designed so that you can either cut it all out on the CNC router using a ‘Vee’ bit cutter to engrave the numerals or as a simpler alternative, you can cut the Dial blank with a recess for the Chapter ring that can be printed on a card.
I also set myself a challenge this time to build the clock entirely from timber salvaged from a Pallet, this turned out to be very hard going as the salvaged wood required quite a lot of work to make it suitable for use in the clock. and promptly fell out when machined. The biggest problem in tackling the project in this way was that the wood itself was actually Pine and not really suited to the to the cutting of the intricate gears, as on several occasions the timber would split or splinter spoiling the part. To overcome some of these problems I used a low viscosity Superglue to seal the faces of the gear teeth, so they would stand up to the loadings applied to them. It was also necessary, because of the softness of the timber used, to put small plastic bushes into the pivots for the shafts. If you are going to use a harder, finer grained wood like Maple then this will not be necessary.
In the end, after several remakes, a working clock was constructed and it actually turned out quite well, keeping a good time and running for 8-9 hours.
I can’t say that I would use this approach again as the work involved in salvaging the timber from the Pallet, and the rather inferior finish obtained using Pine instead of Maple or Cherry actually spoilt the appearance of the finished clock.
If you want to cut out parts on a scroll saw you can use the the PDF file included with the purchased downloads to do this. This PDF is one big sheet of all the parts so you will need to follow the PDF printing instructions below.
DXF files, and the IGS and STP files that can be used with your CNC machine can be downloaded here for $26. You also get the unrestricted version of the PDF files that can be printed at full size.
Drawings for this clock in PDF format can be downloaded here. These free files are low resolution and not to scale and only a sample of the full set that comes in the paid for version. Clicking here will download the PDF file directly to your browser, may take a few moments so please be patient.
Details of the materials and equipment needed to build this clock, along with Hints and Tips.
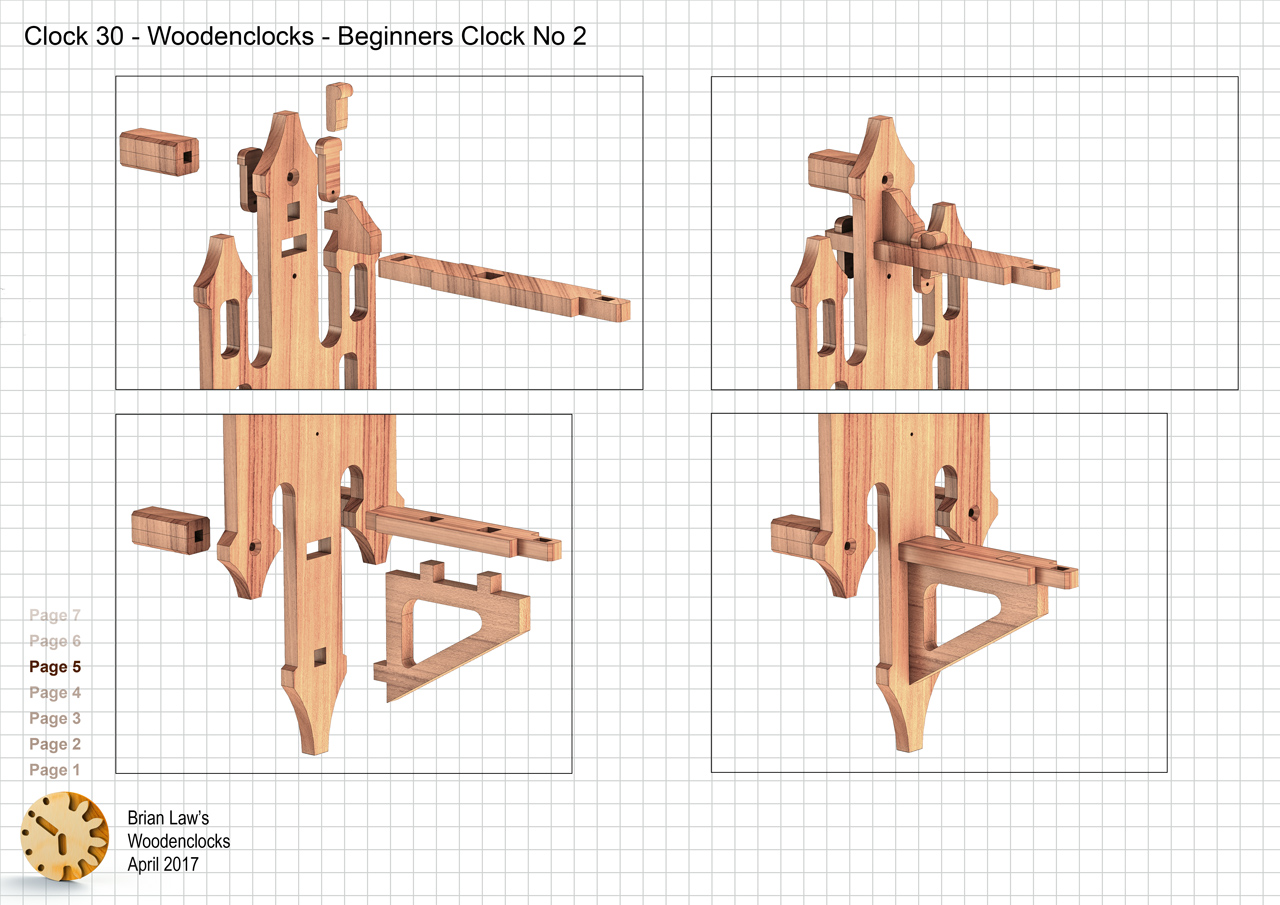
Instructions for assembling the clock components.
A sample from the DXF file – the file is purposely low resolution, with no vector data. The actual files purchased above are included on one large sheet so that they may be directly loaded into your CAM program.
To print only a single item of the drawing to scale using Adobe Acrobat Reader, do the following:
Go to Edit, then click on Take a snapshot, move the cursor to the top left of the item you want to print and hold down the left mouse button whilst you drag a box around the item. The inside of the box turns blue and you can now go to File and then click on Print. This brings up the print dialogue, make sure Selected graphic is selected and that the Page scaling is set to None and the click on OK. As long as your printer is connected you will have printed the item at size. Do this for each item you want to cut out.