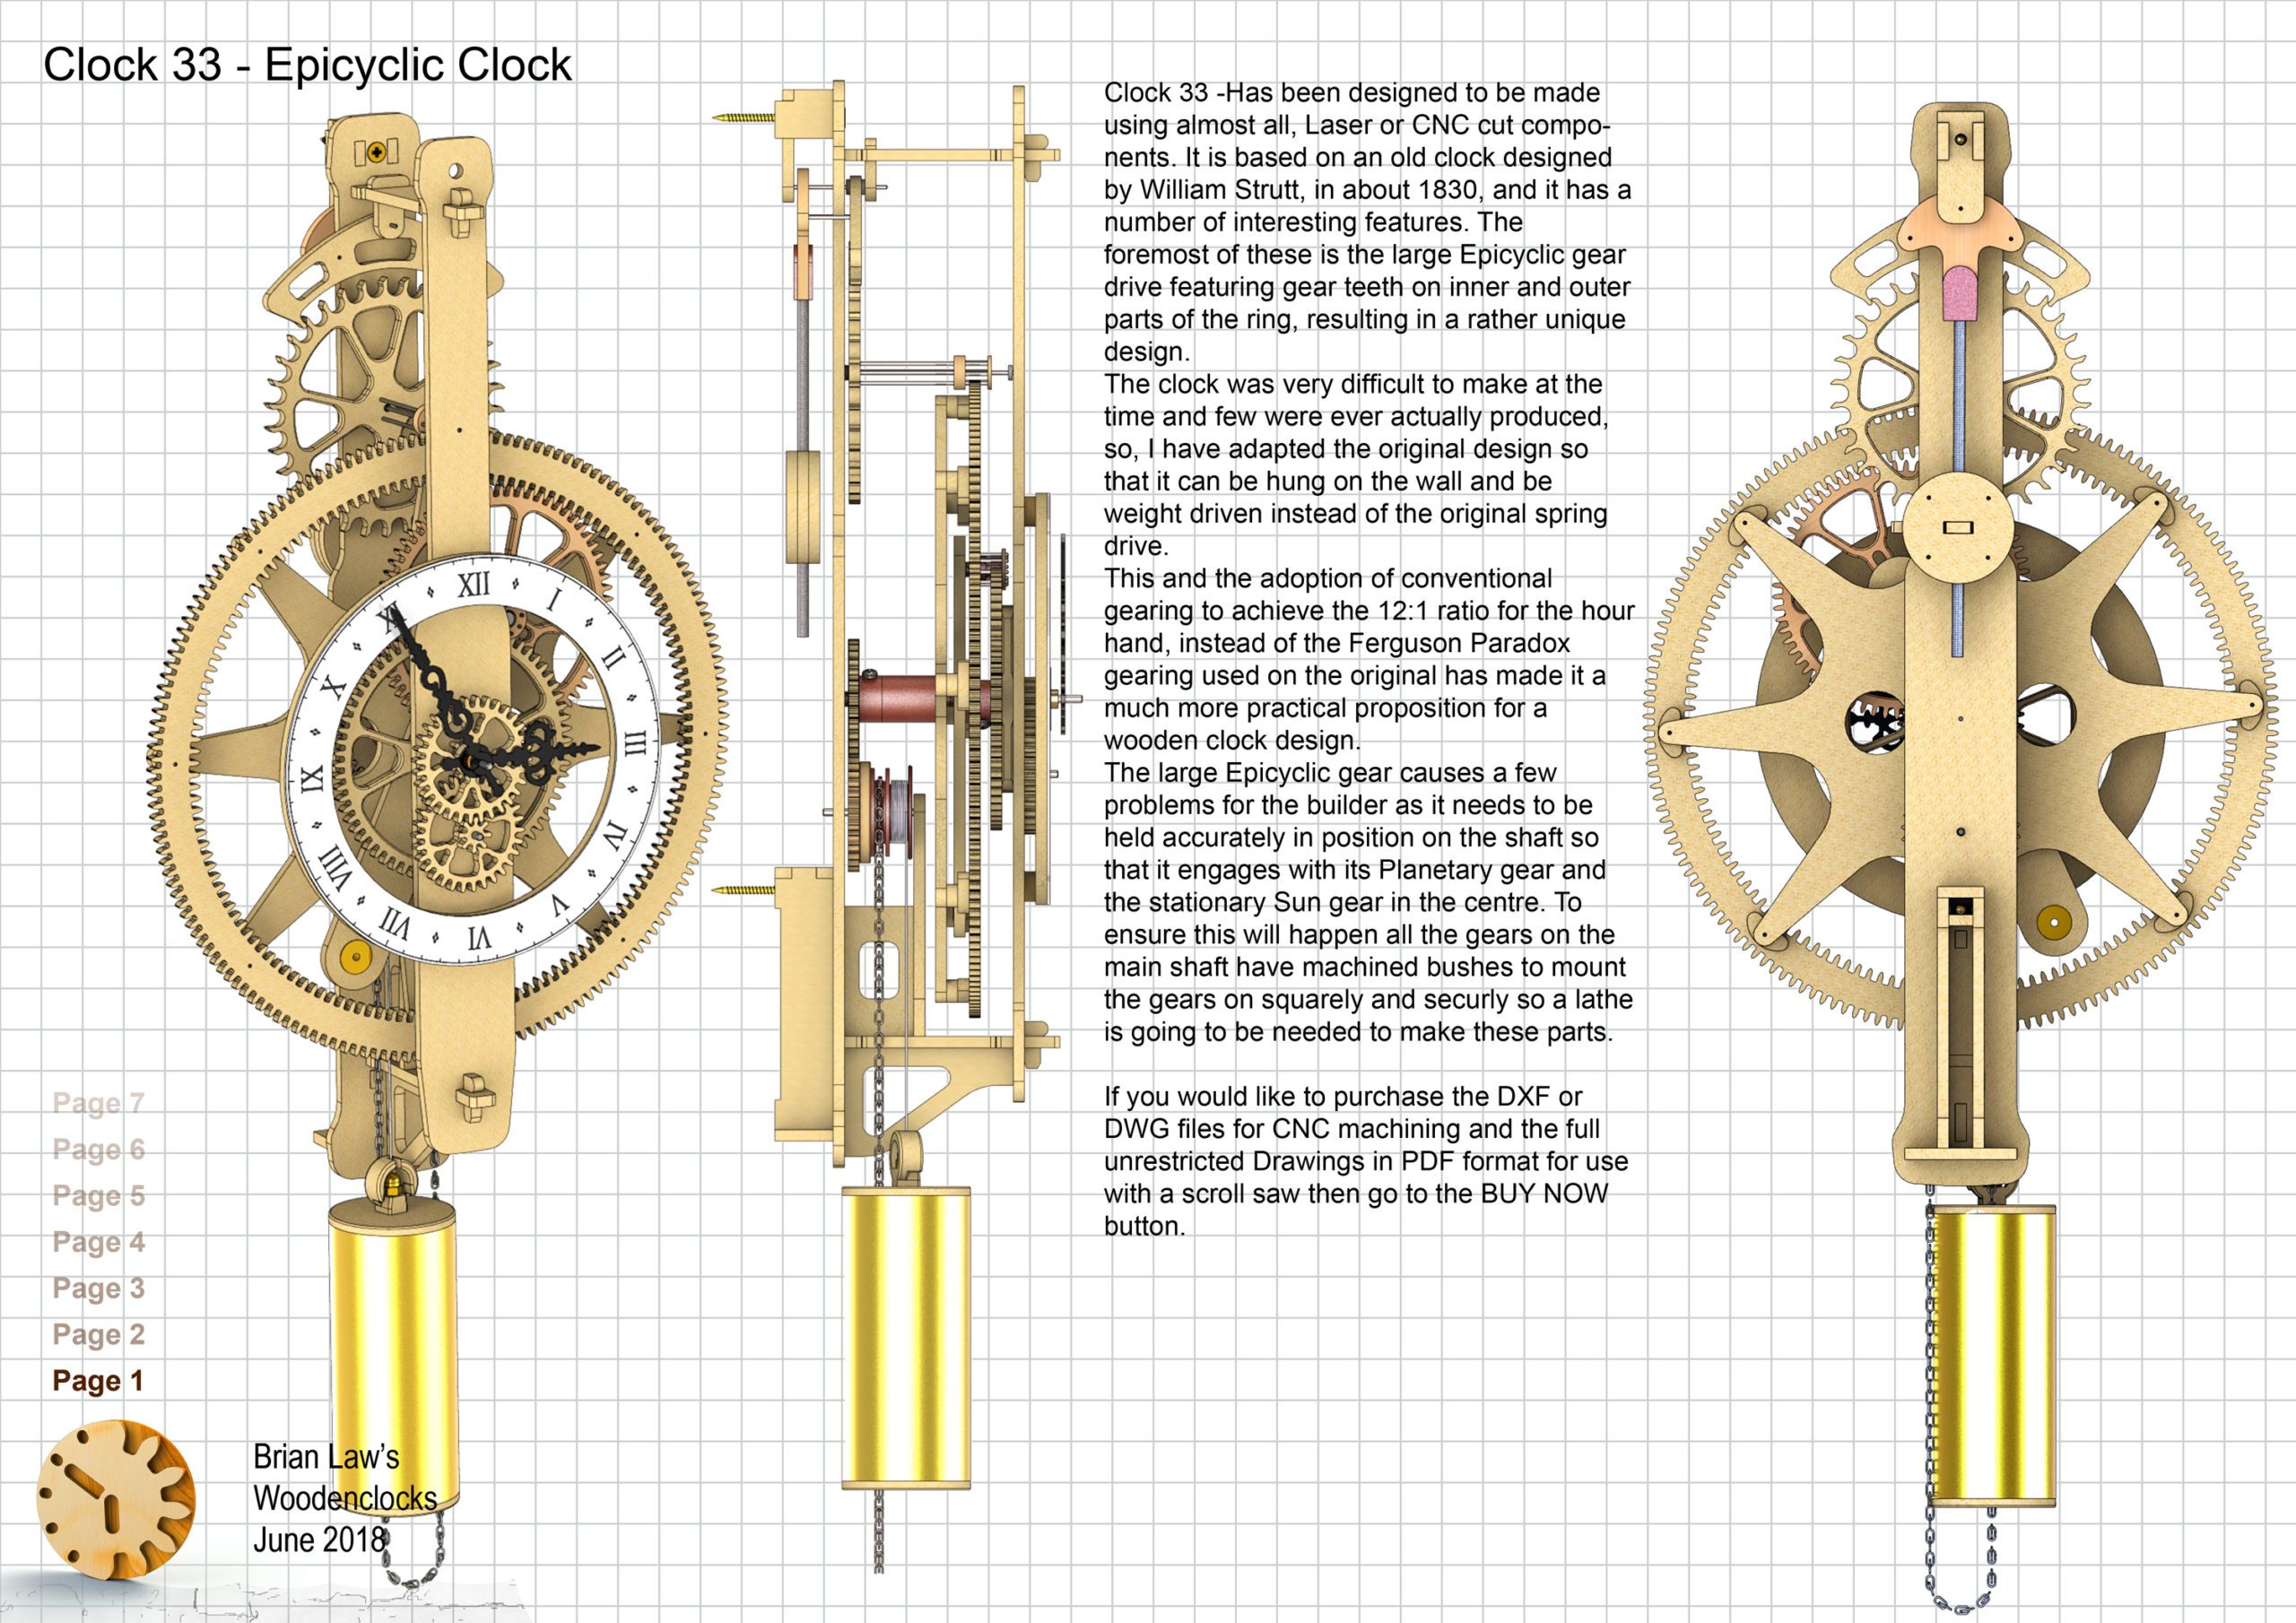
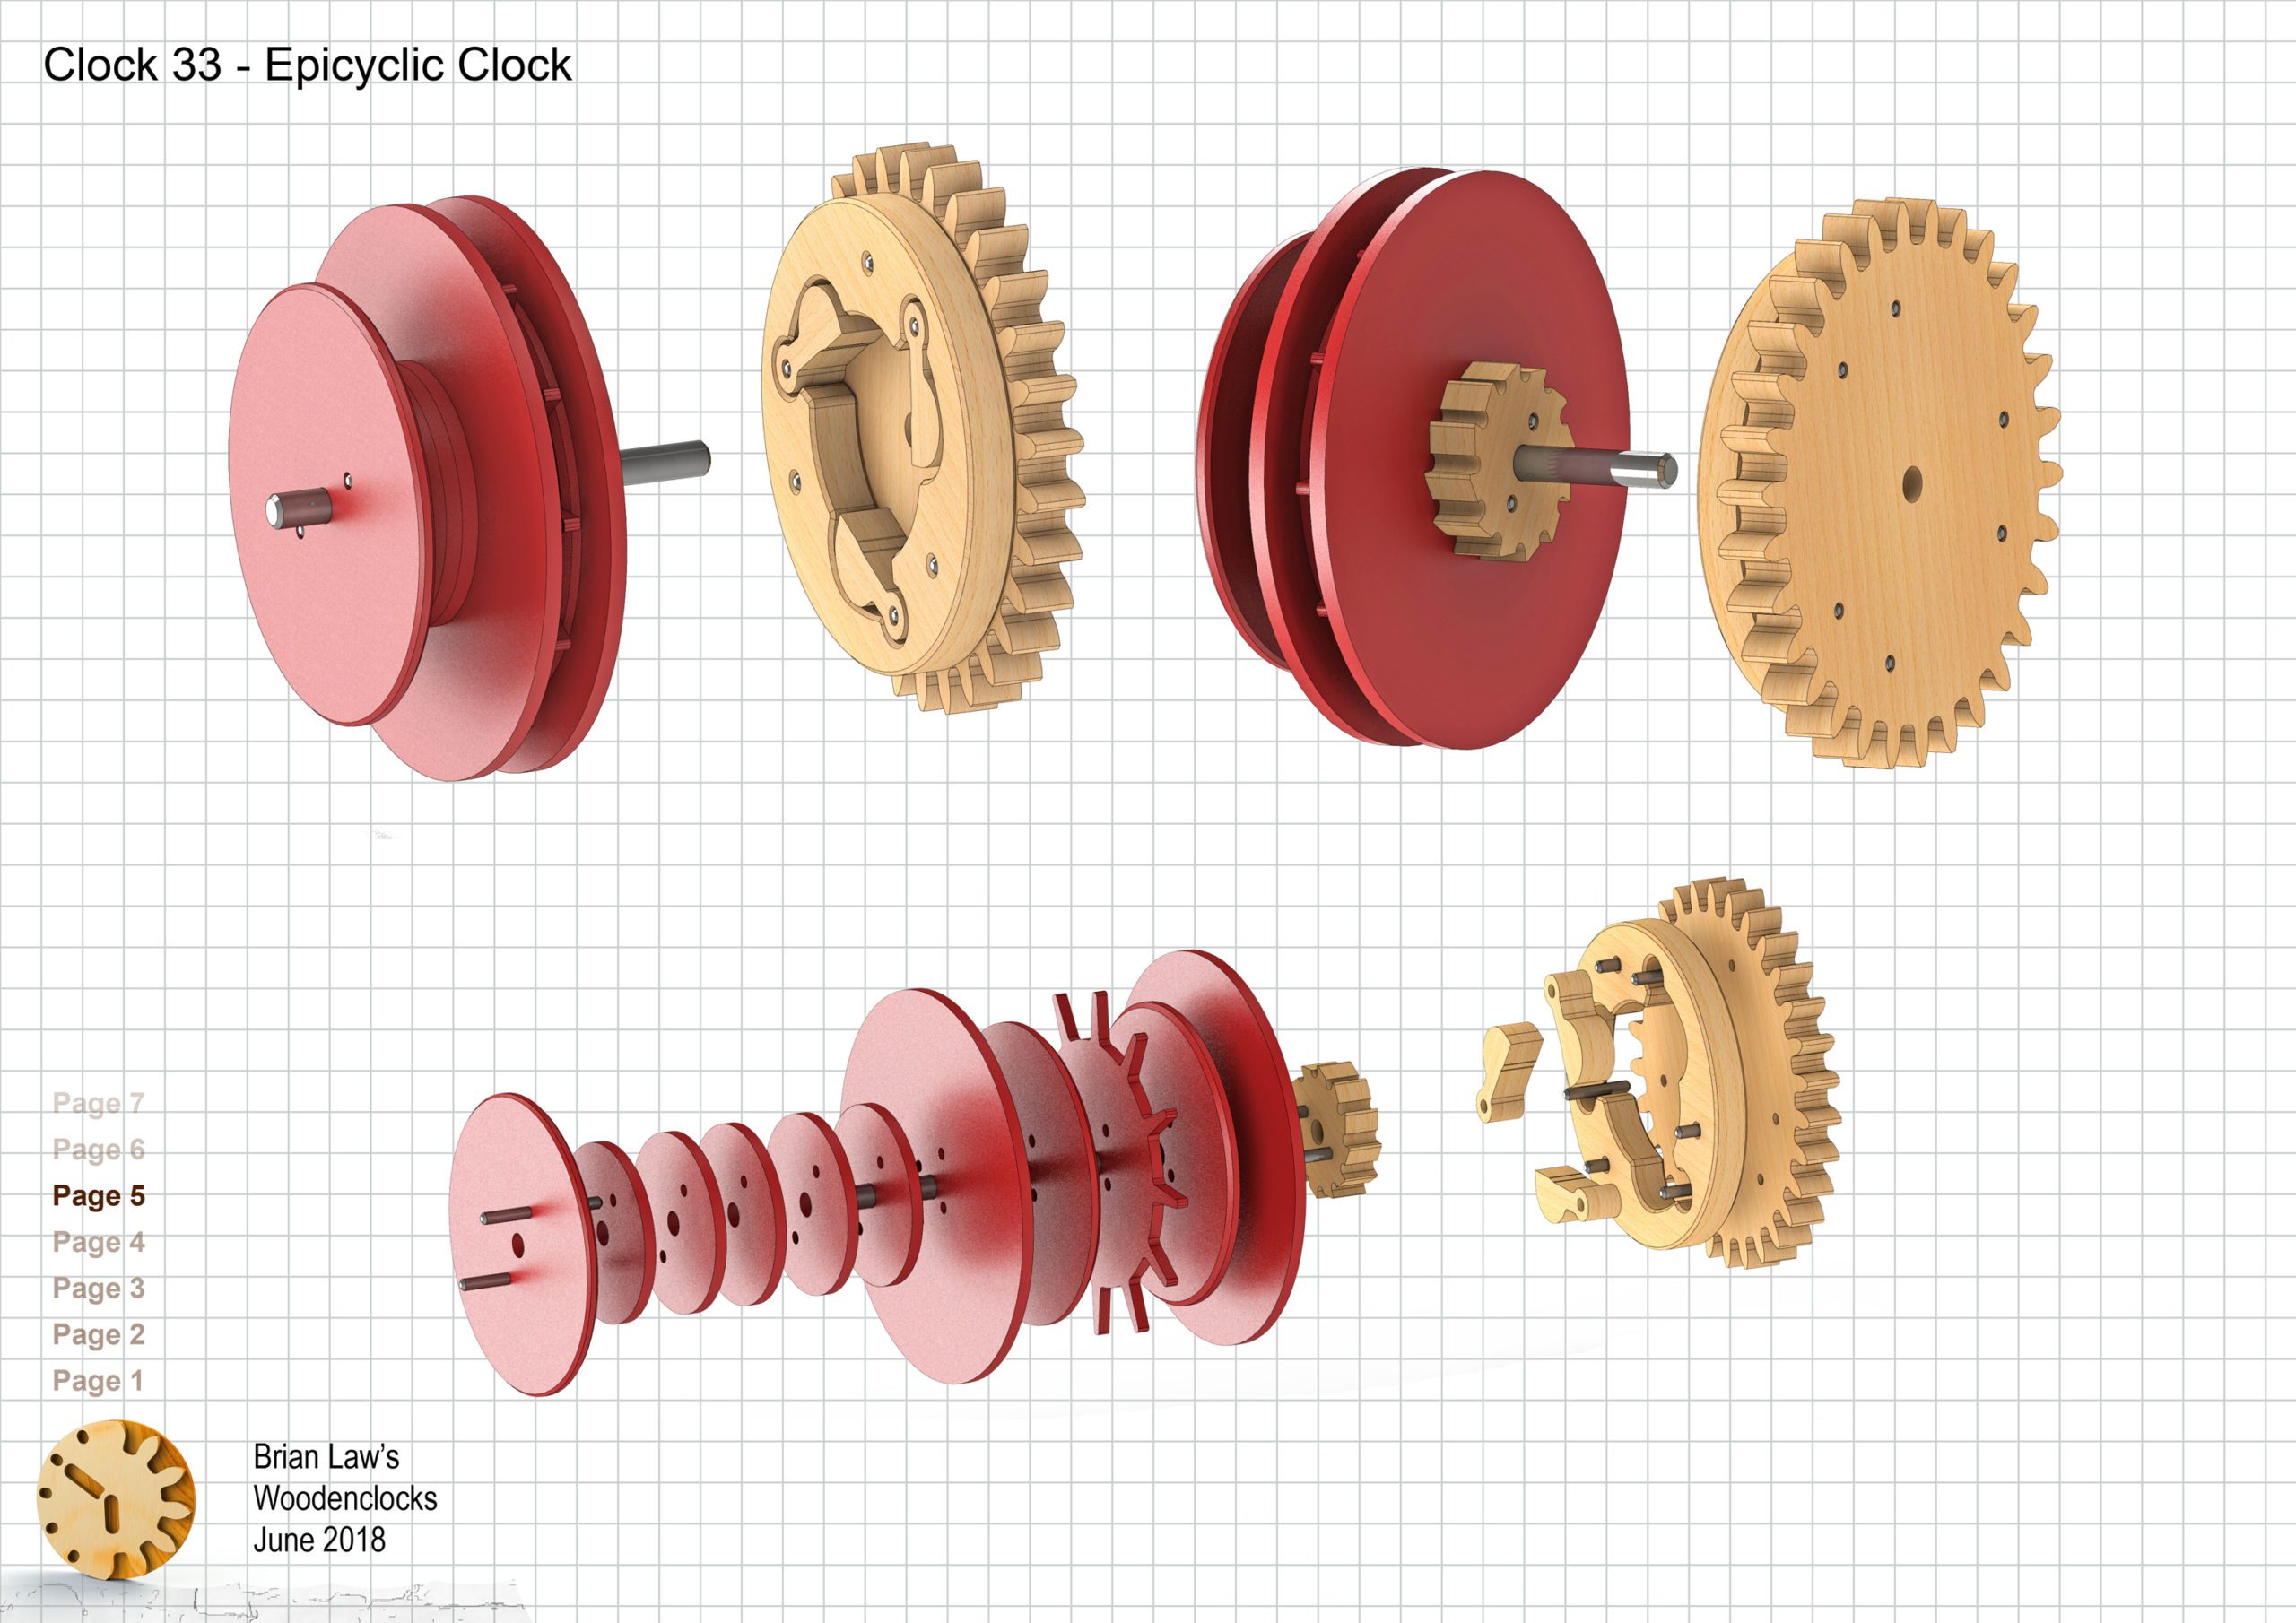
Clock 33 – Has been designed to be made using almost all, Laser or CNC cut components. It is based on an old clock designed by William Strutt, in about 1830, and it has several interesting features. The foremost of these is the large Epicyclic gear drive featuring gear teeth on inner and outer parts of the ring, resulting in a rather unique design.The clock was very difficult to make at the time and few were ever actually produced, so, I have adapted the original design so that it can be hung on the wall and be weight driven instead of the original spring drive. This and the adoption of conventional gearing to achieve the 12:1 ratio for the hour hand, instead of the Ferguson Paradox gearing used on the original has made it much more practicable proposition for a wooden clock design.The large Epicyclic gear causes a few problems for the builder as it needs to be held accurately in position on the shaft so that it engages with its Planetary gear and the stationary Sun gear in the centre. To ensure this will happen all the gears on the main shaft have machined bushes to mount the gears on squarely and securely so a lathe is going to be needed to make these parts.
Although this is not really a clock for the beginner it is actually a great project if you are an experienced engineer and want a quick build and a satisfying result.
I don’t normally use sheet materials for the clocks but in this case with the large Epicyclic gear required to be as flat and distortion free as possible, sheet materials, MDF, Plywood or Perspex are actually ideal.
DXF files, and the IGS and STP files that can be used with your CNC machine can be downloaded here for $26. You also get the unrestricted version of the PDF files that can be printed at full size.
Drawings for this clock in PDF format can be downloaded here. These free files are low resolution and not to scale and only a sample of the full set that comes in the paid for version. Clicking here will download the PDF file directly to your browser, may take a few moments so please be patient.
Details of the materials and equipment needed to build this clock, along with Hints and Tips.
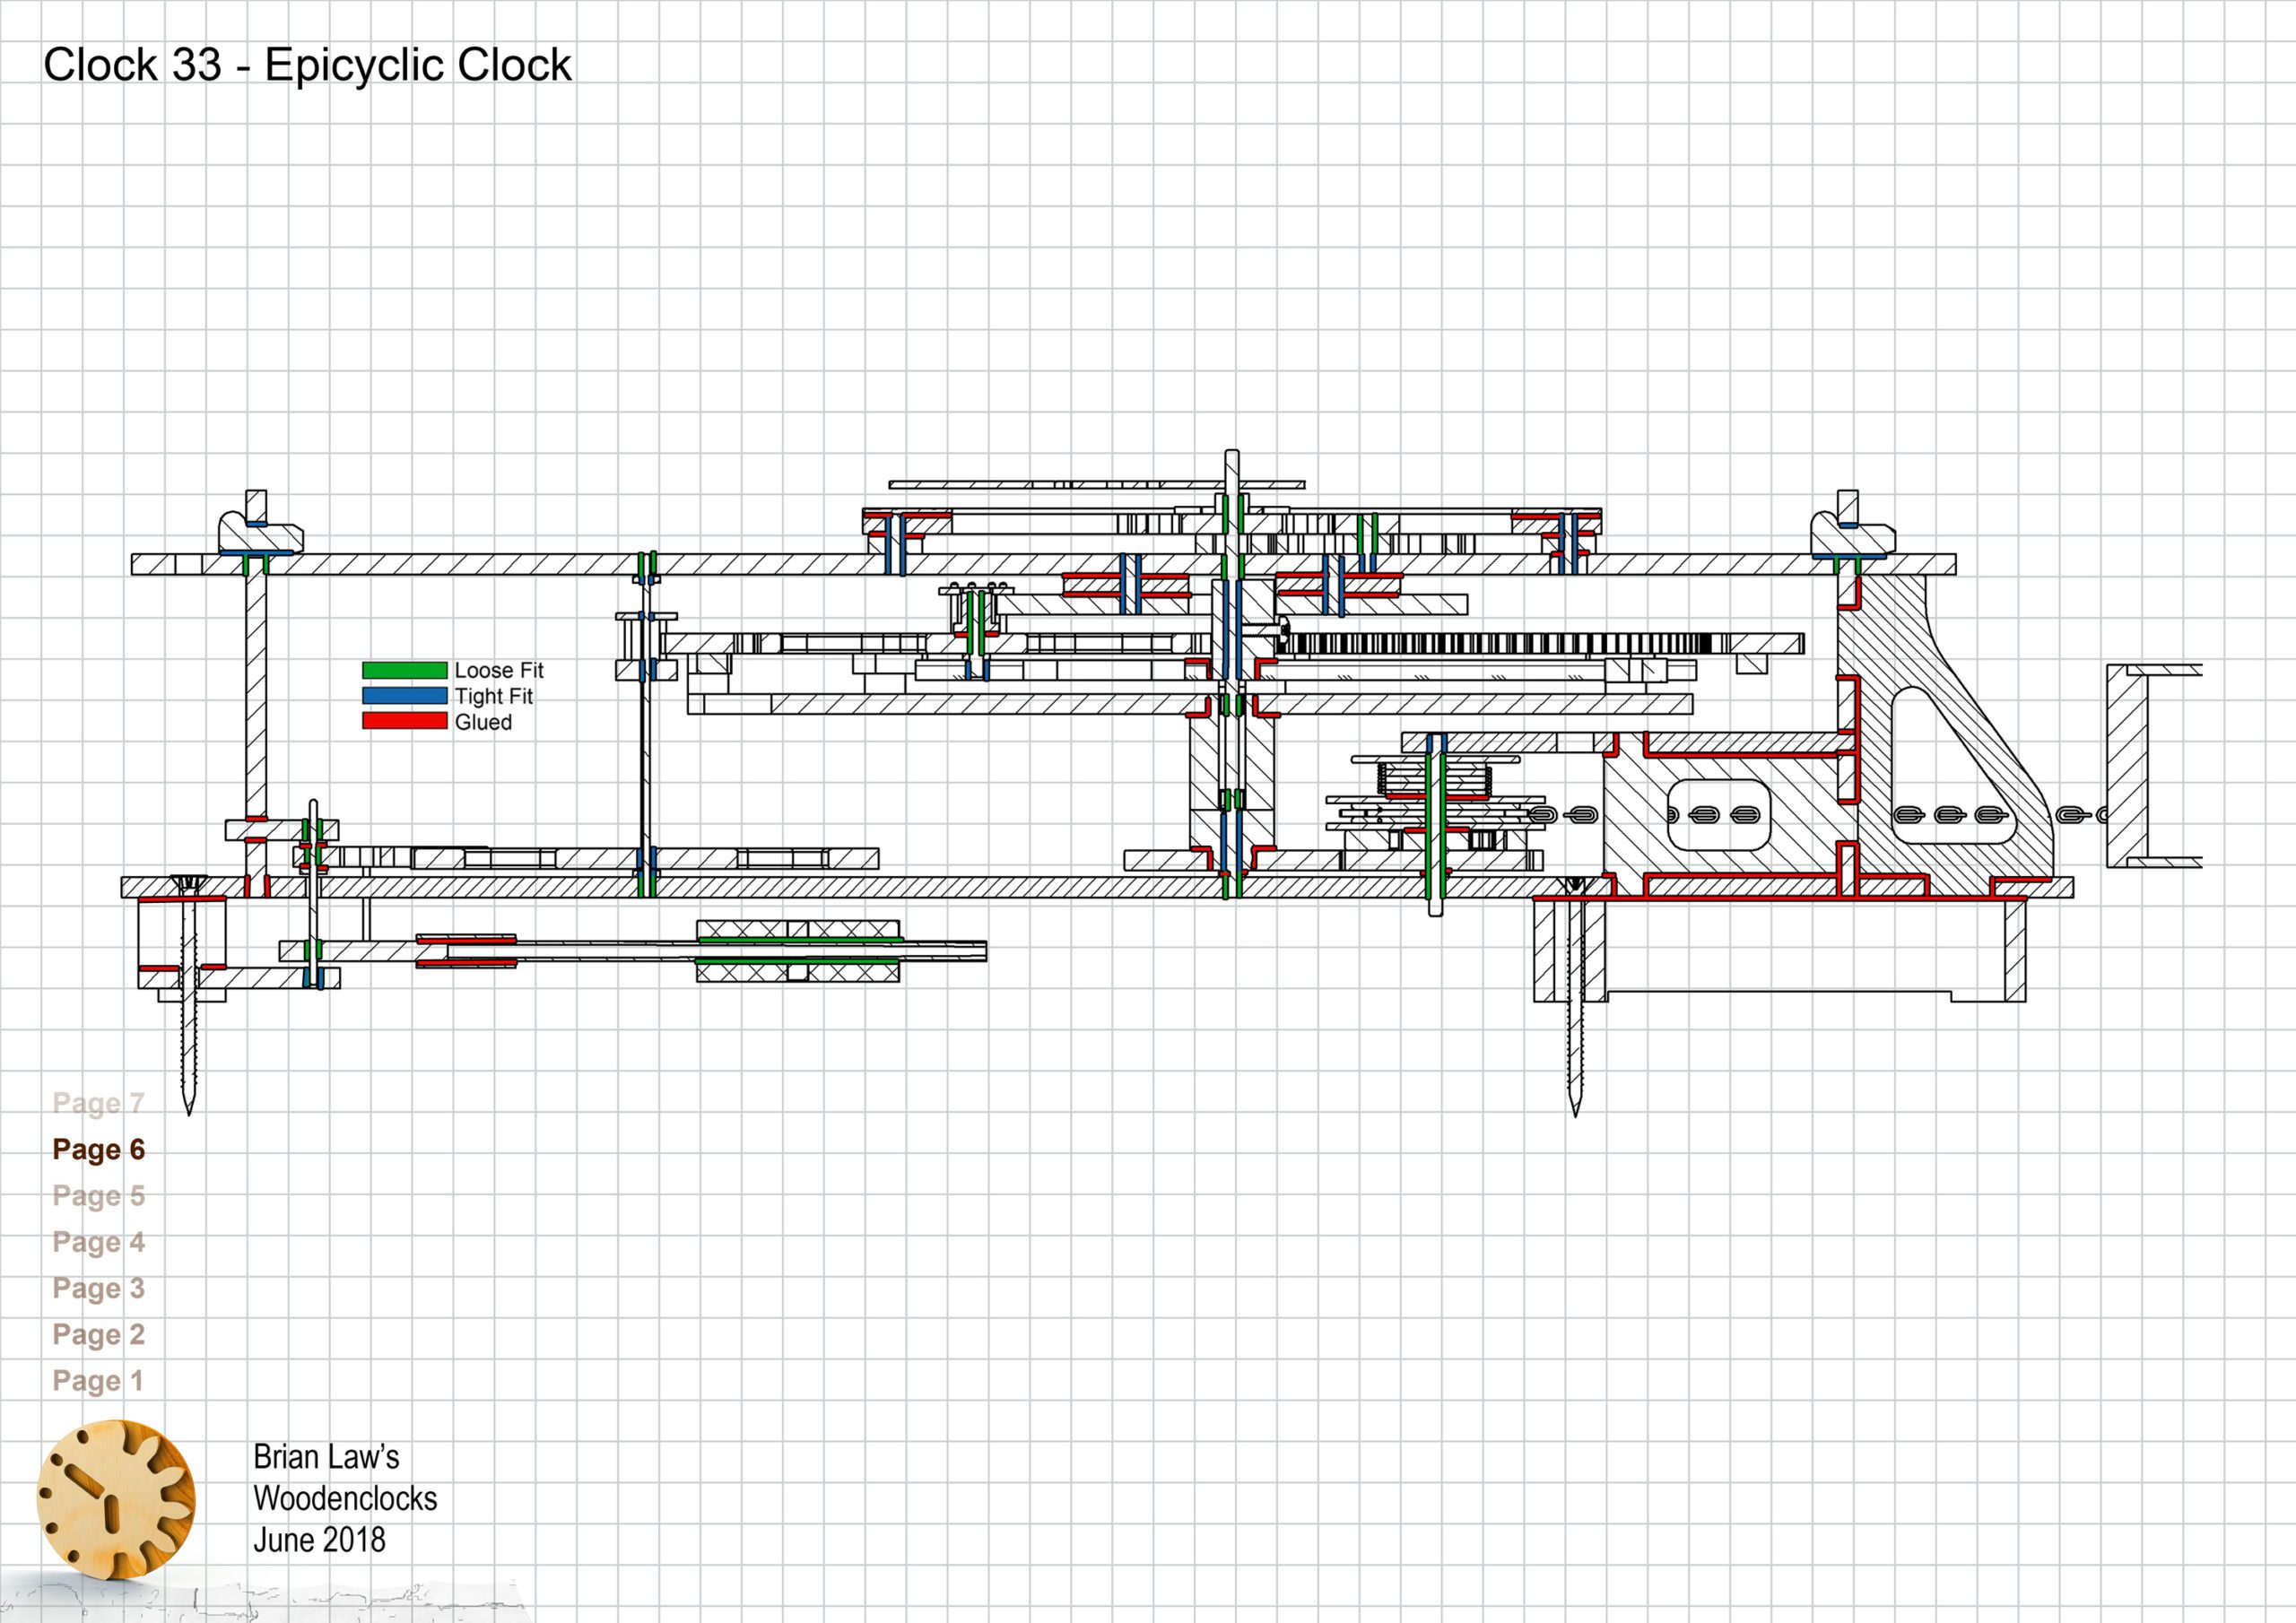
Instructions for assembling the clock components.
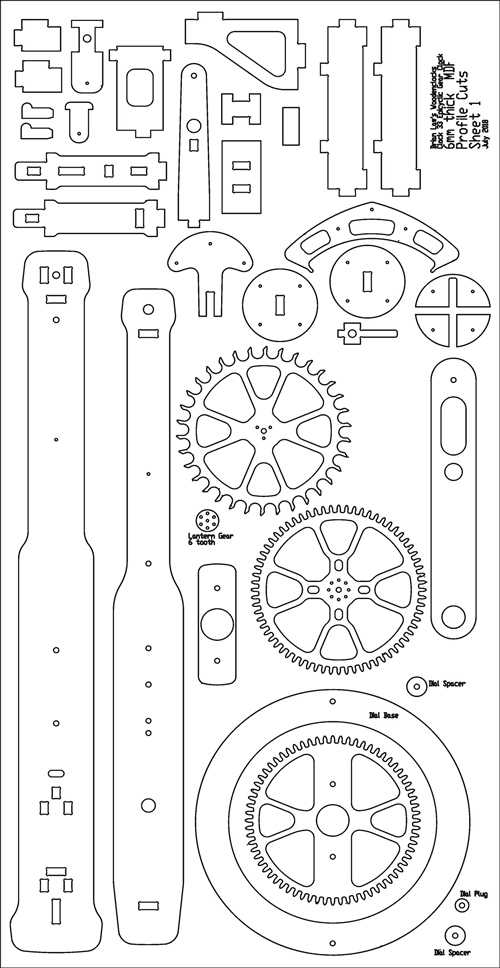
A sample from the DXF file – the file is purposely low resolution, with no vector data. The actual files purchased above are included on one large sheet so that they may be directly loaded into your CAM program.
To print only a single item of the drawing to scale using Adobe Acrobat Reader, do the following:
Go to Edit, then click on Take a snapshot, move the cursor to the top left of the item you want to print and hold down the left mouse button whilst you drag a box around the item. The inside of the box turns blue and you can now go to File and then click on Print. This brings up the print dialogue, make sure Selected graphic is selected and that the Page scaling is set to None and the click on OK. As long as your printer is connected you will have printed the item at size. Do this for each item you want to cut out.