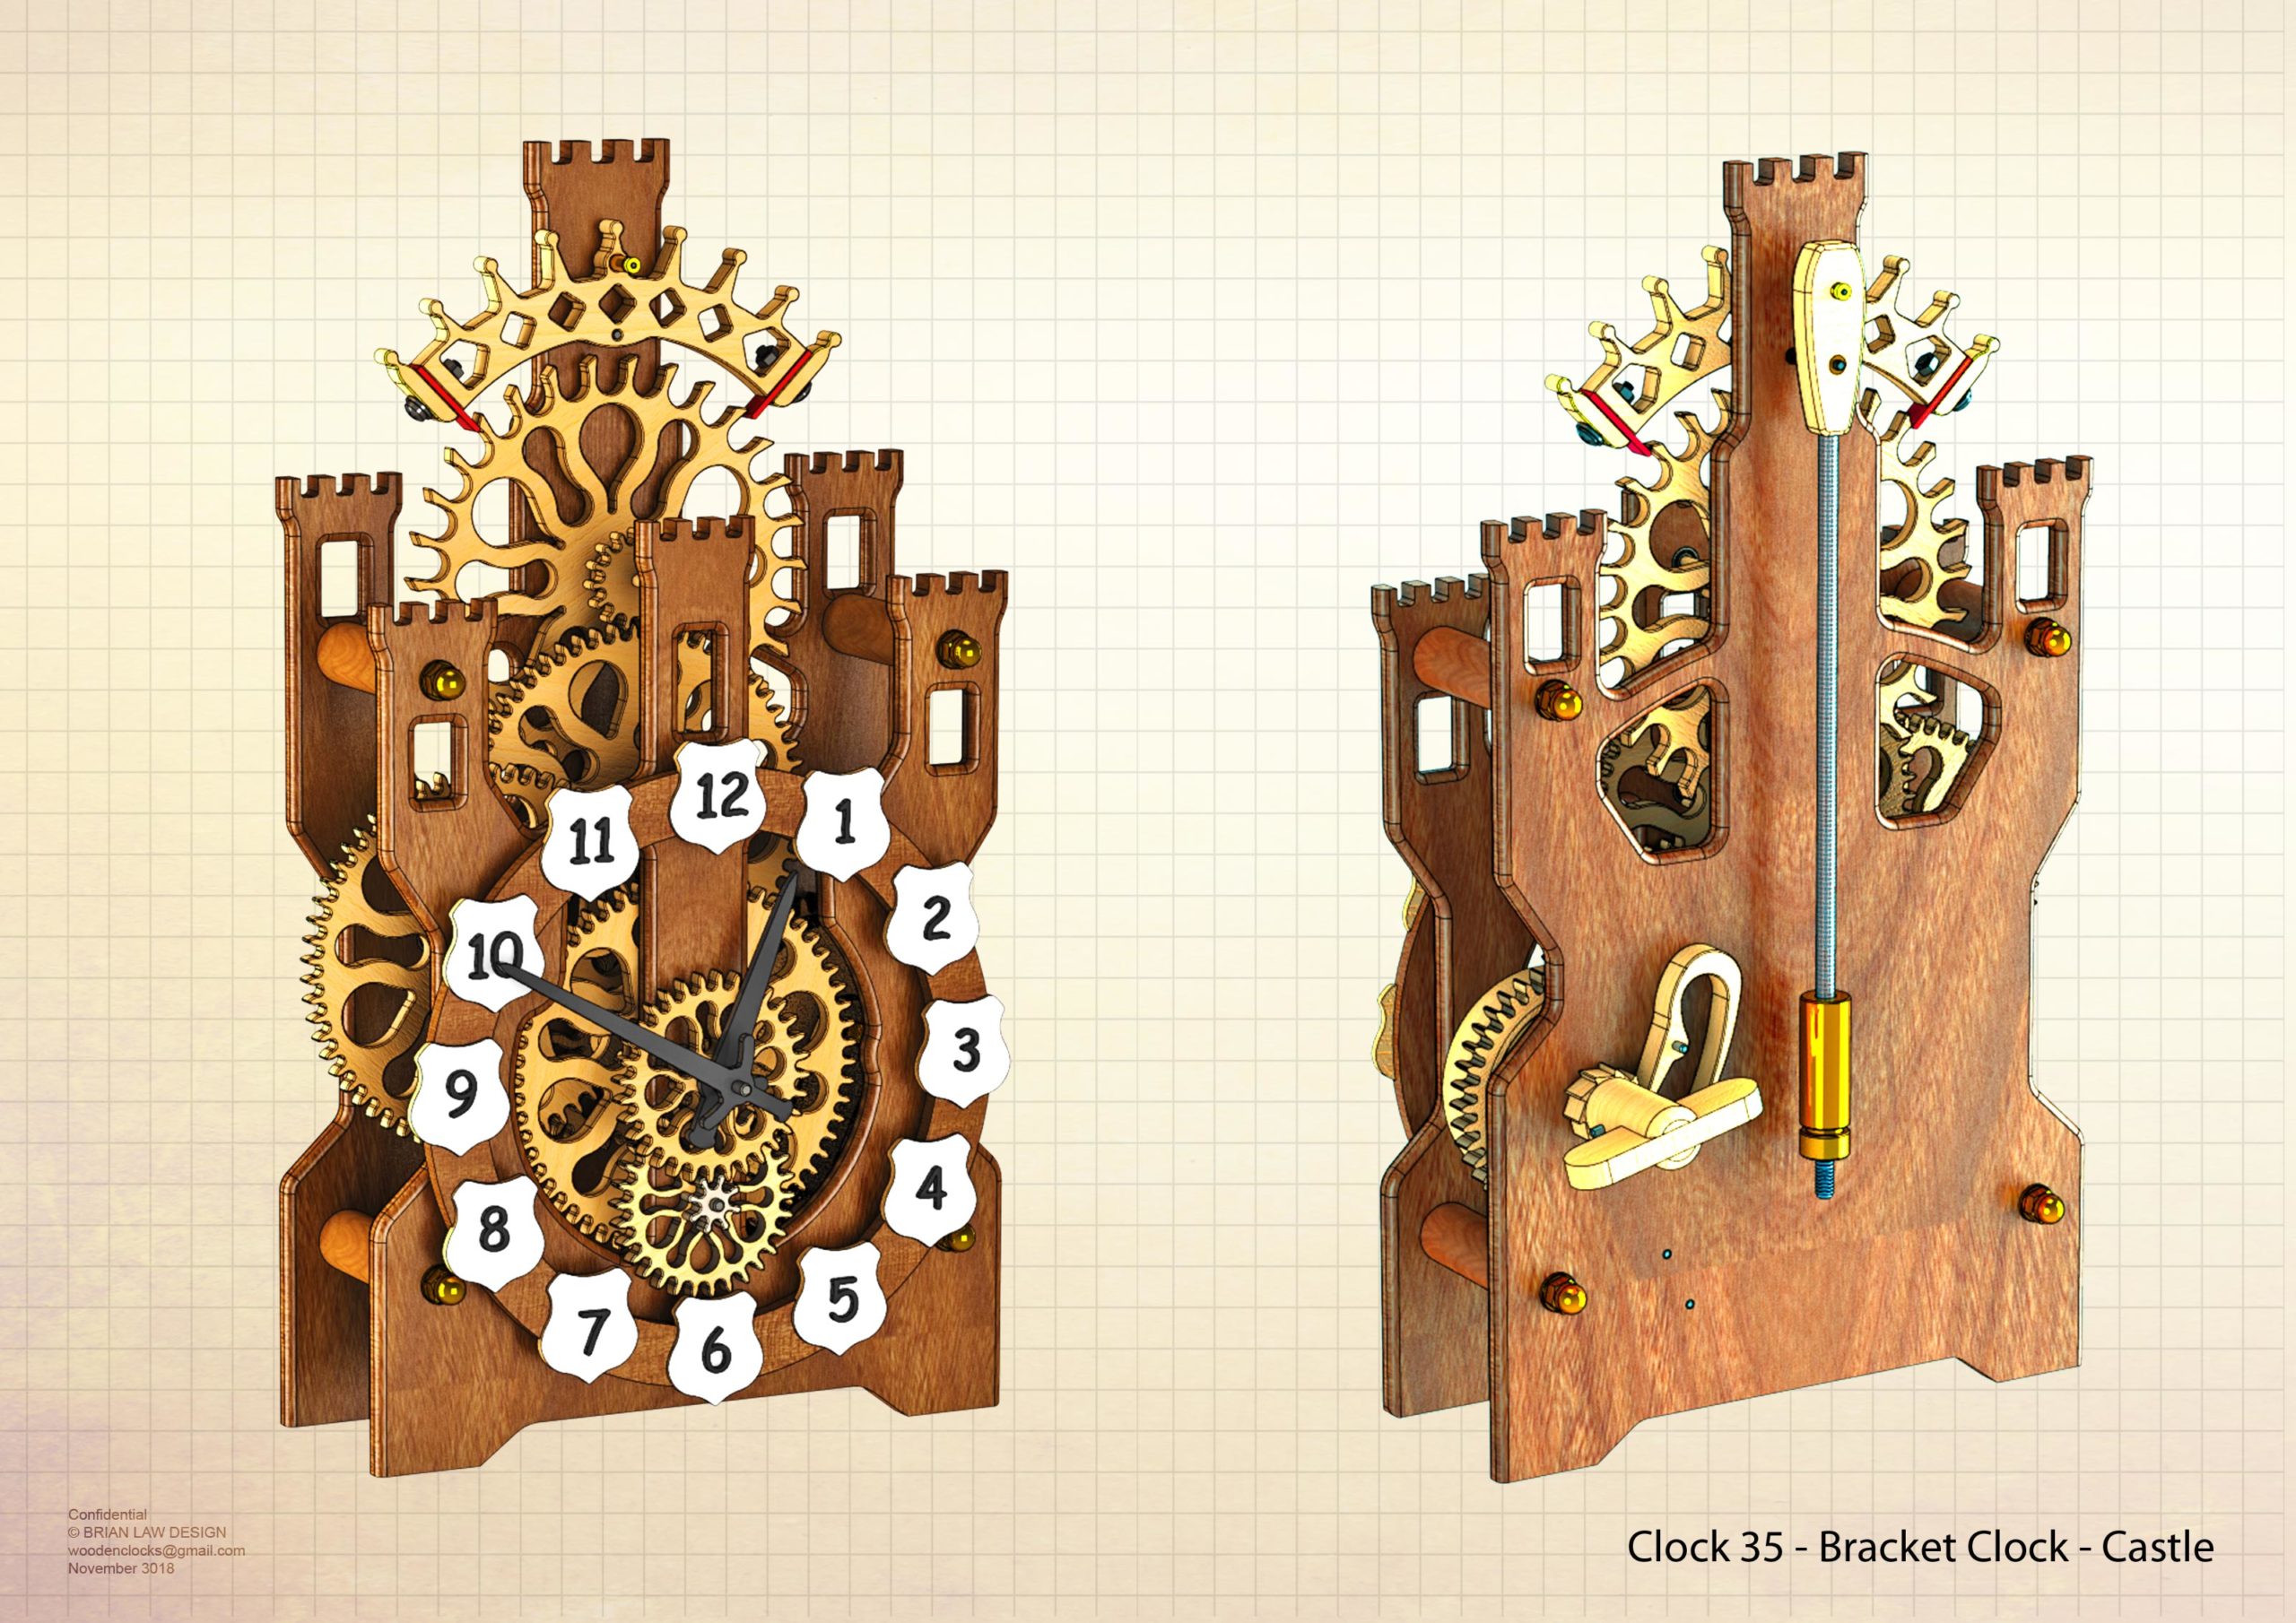
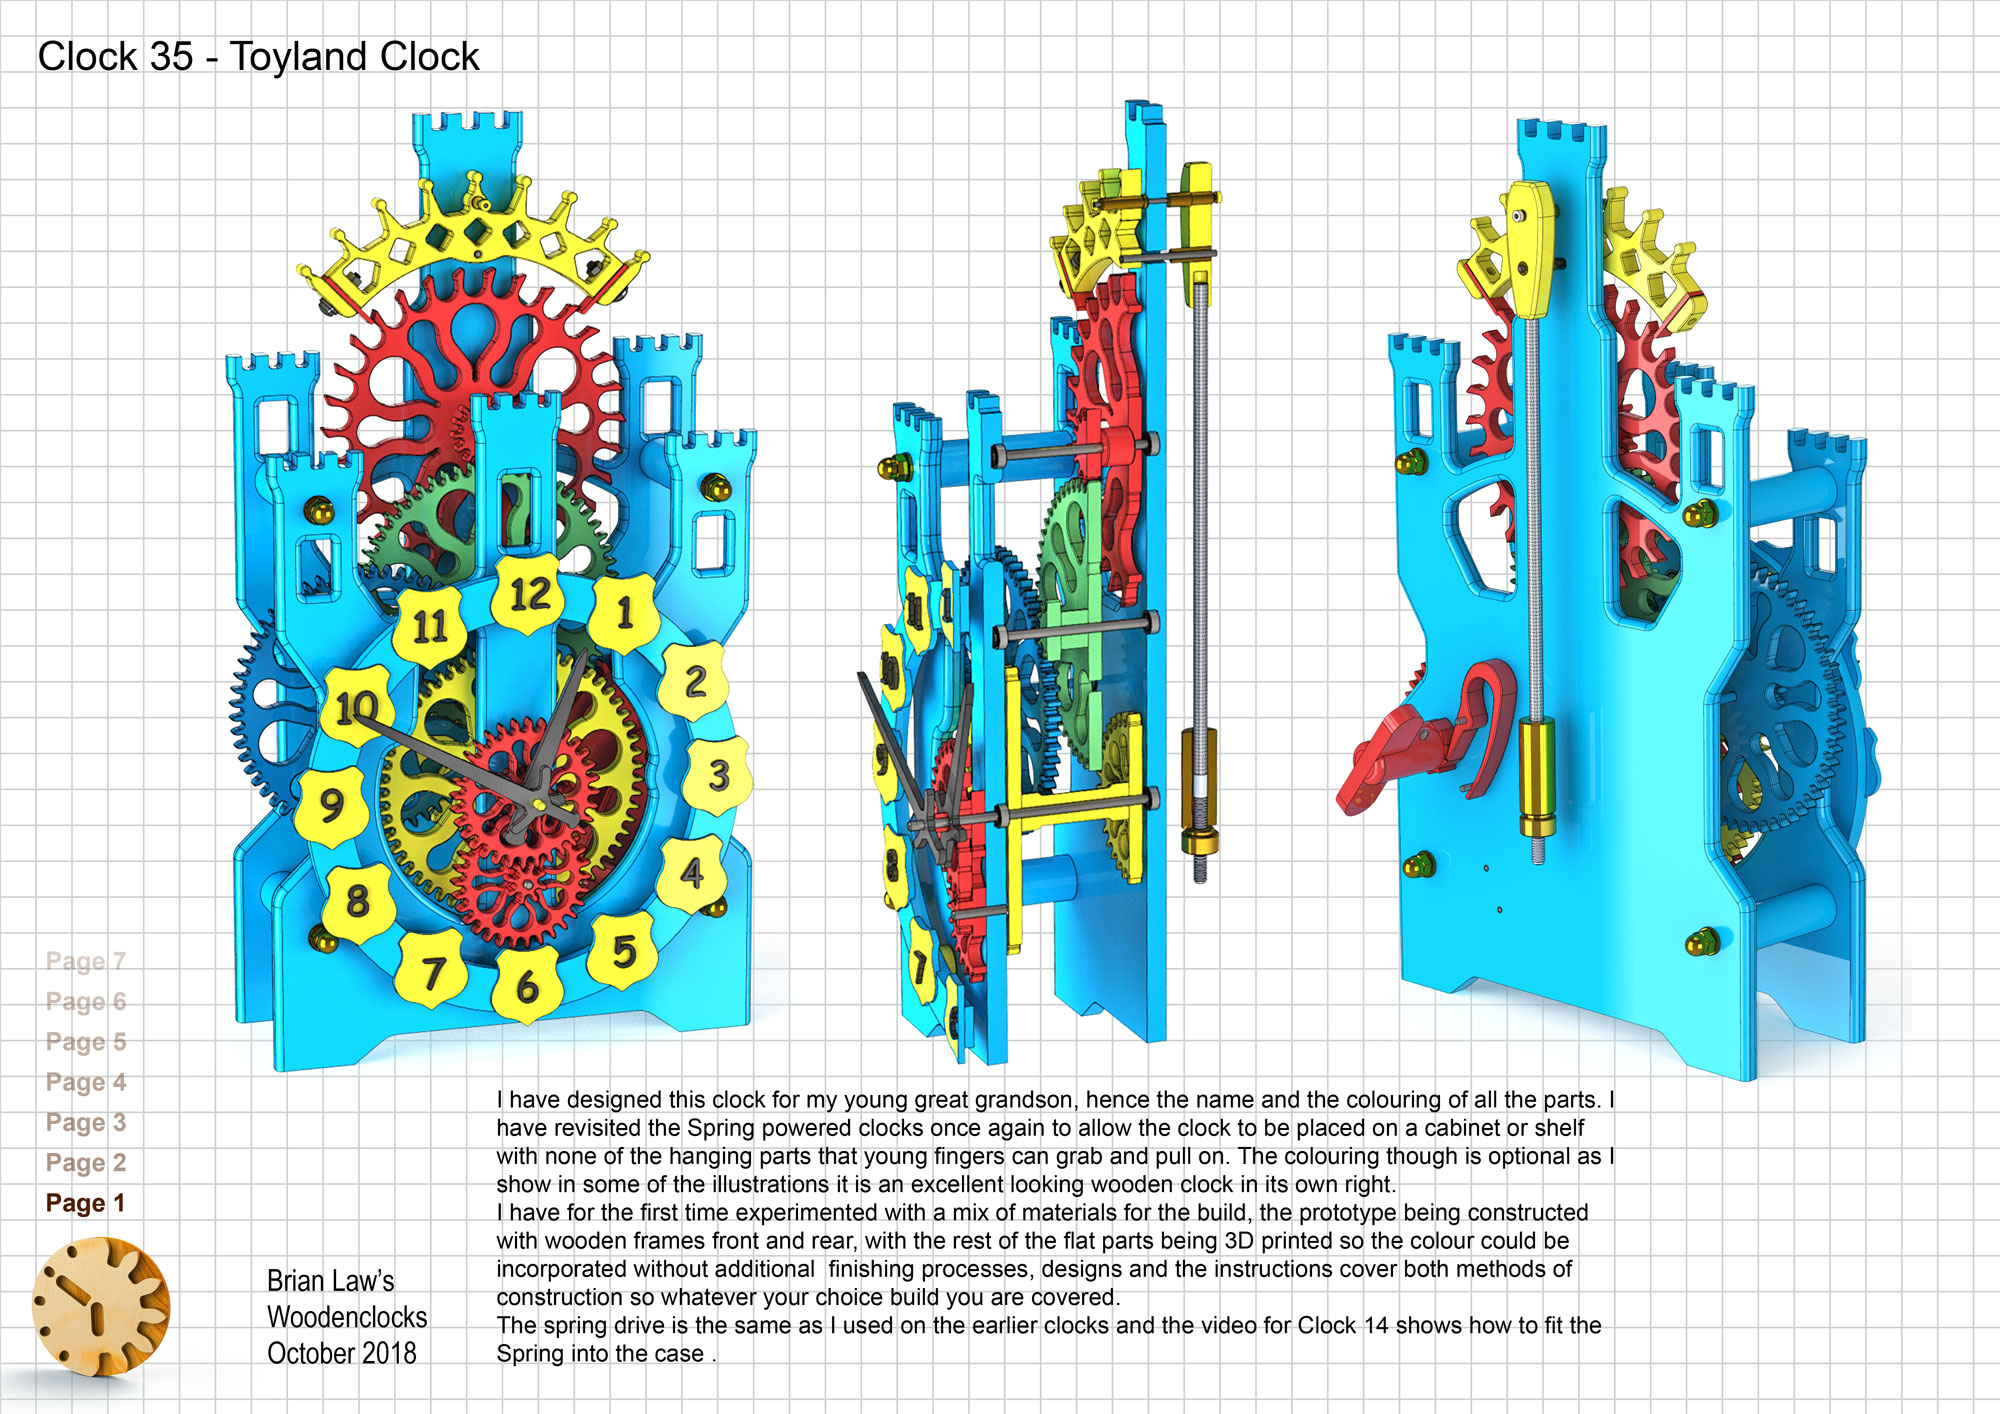
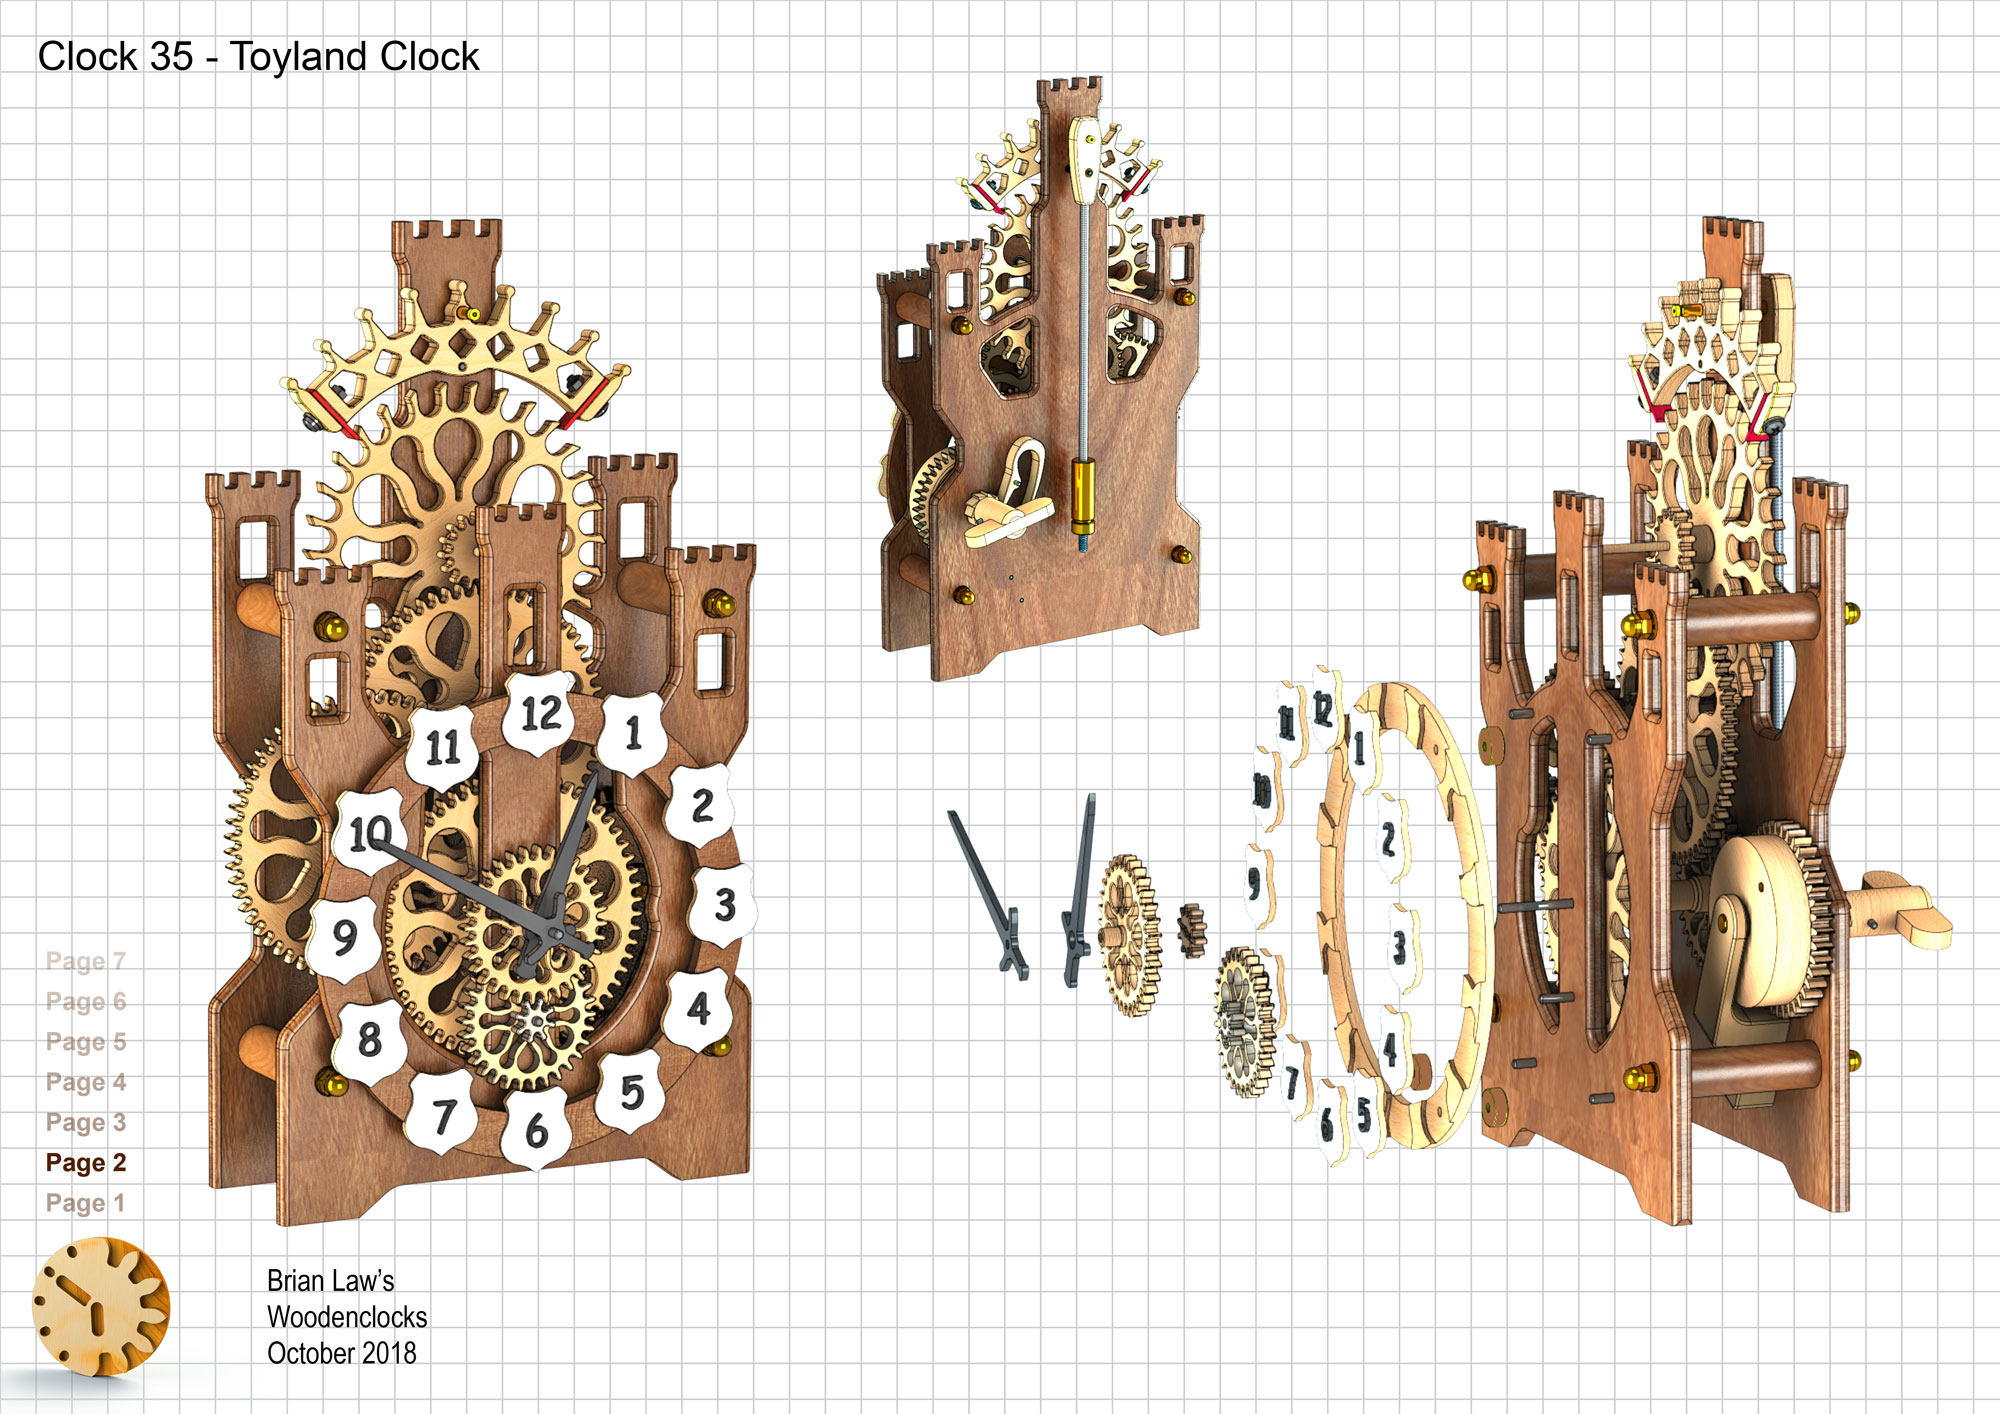
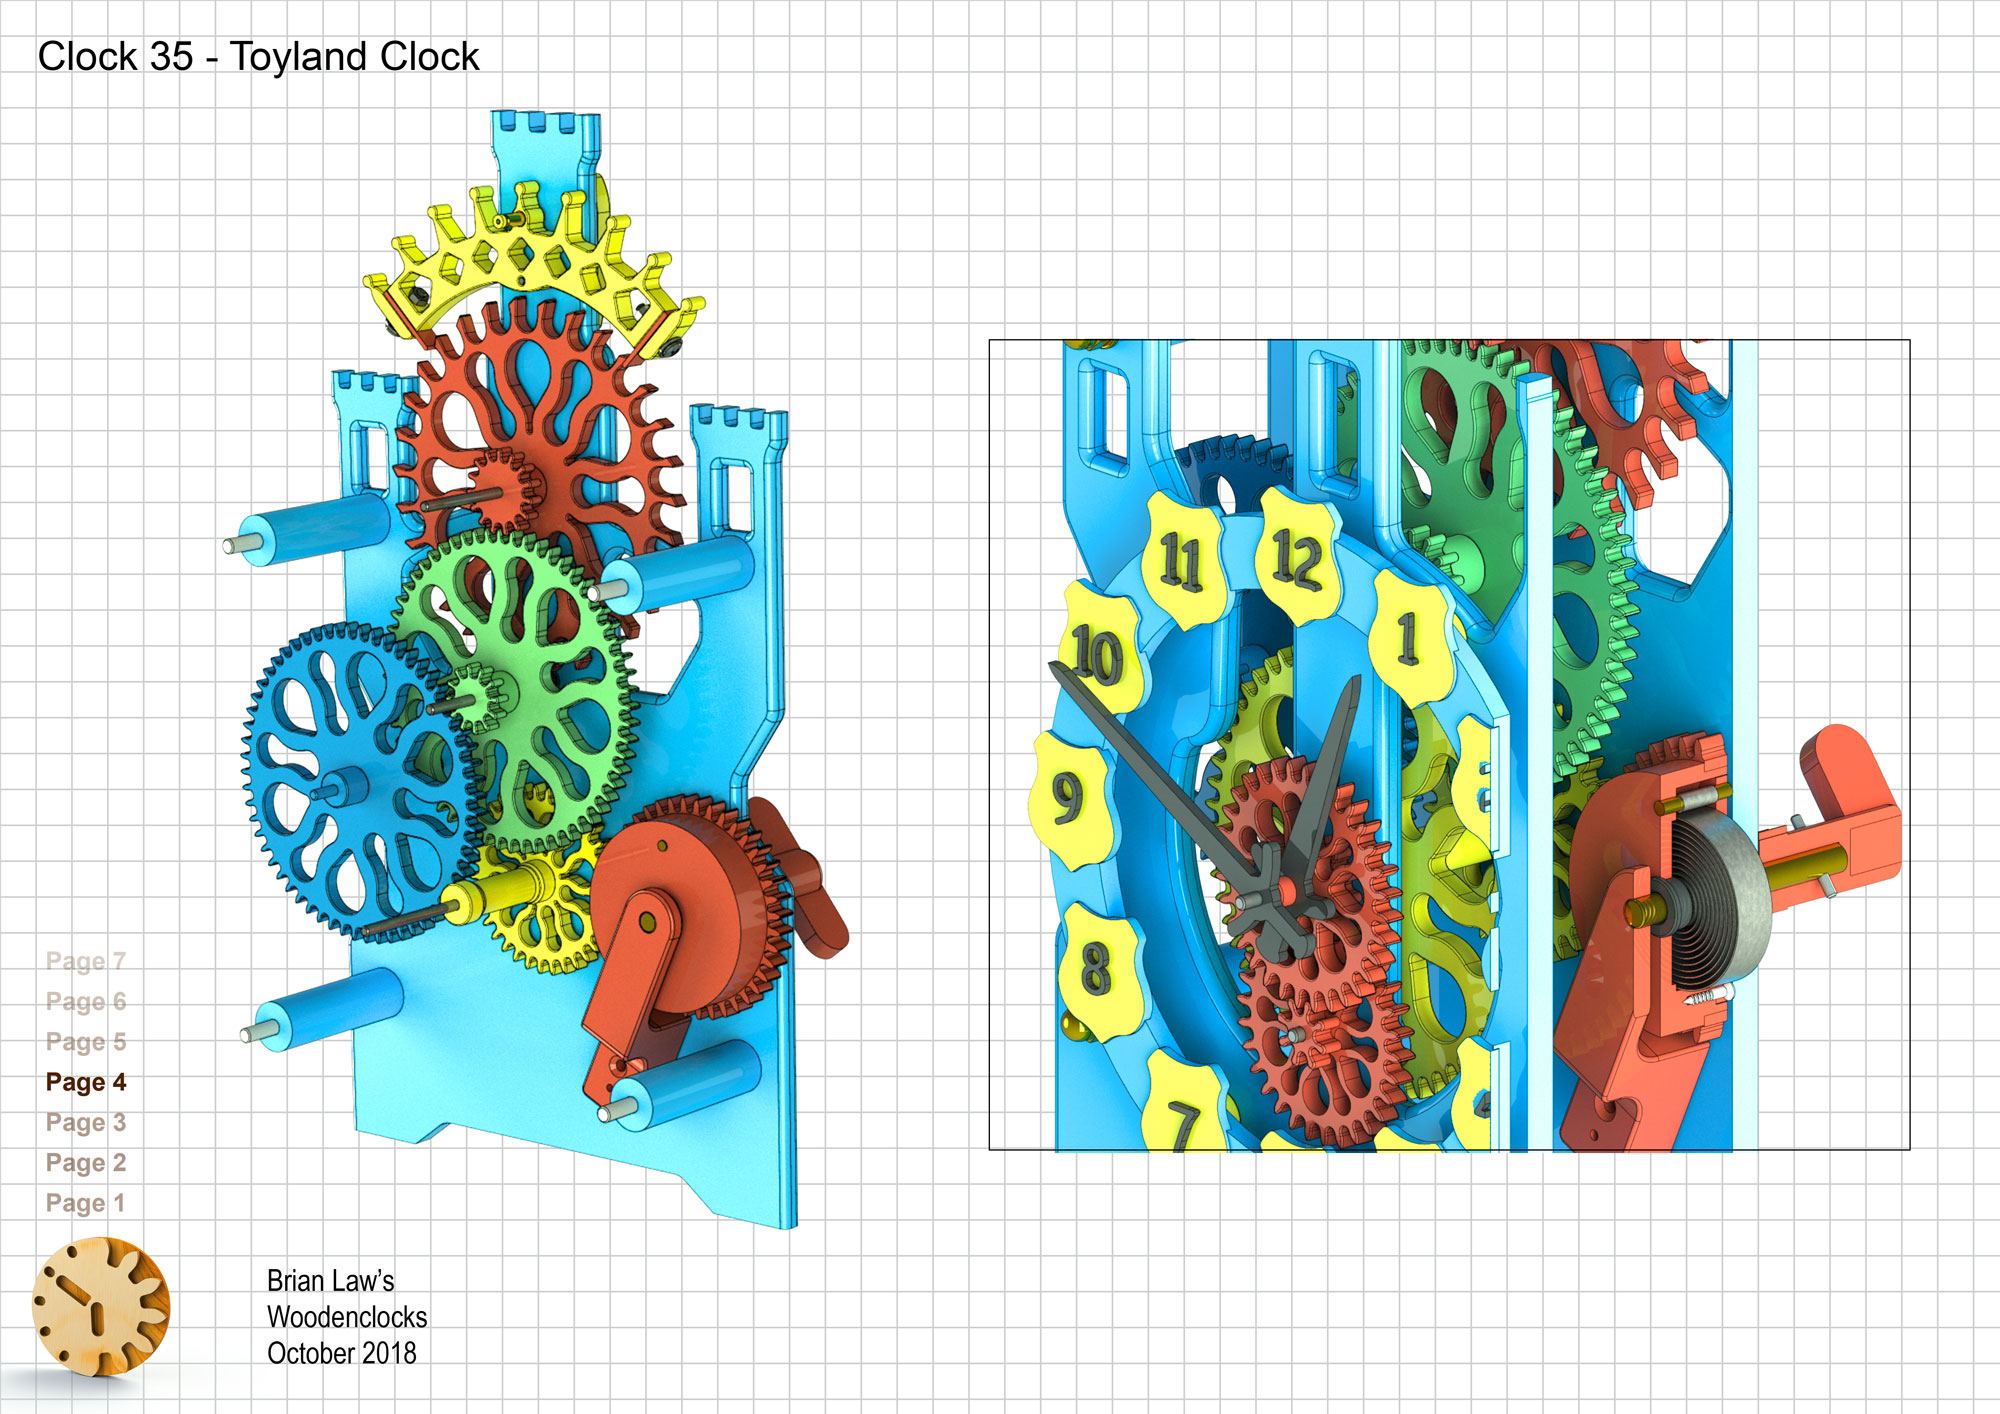
Clock 35 I have designed this clock for my young great grandson, with a Knights and Castle theme. I have revisited the Spring powered clocks once again to allow the clock to be placed on a cabinet or shelf with none of the hanging parts that young fingers can grab and pull on. The coloured version shown elsewhere in some of the illustrations, is optional.
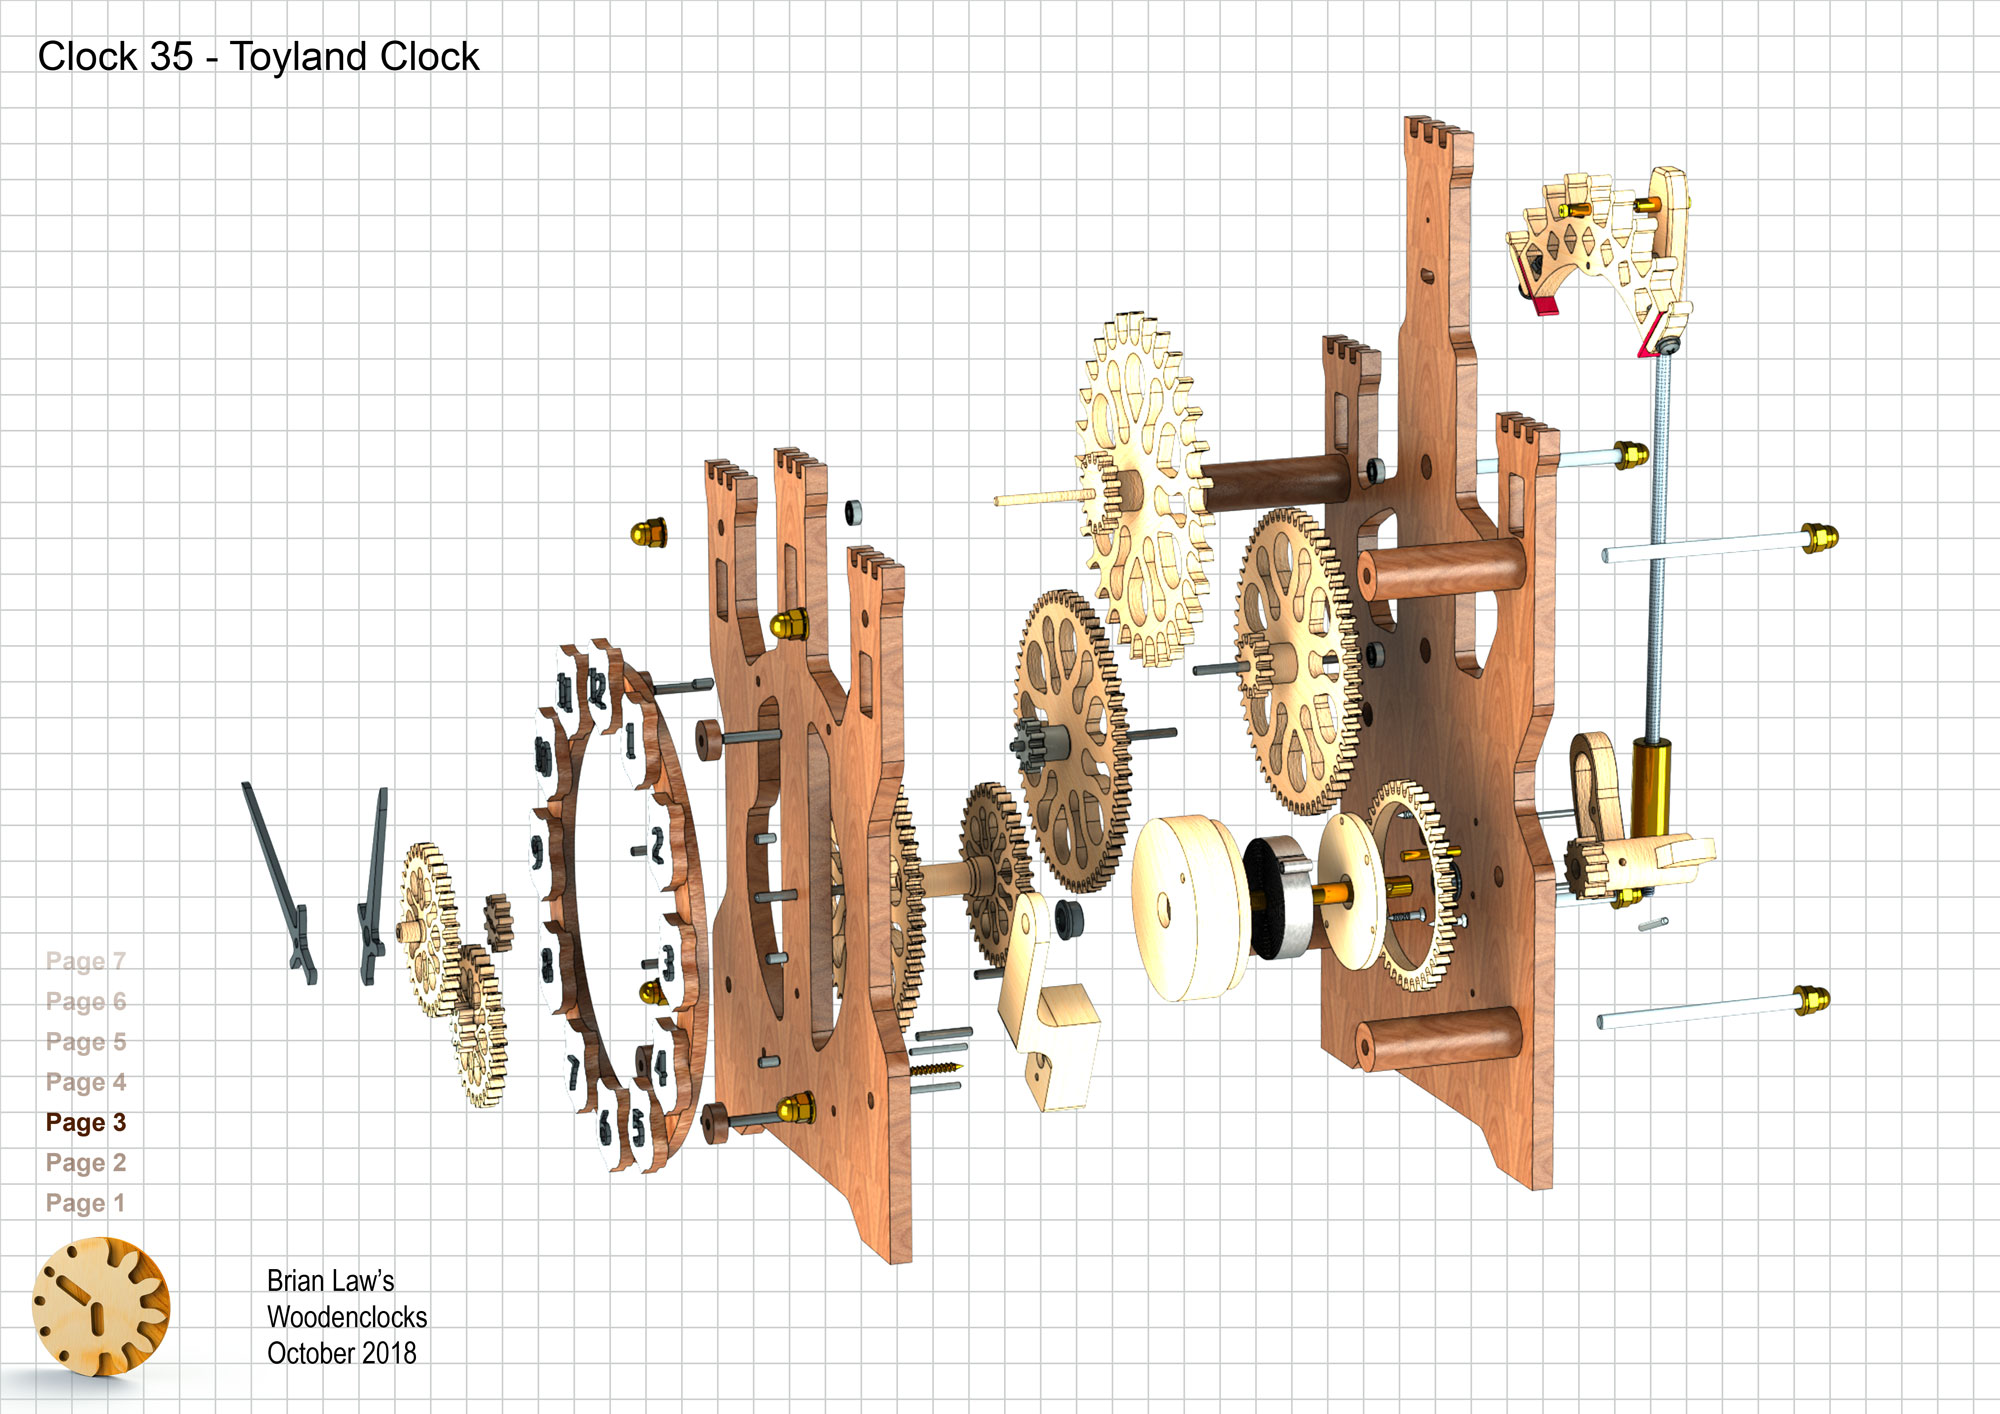
I have for the first time experimented with a mix of materials for the build, the prototype being constructed with wooden frames front and rear, with the rest of the flat parts being 3D printed so the colour could be incorporated without additional finishing processes, designs and the instructions cover both methods of construction so whatever your choice build you are covered.
The spring drive is the same as I used on the earlier clocks and the video for Clock 14 shows how to fit the Spring into the case: https://youtu.be/Jiw4SPPkl0w
I really like this clock it runs for 10.5 hours on a single wind, it measures 41 cm high x 22 cm Wide x 170 cm deep.
DXF files, and the IGS and STP files that can be used with your CNC machine can be downloaded here for $26. You also get the unrestricted version of the PDF files that can be printed at full size.
Drawings for this clock in PDF format can be downloaded here. These free files are low resolution and not to scale and only a sample of the full set that comes in the paid for version. Clicking here will download the PDF file directly to your browser, may take a few moments so please be patient.
A sample from the DXF file – the file is purposely low resolution, with no vector data. The actual files purchased above are included on one large sheet so that they may be directly loaded into your CAM program.
Instructions for assembling the clock components.
To print only a single item of the drawing to scale using Adobe Acrobat Reader, do the following:
Go to Edit, then click on Take a snapshot, move the cursor to the top left of the item you want to print and hold down the left mouse button whilst you drag a box around the item. The inside of the box turns blue and you can now go to File and then click on Print. This brings up the print dialogue, make sure Selected graphic is selected and that the Page scaling is set to None and the click on OK. As long as your printer is connected you will have printed the item at size. Do this for each item you want to cut out.