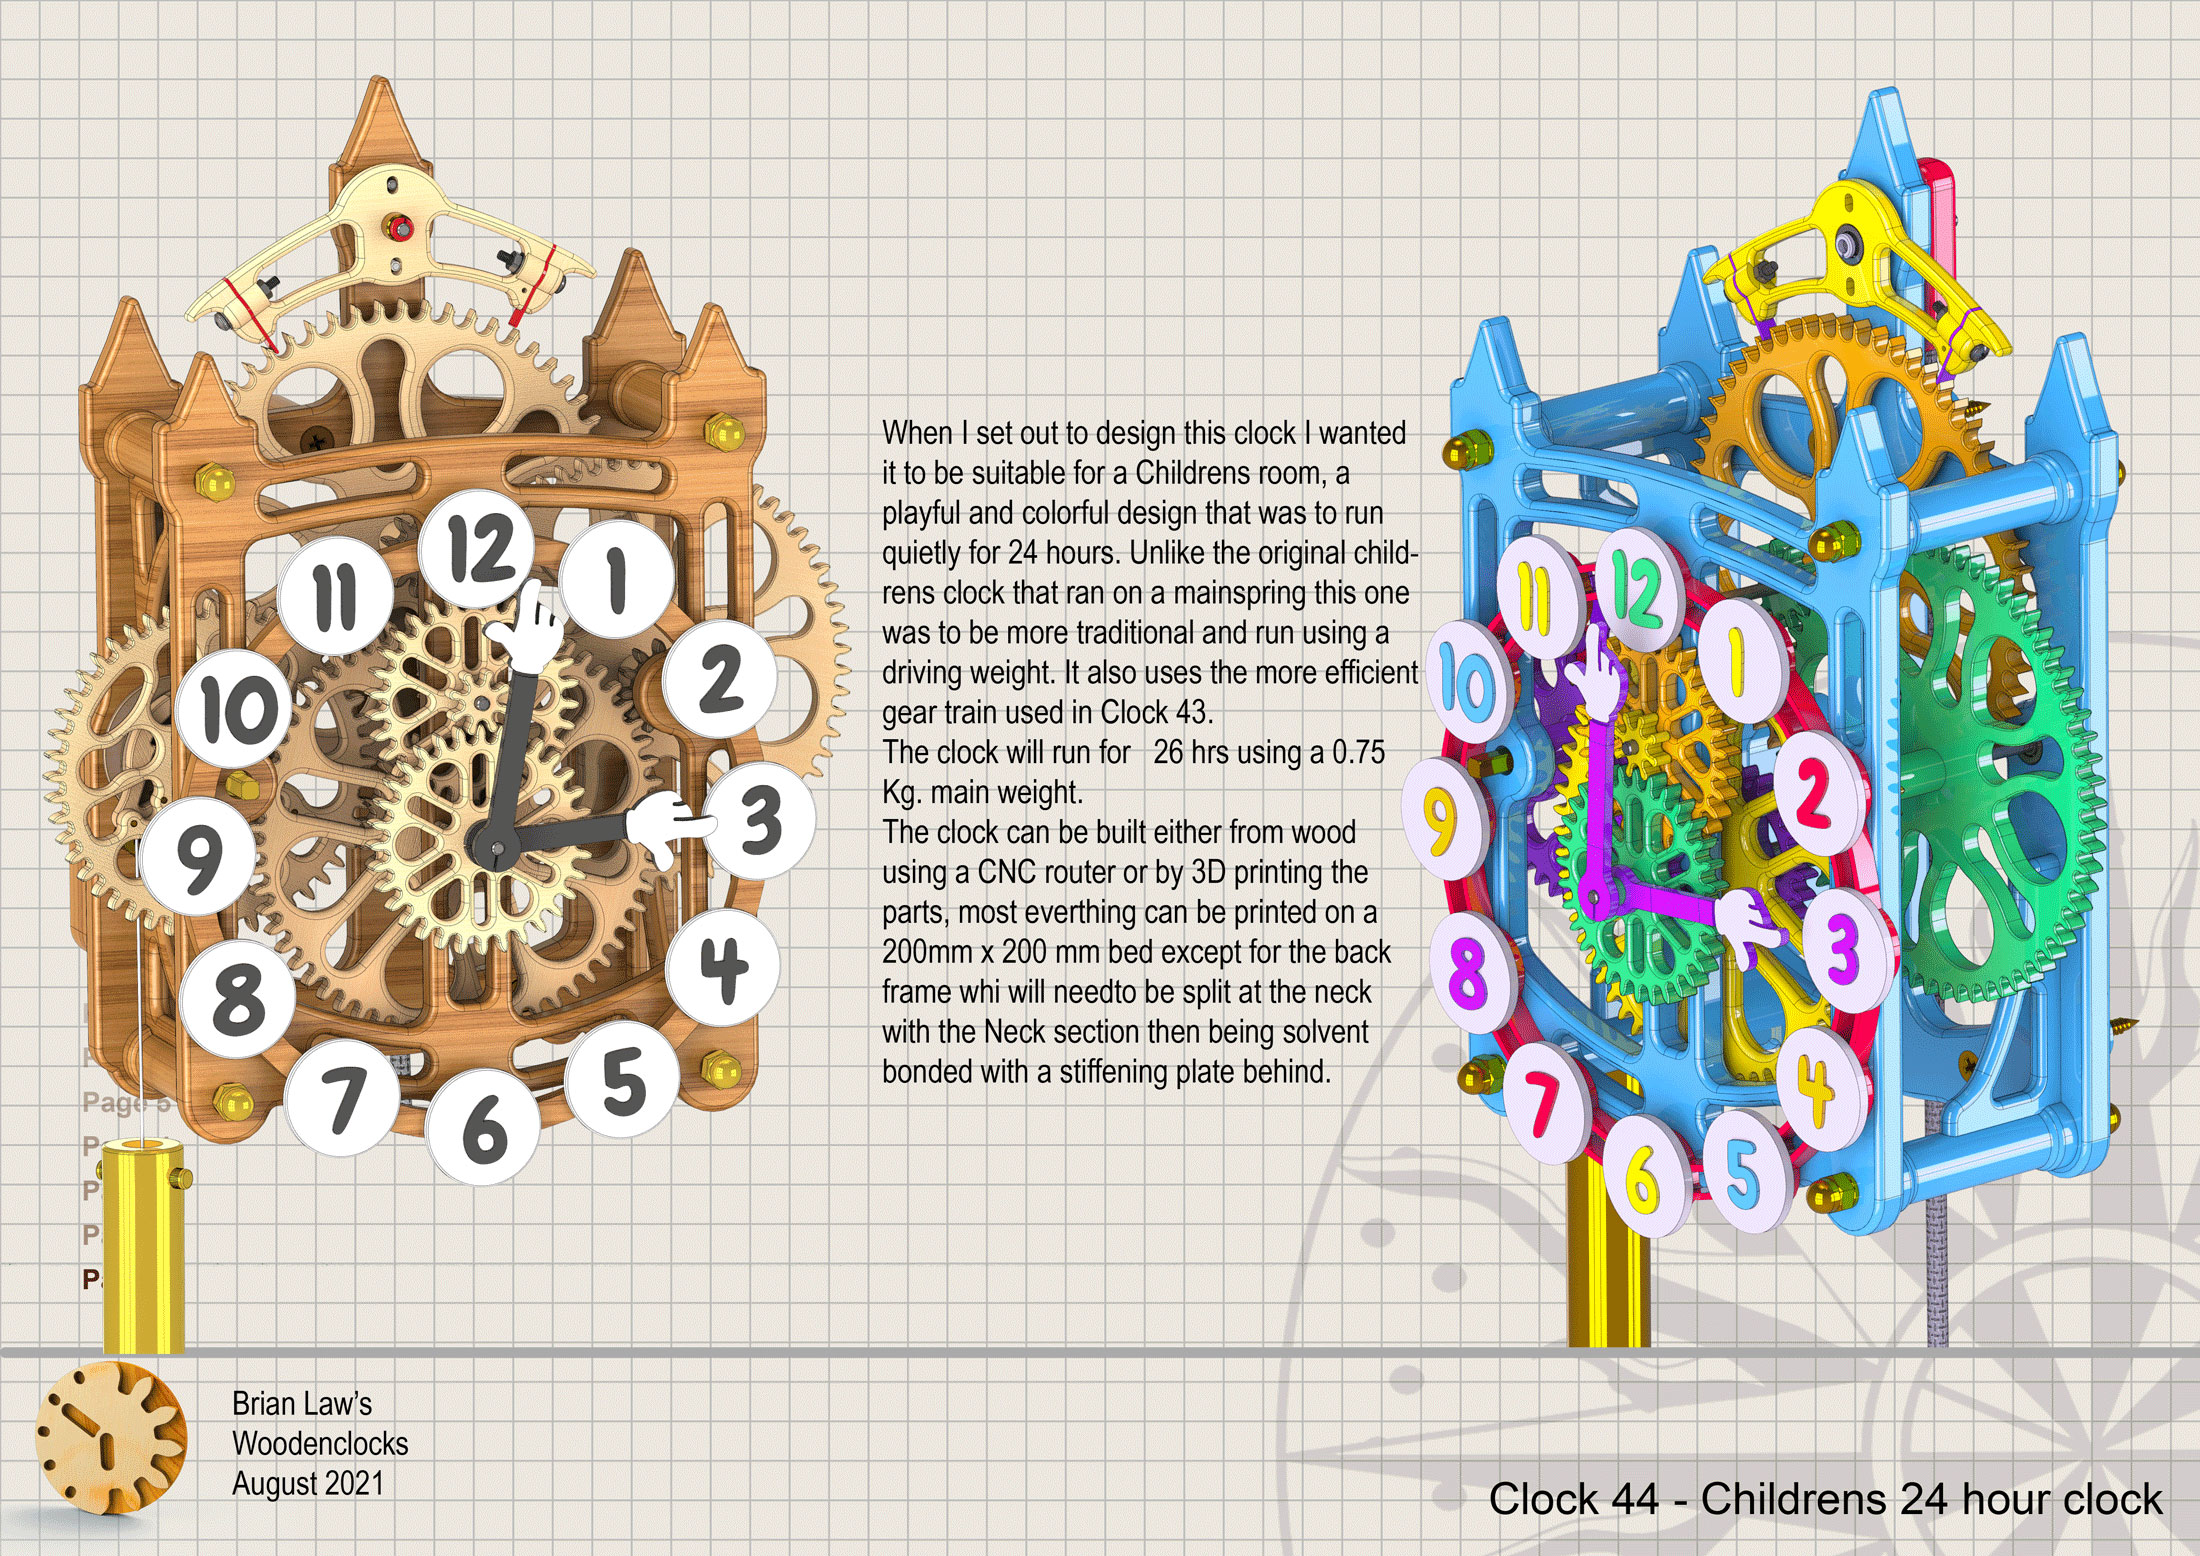
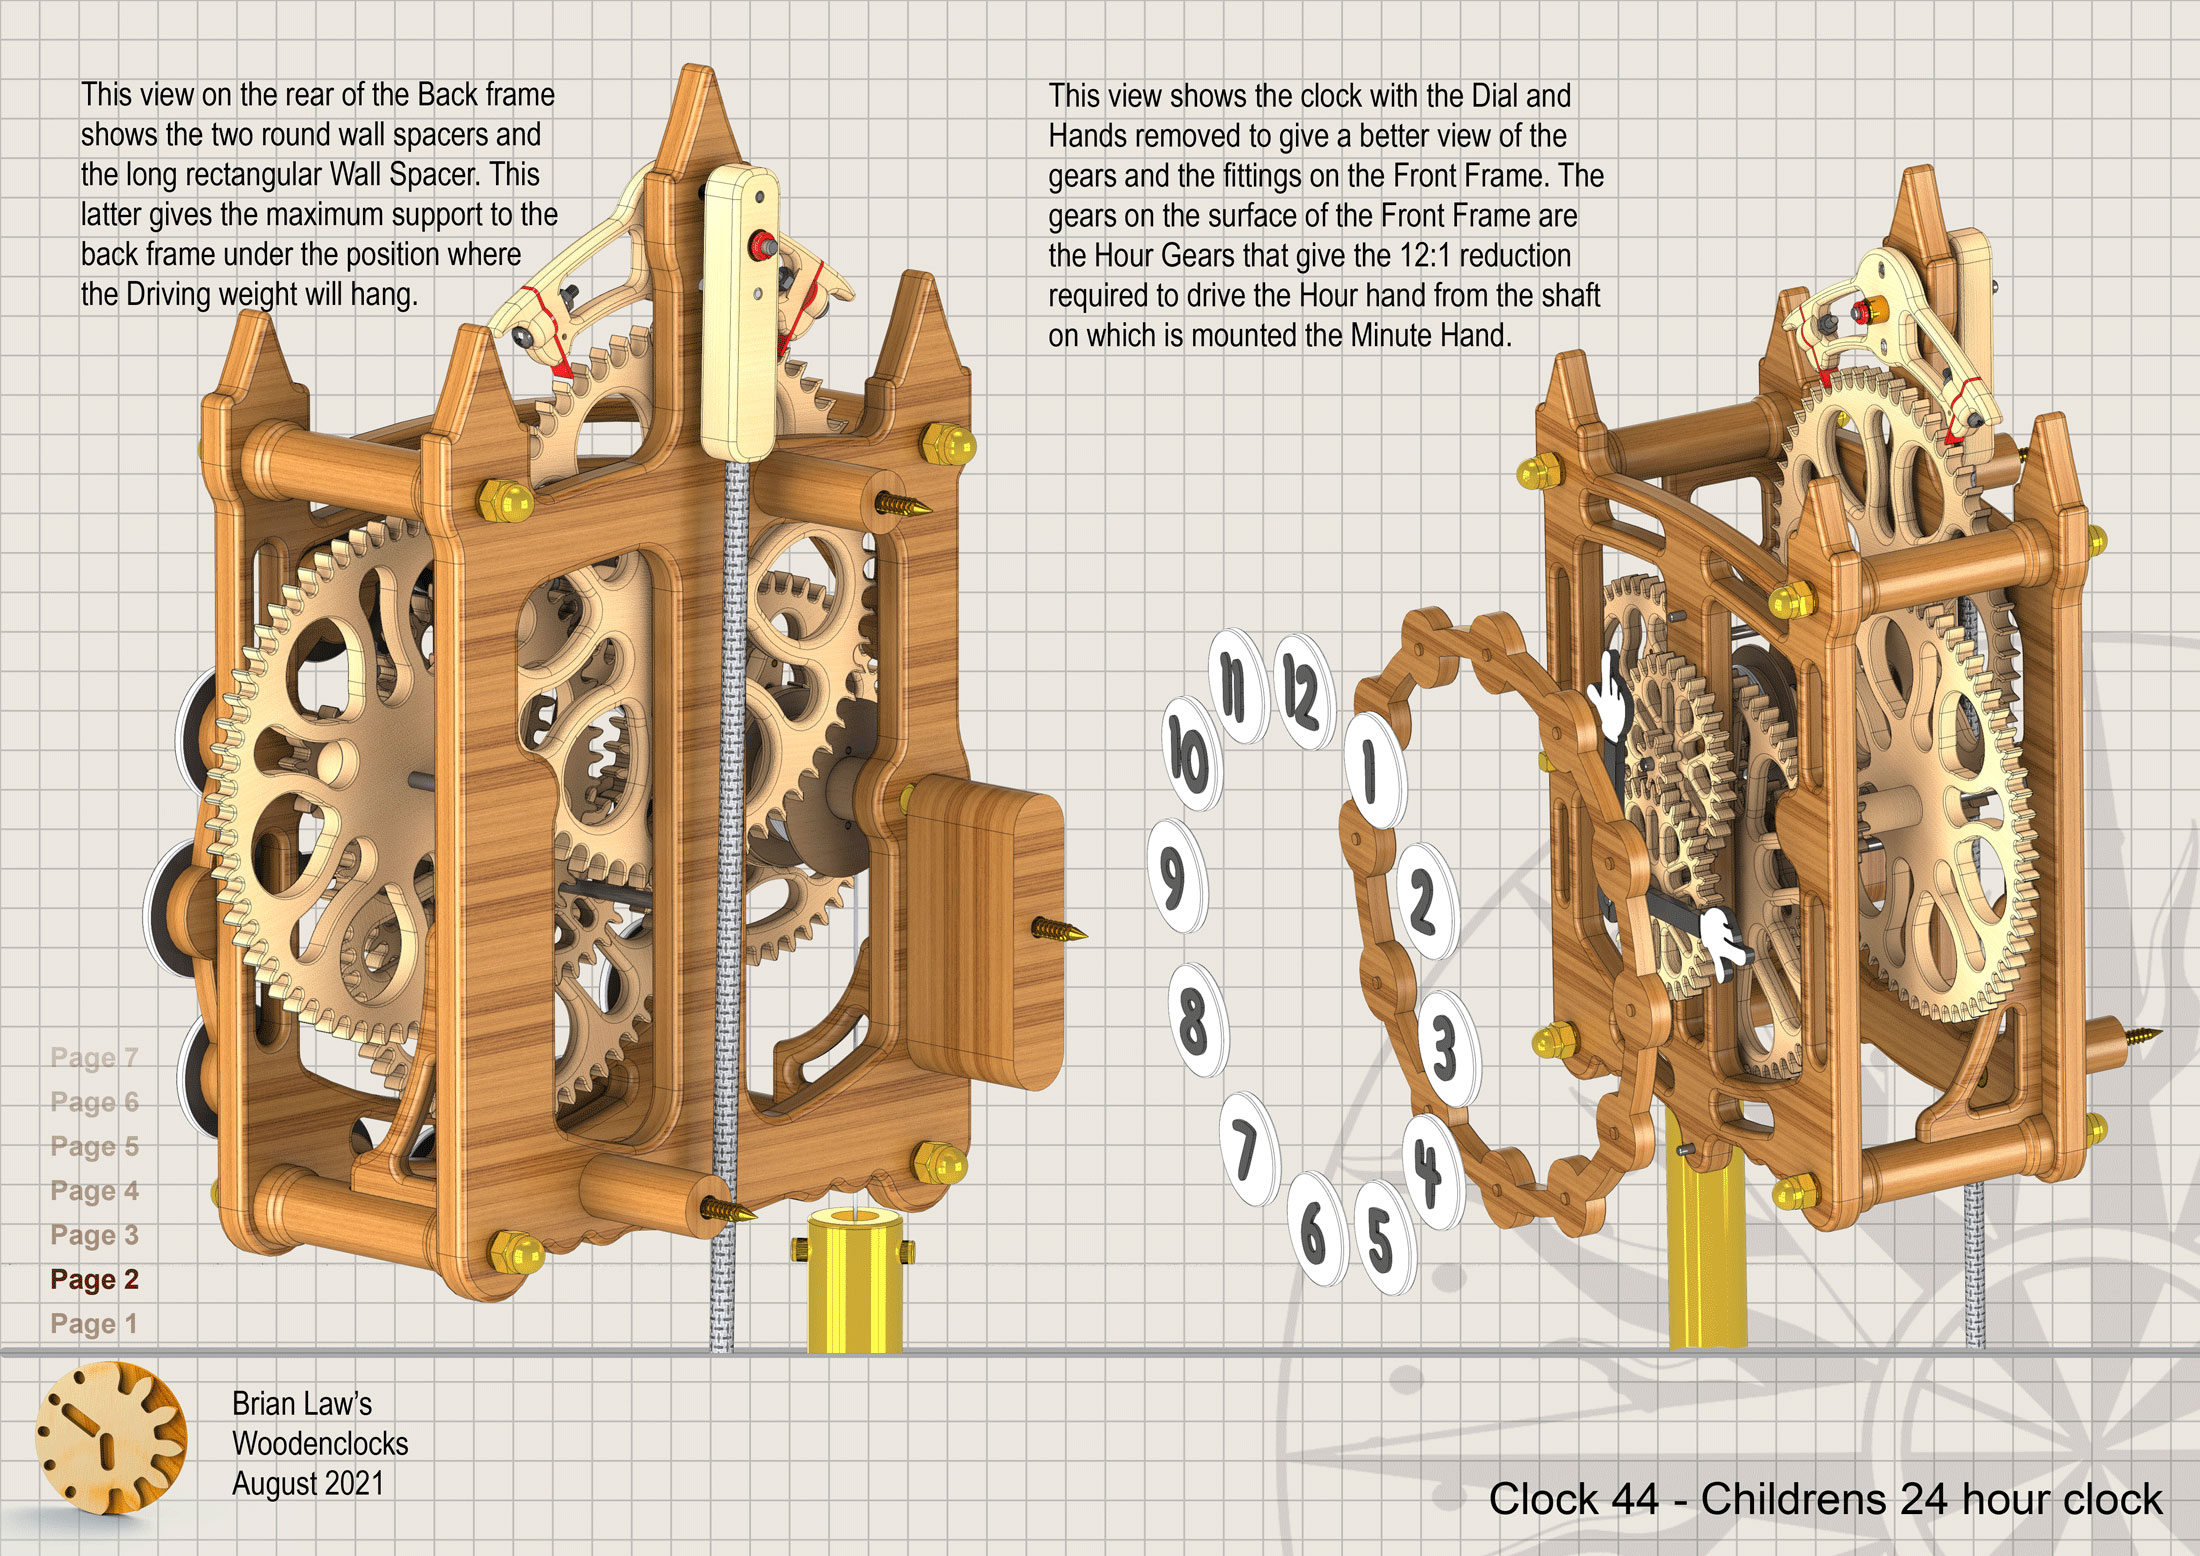
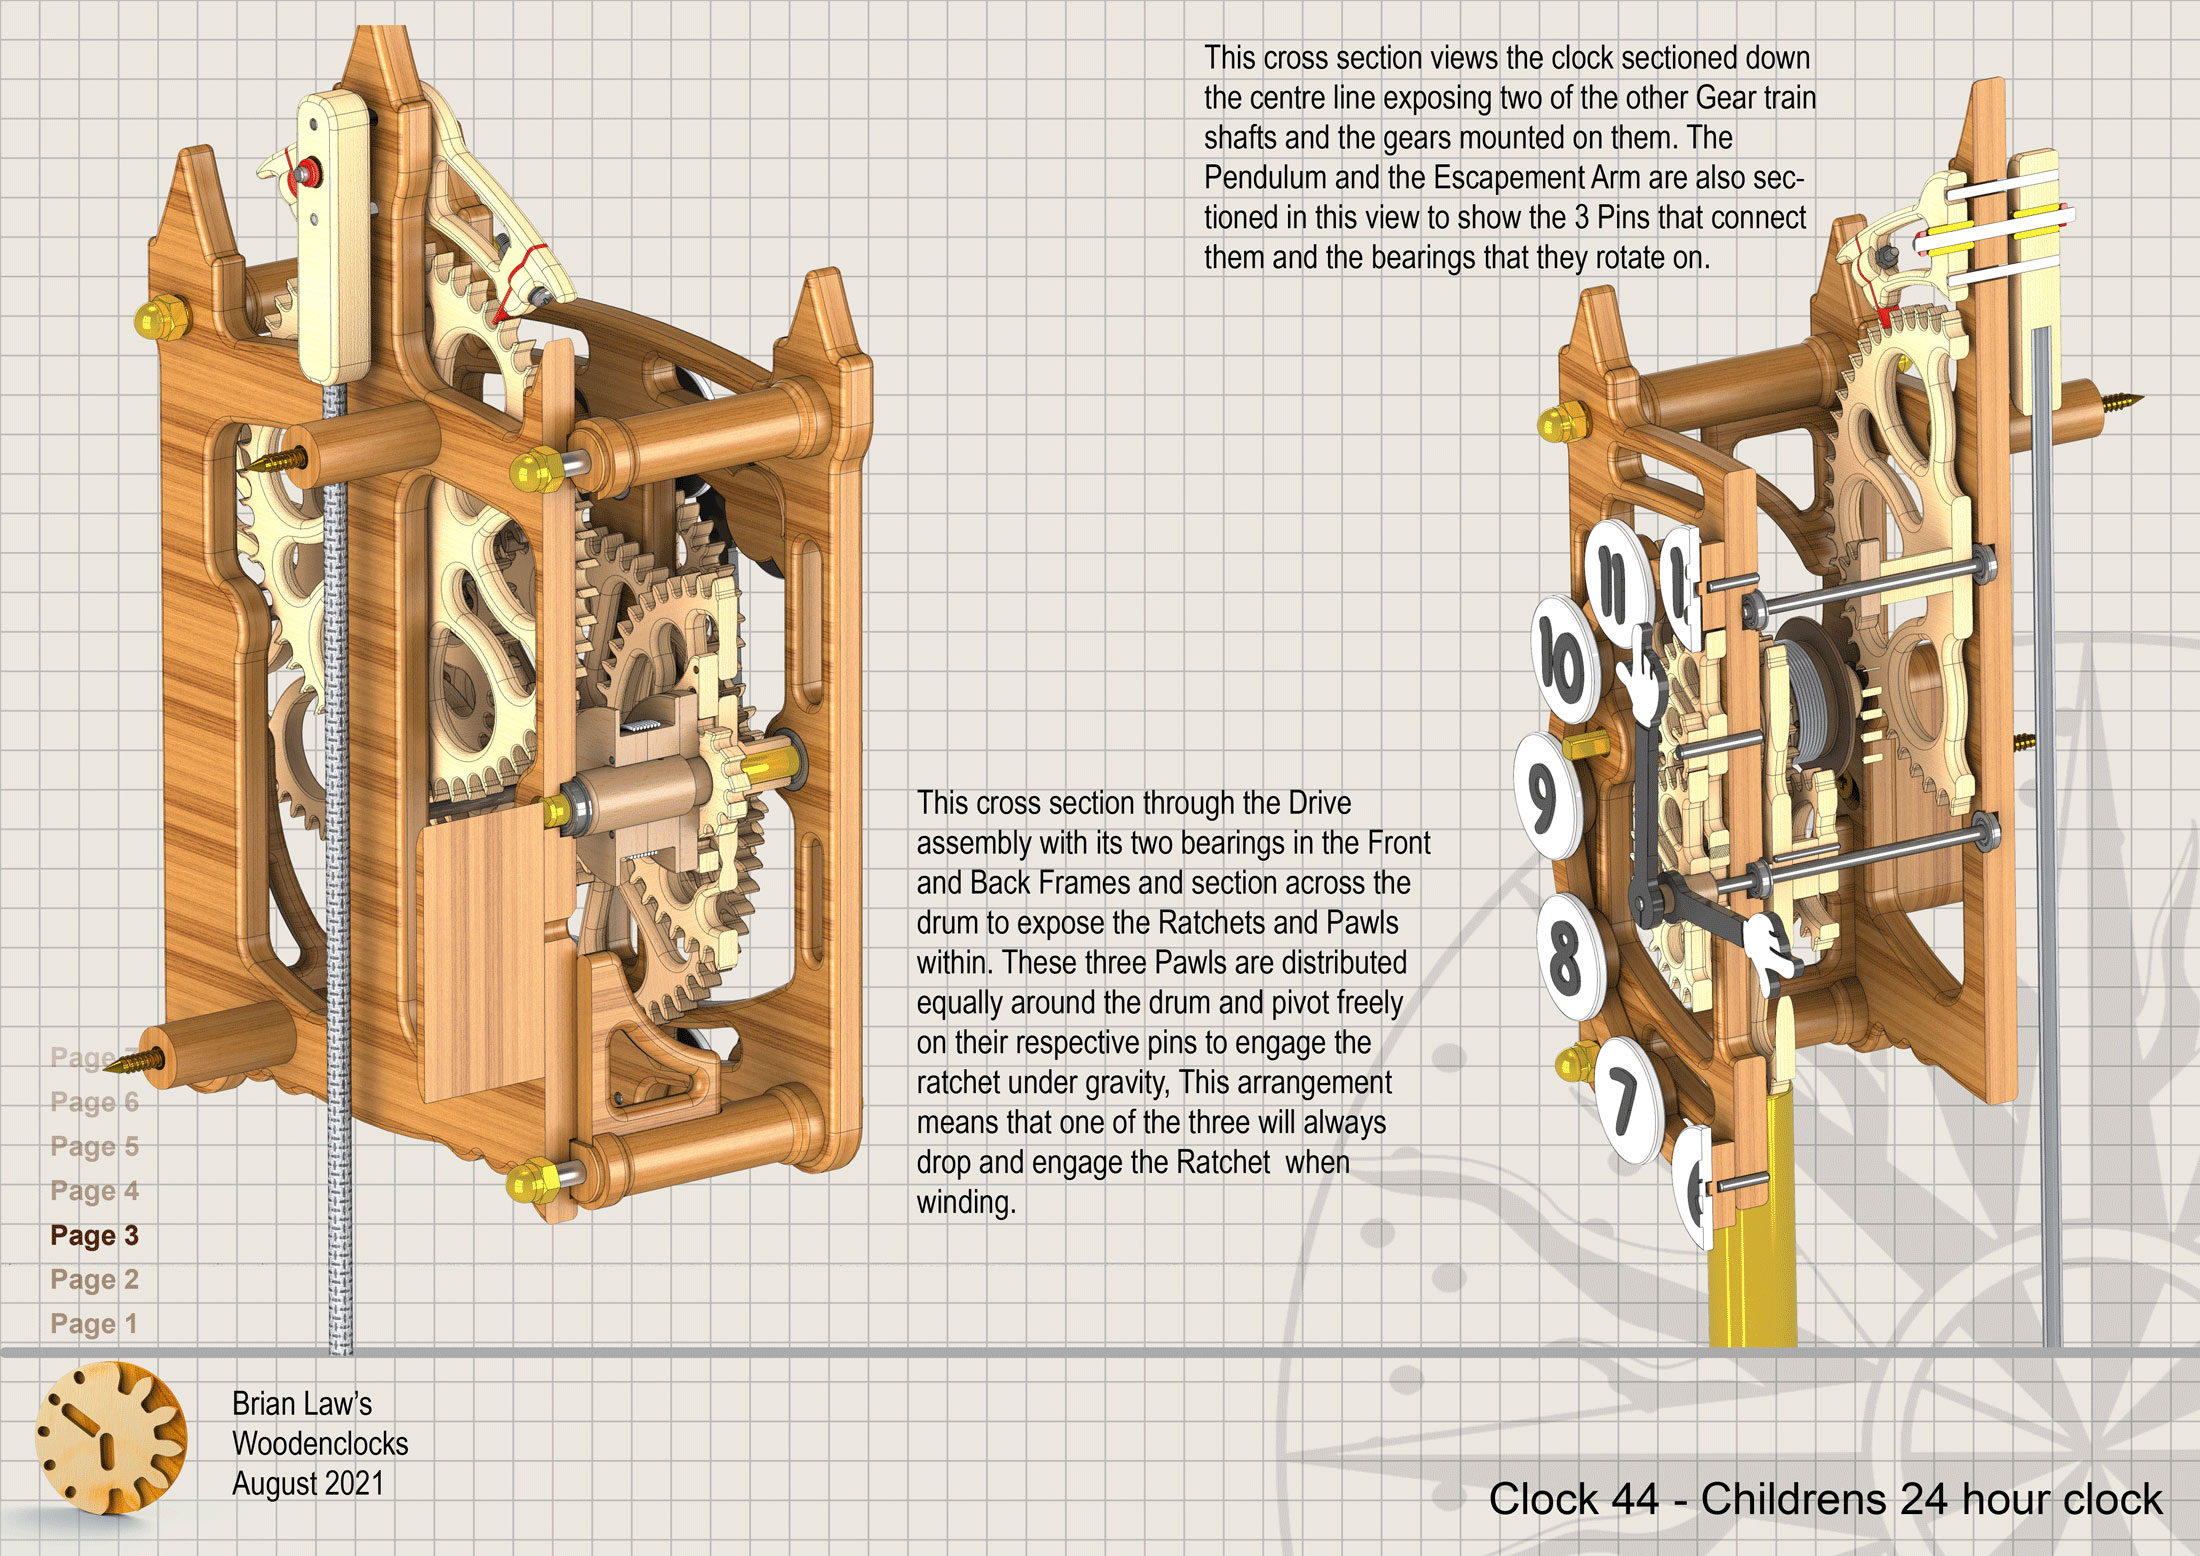
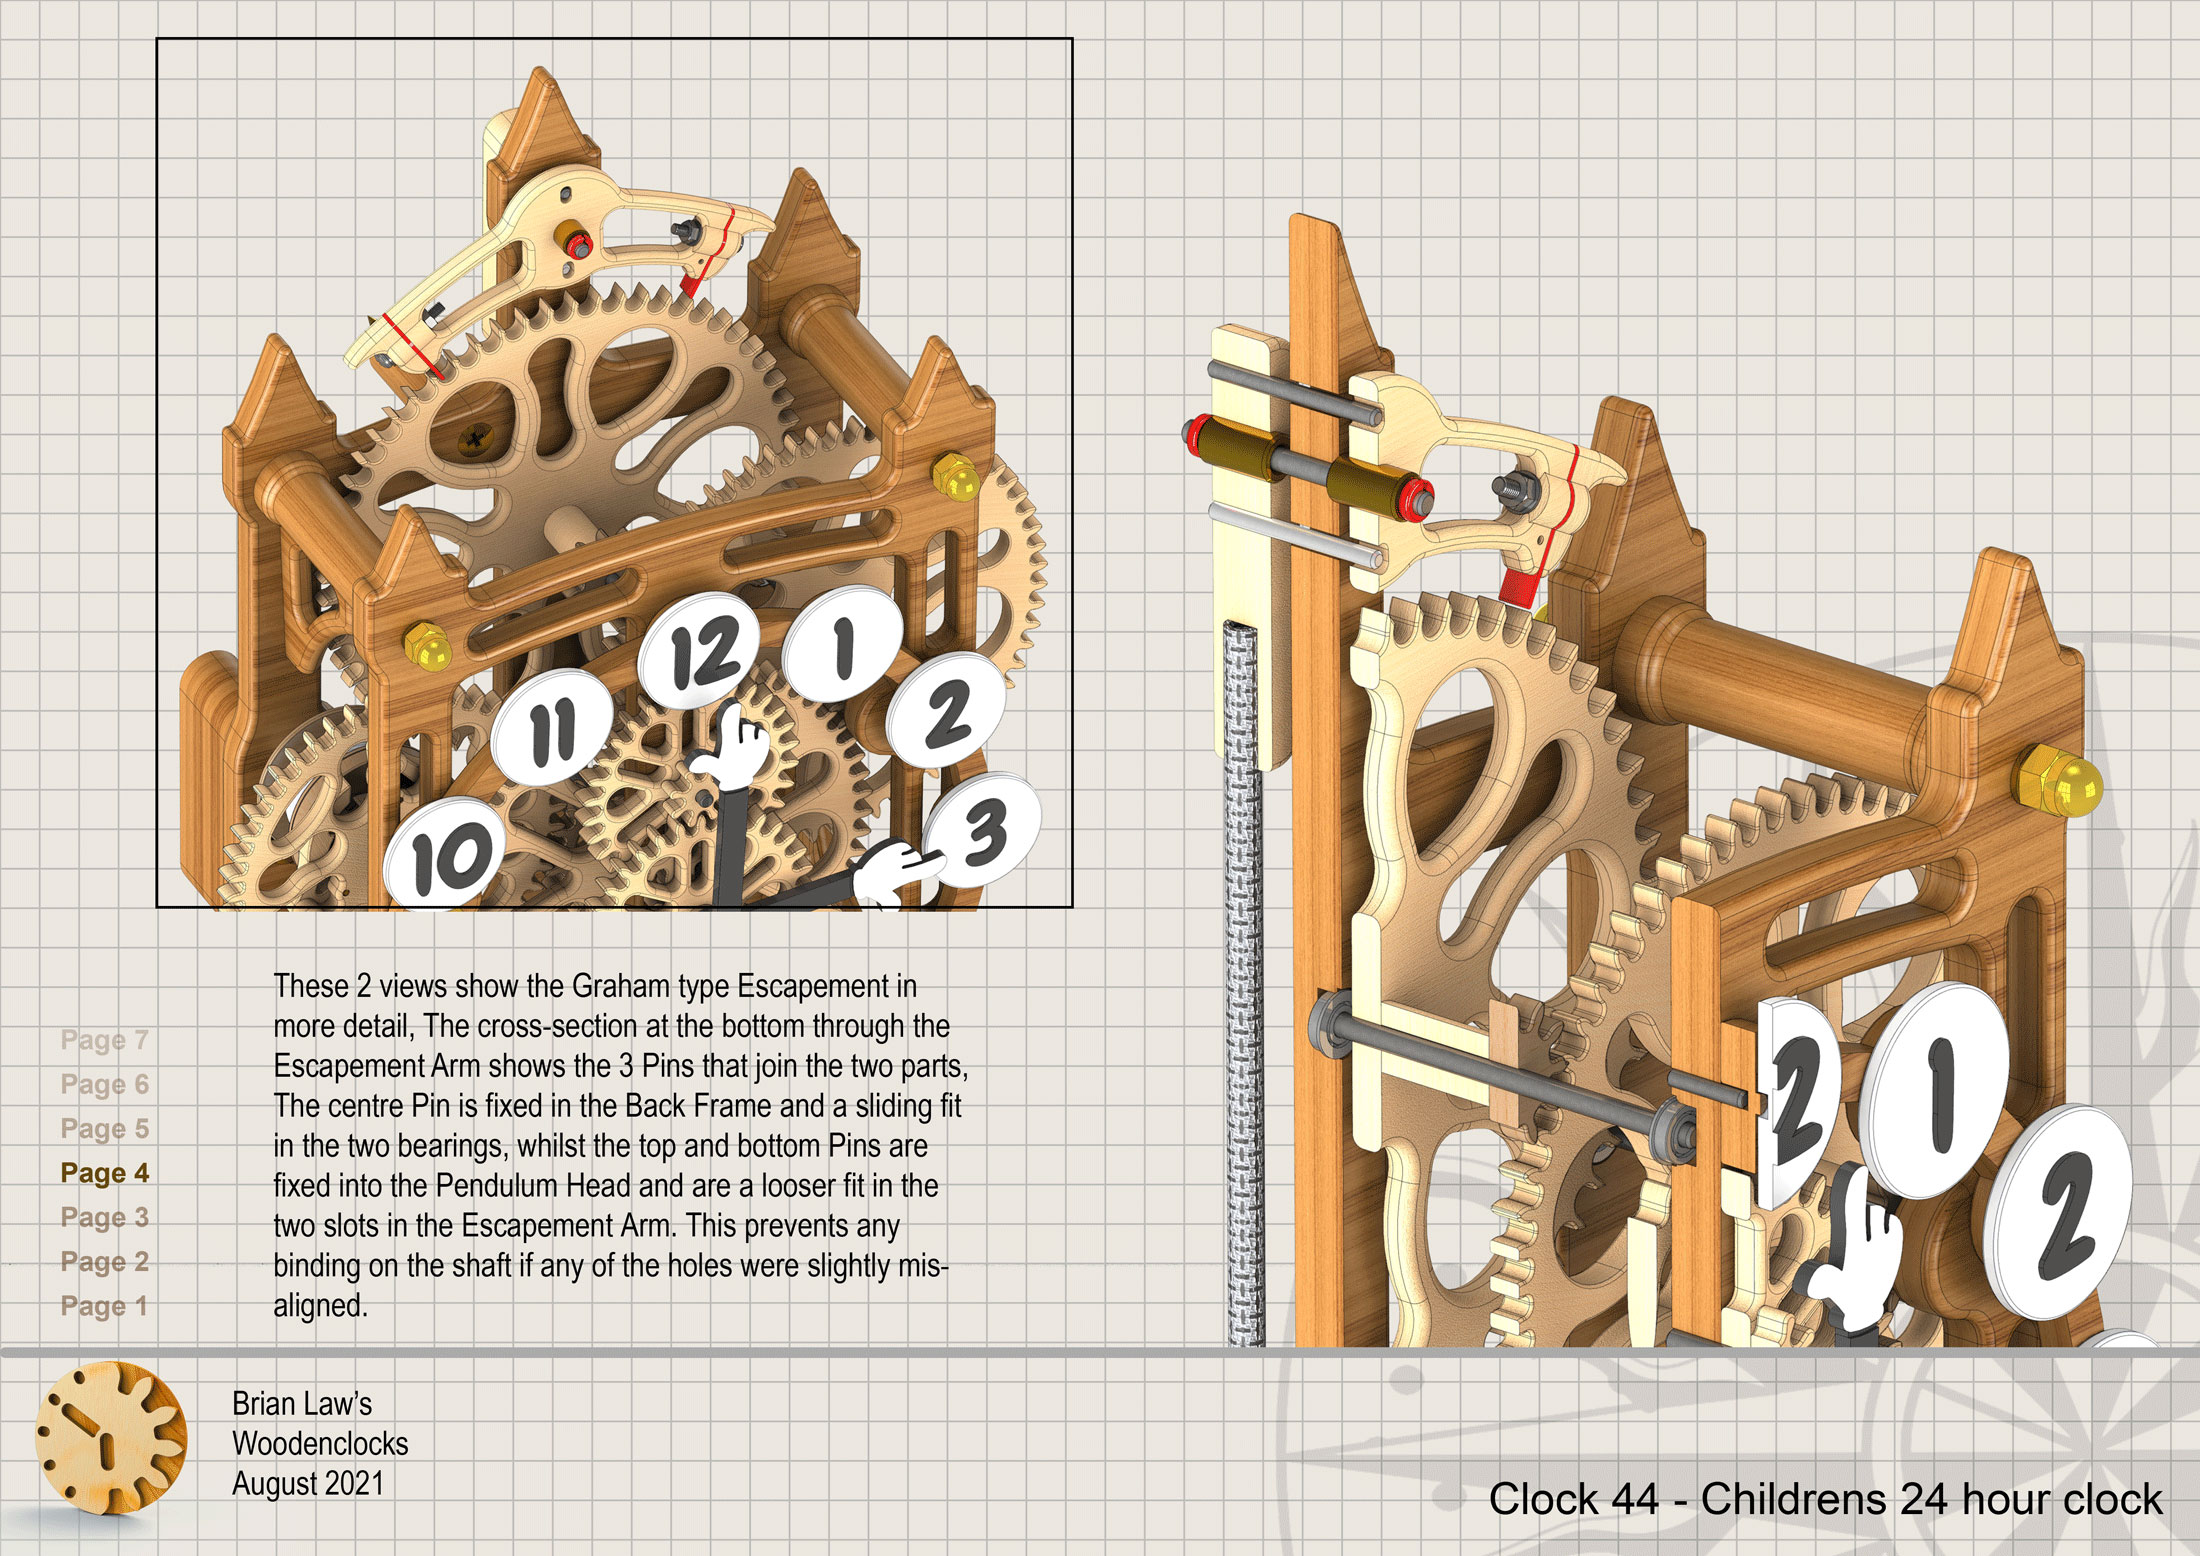
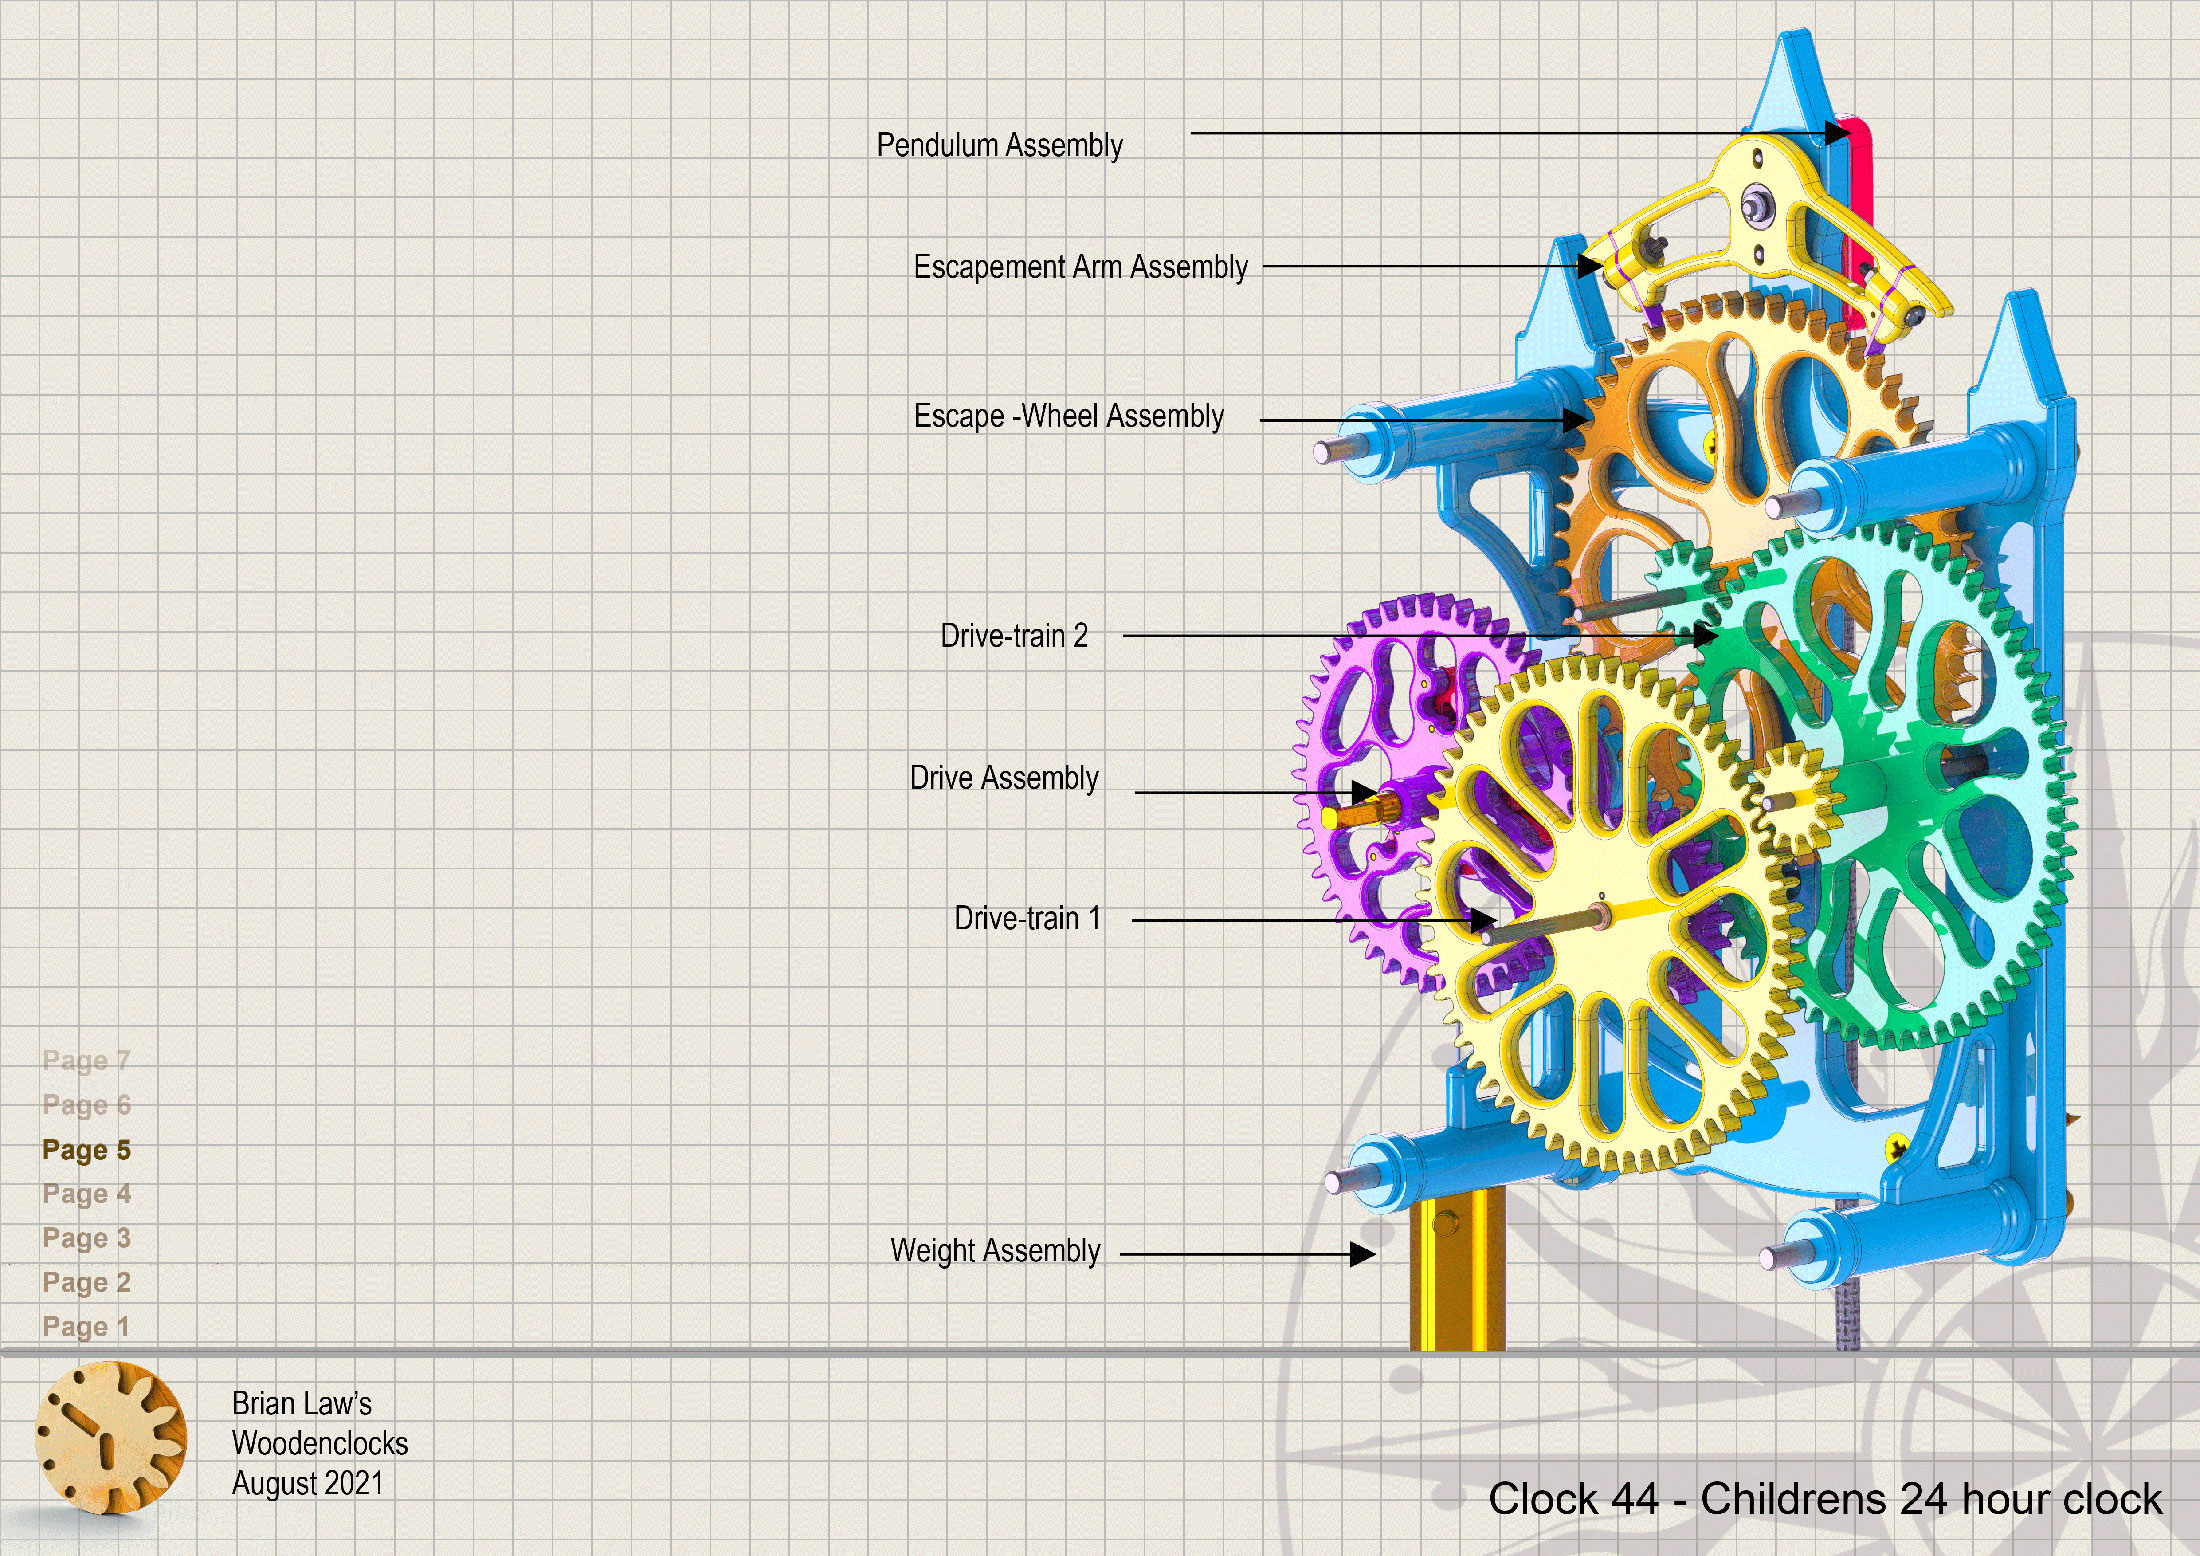
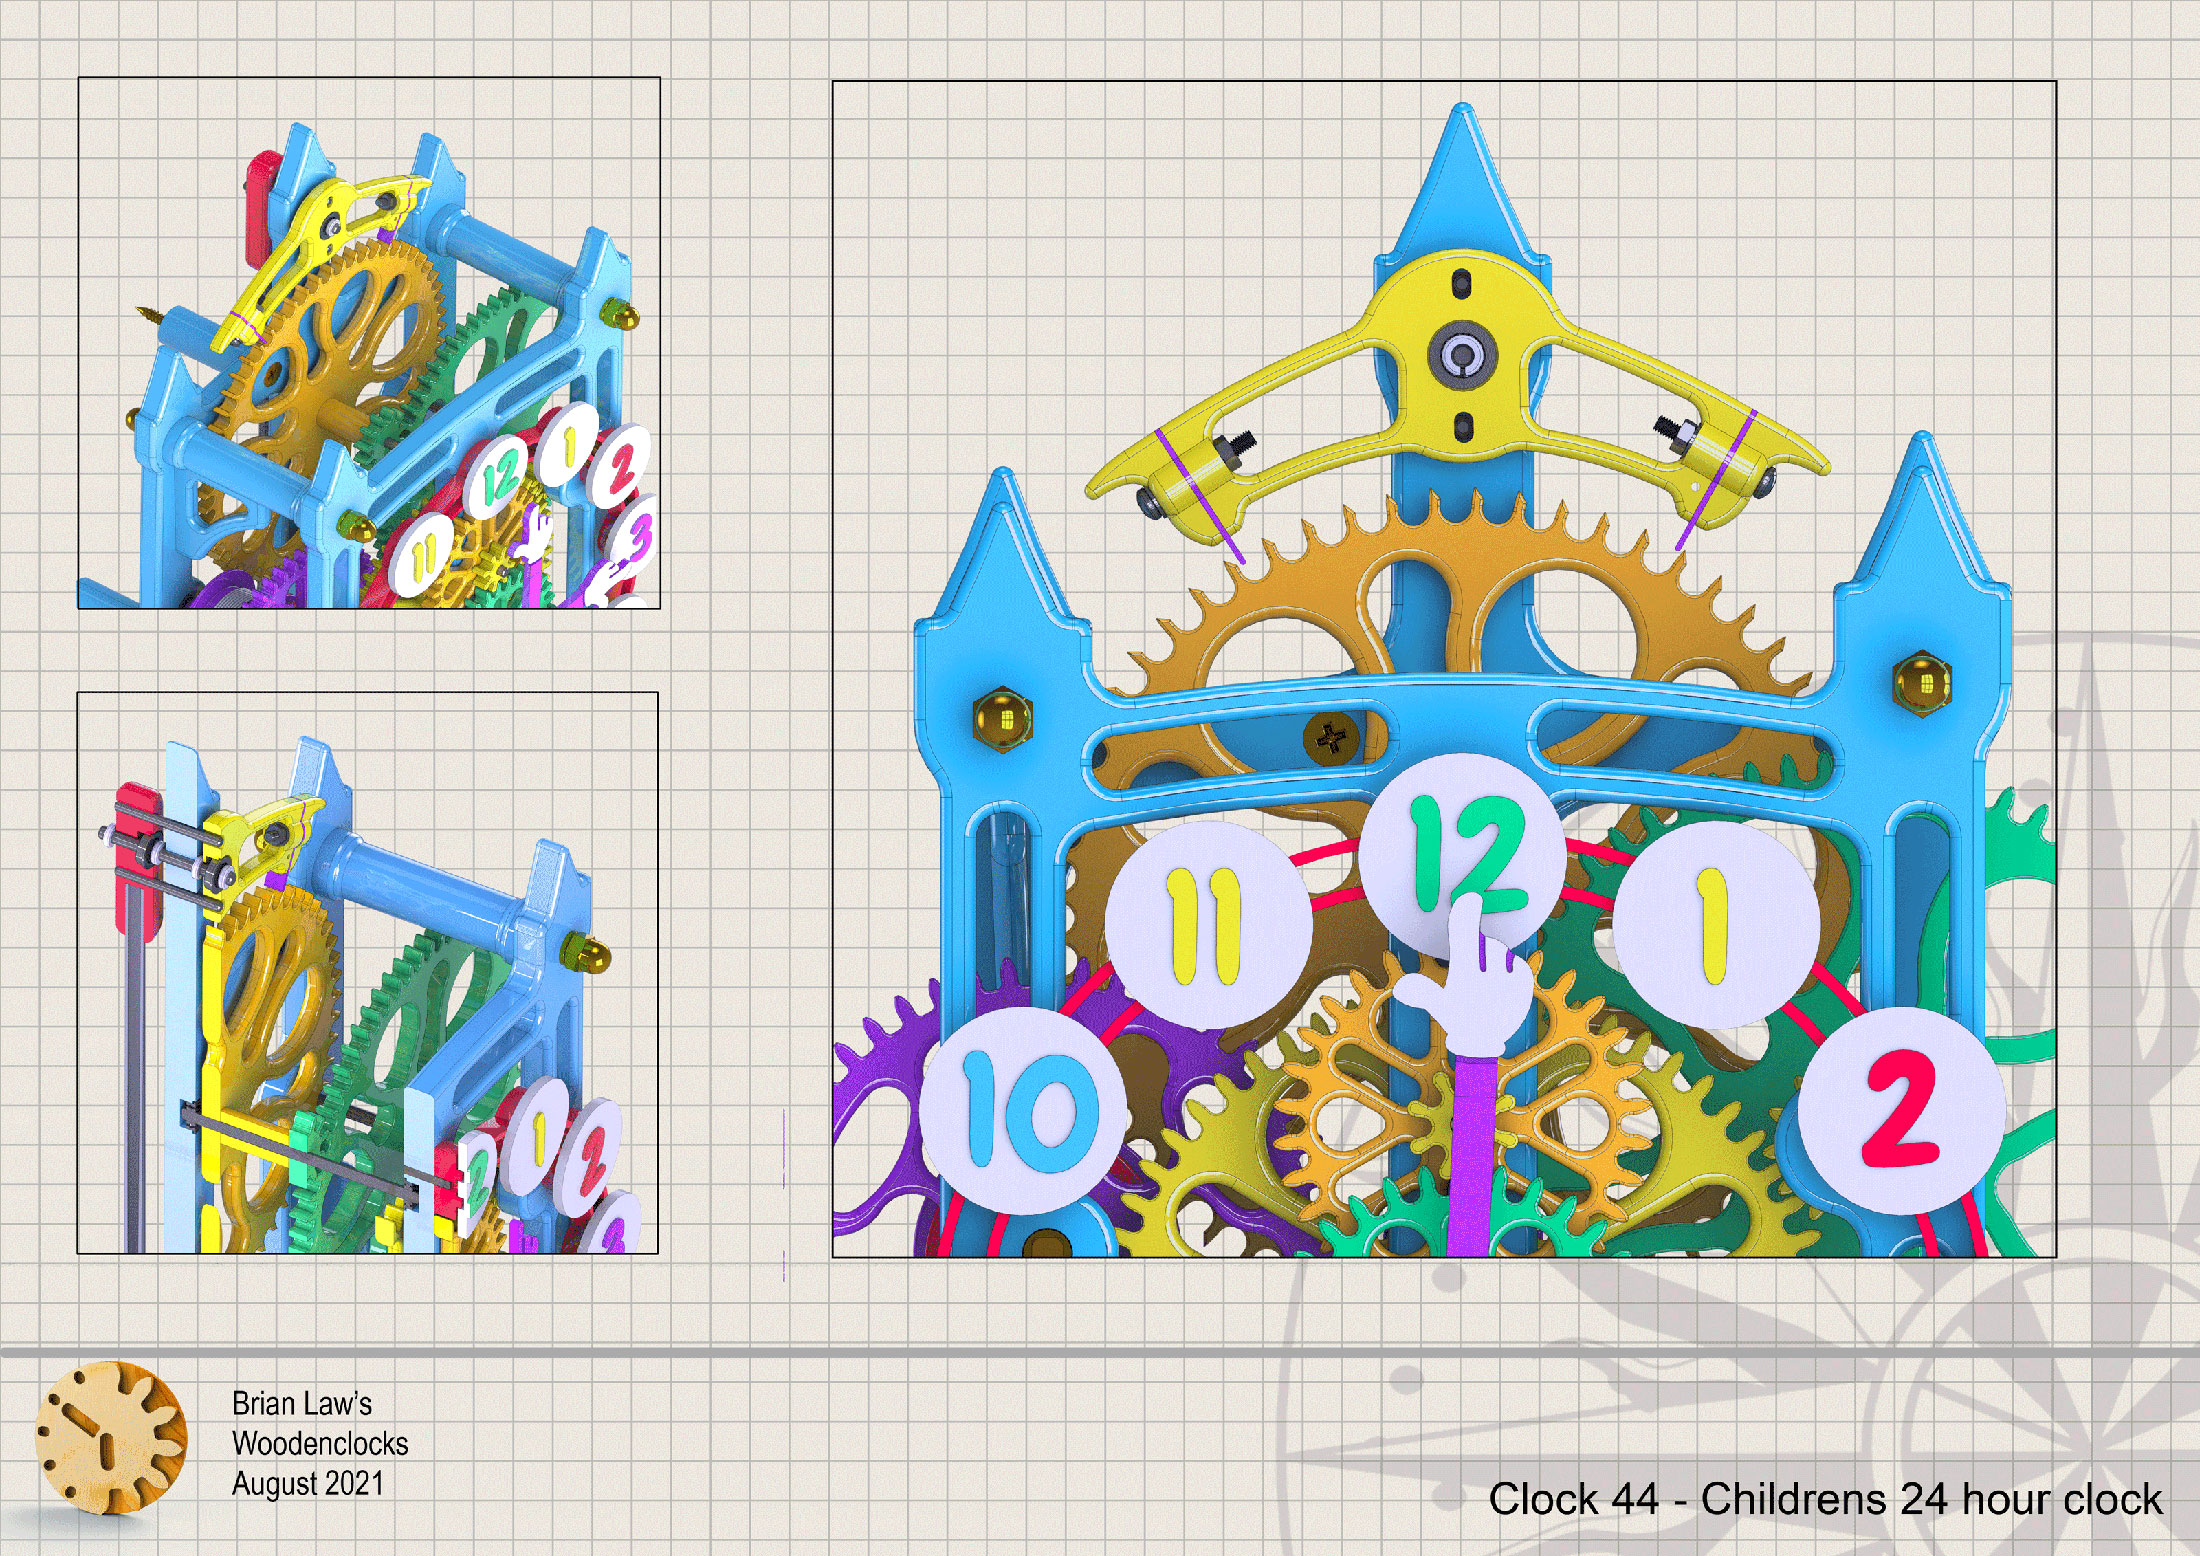
When I set out to design this clock I wanted it to be suitable for a Children’s room, a playful and colourful design that was to run quietly for 24 hours. Unlike the original children’s clock that ran on a mainspring this one was to be more traditional and run using a driving weight. It also uses the more efficient gear train used in Clock 43.
This does have a downside though as it increases the difficulty in building the clock as the teeth on the Escape wheel now need to be cut very accurately in order to ensure the the pallets will be able to interact properly with them. As a consequence of this I would recommend that this clock is not cut out using hand sawn methods, as the accuracy requirements are too high.
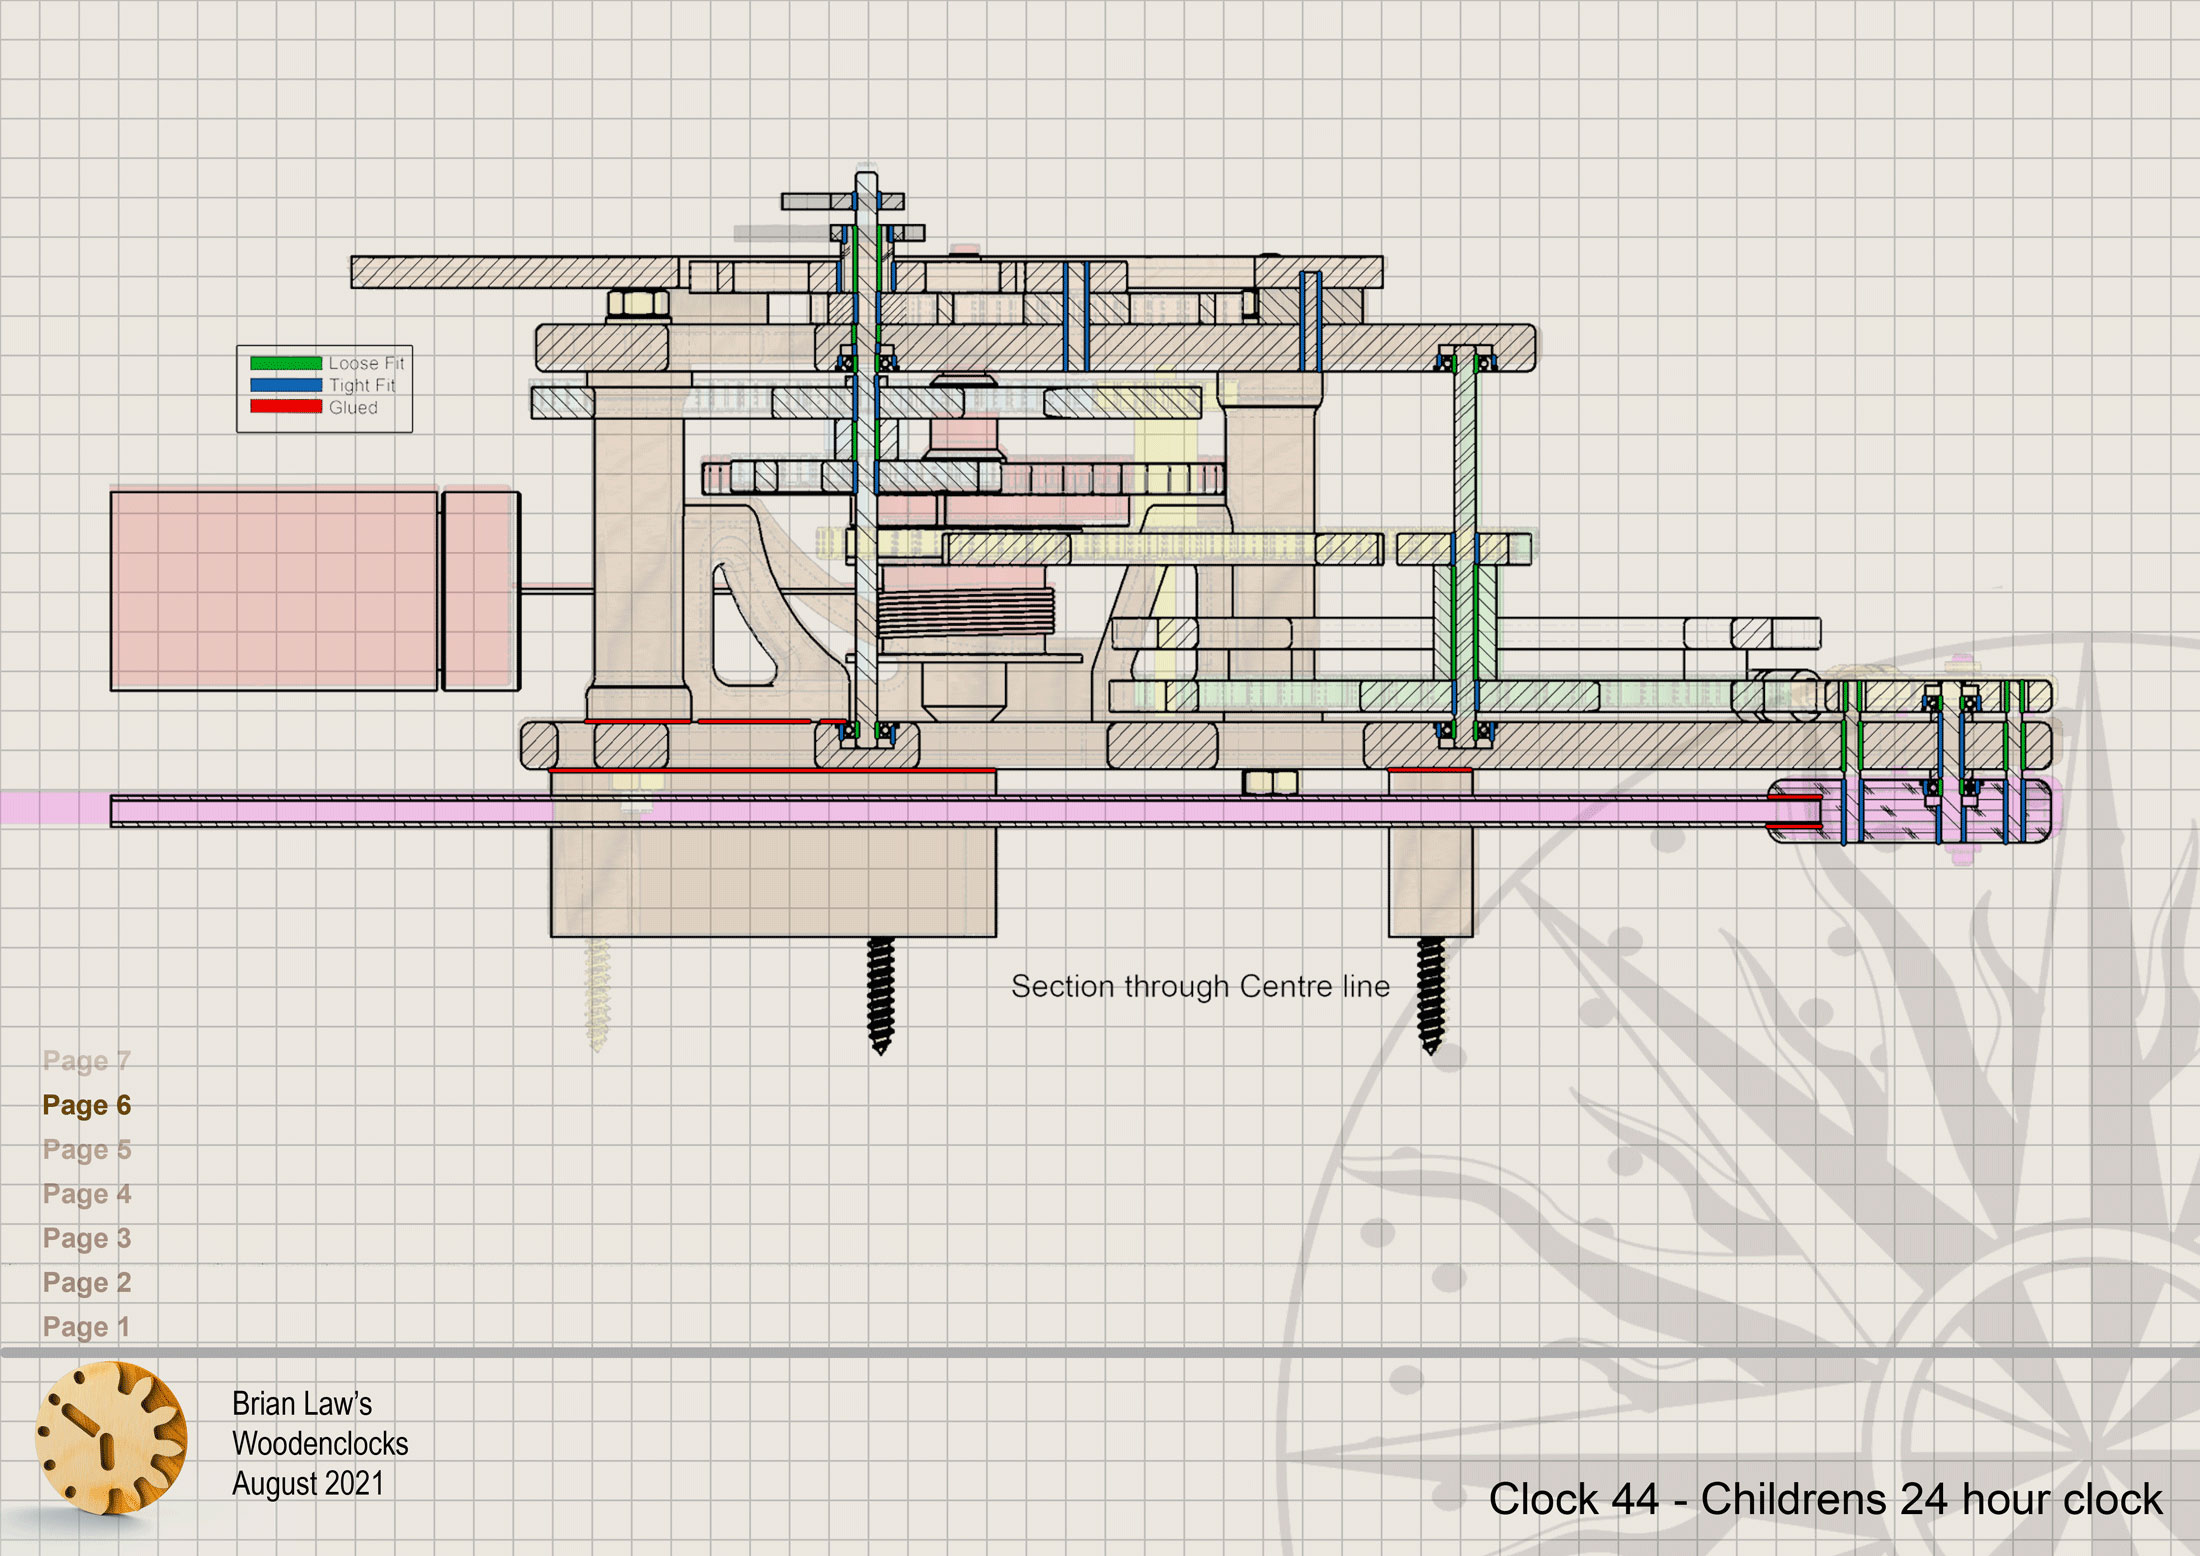
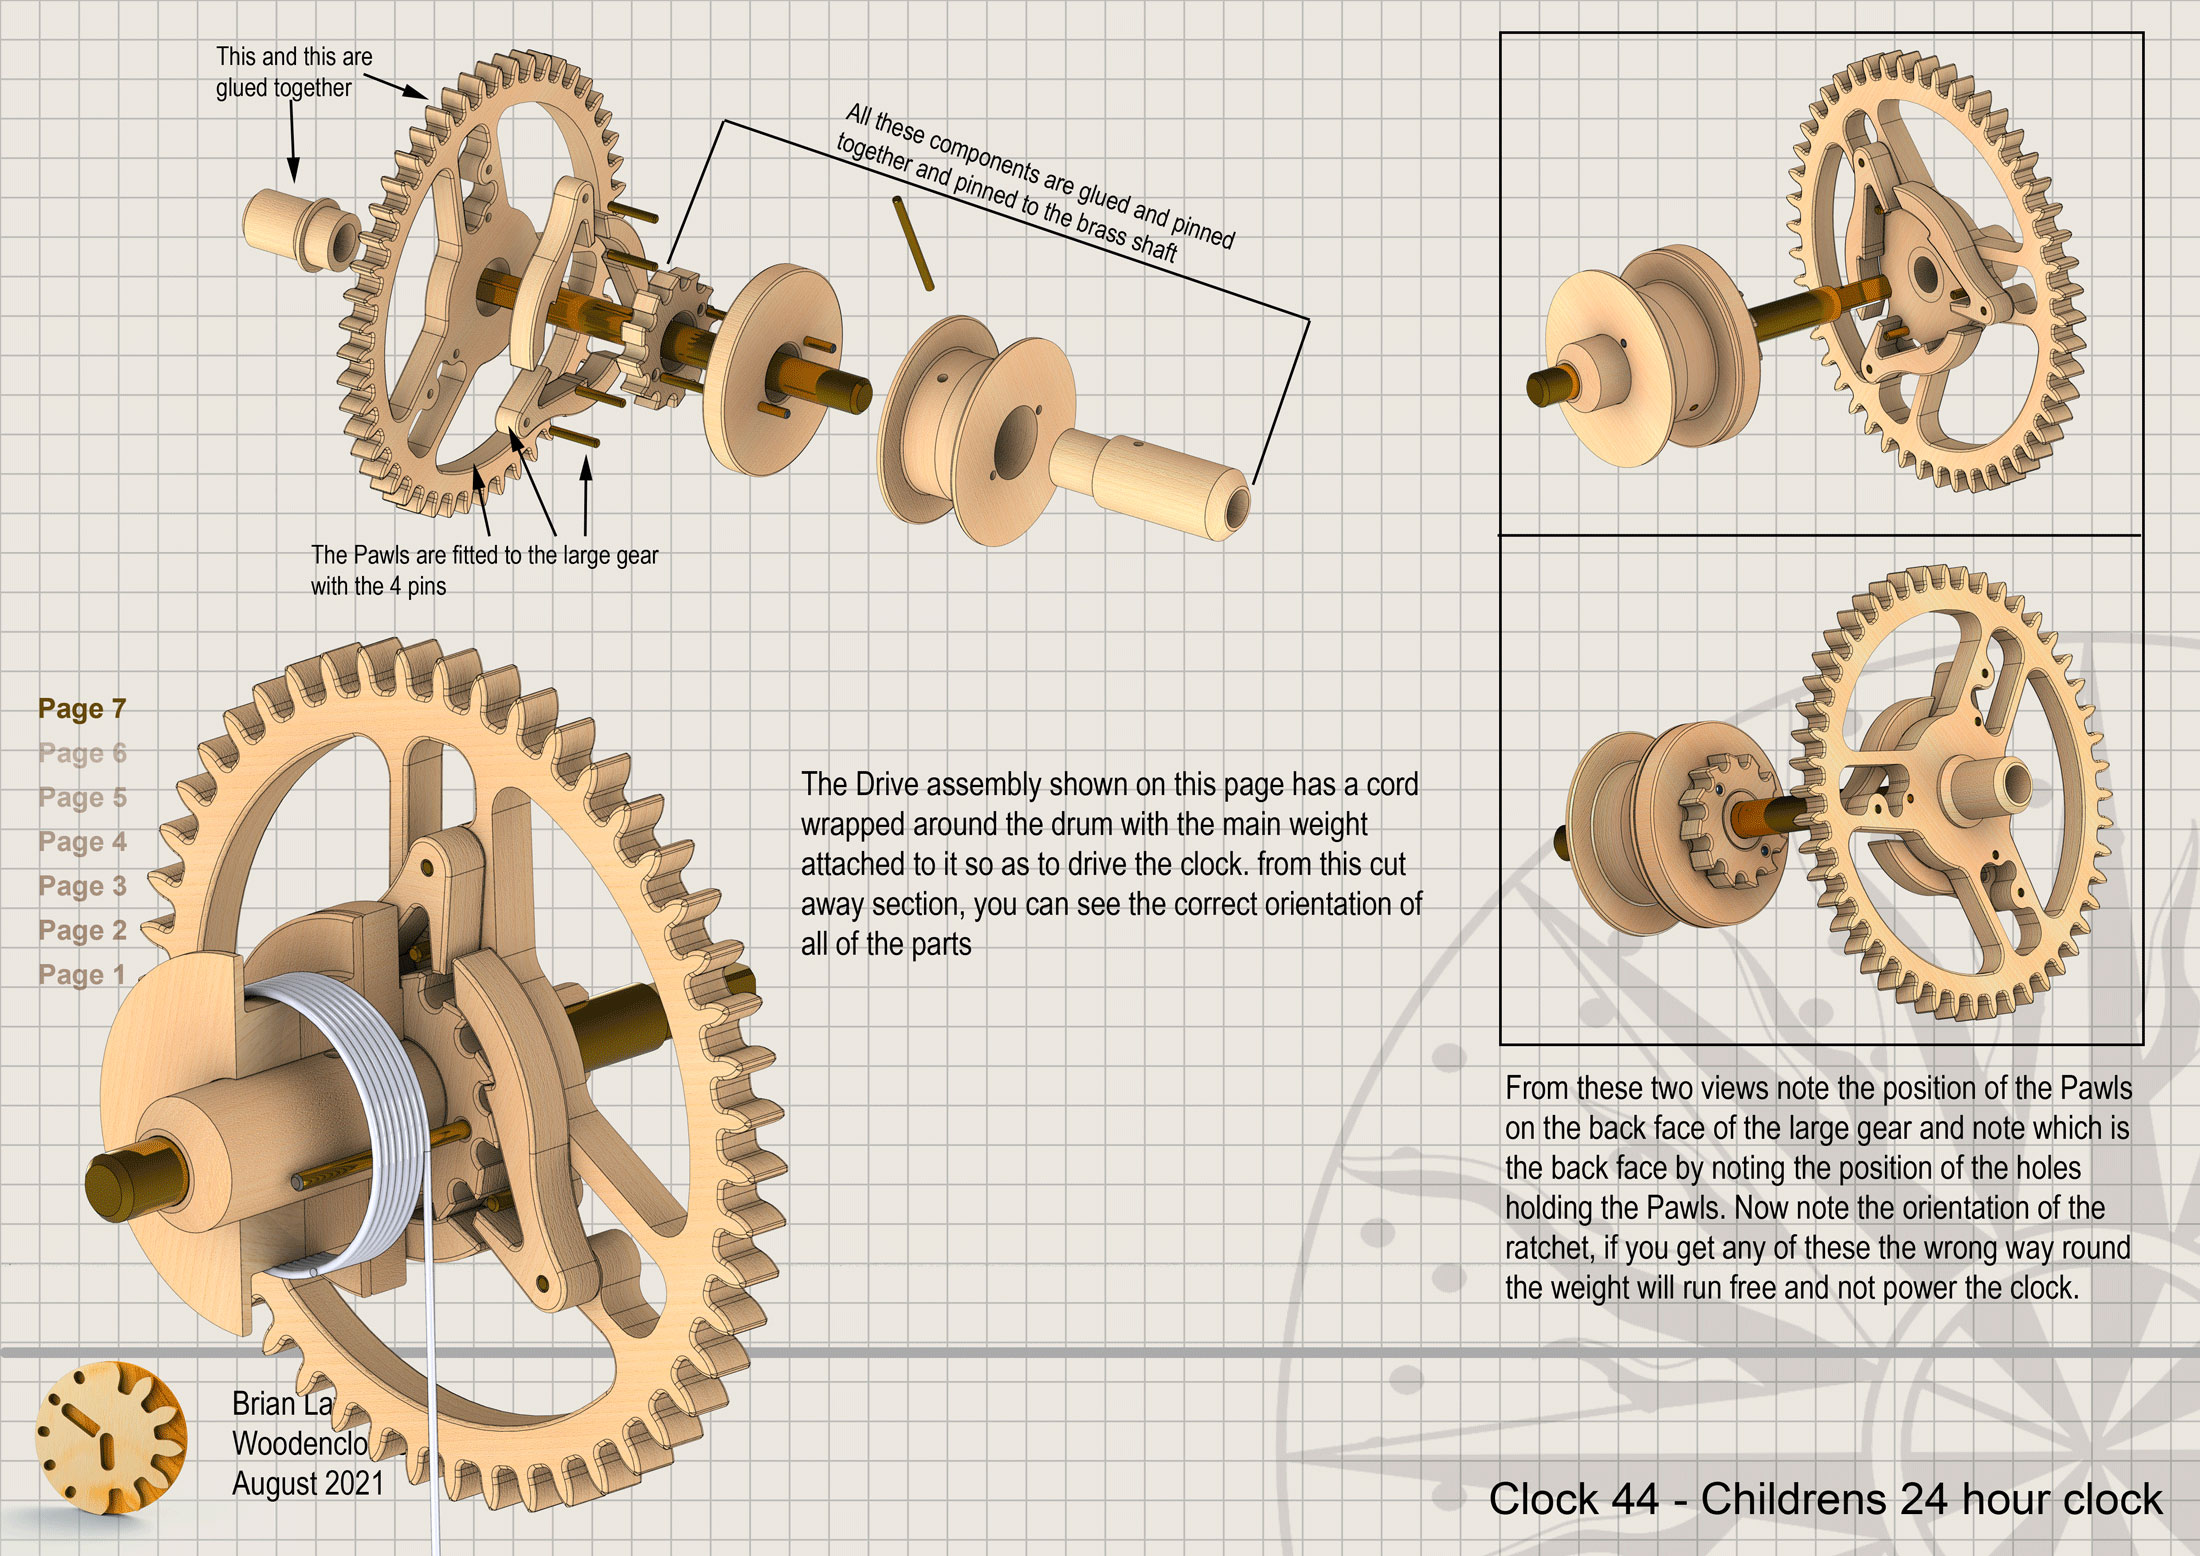
The clock will run for 26 hrs using a 0.6 Kg. main weight. The clock can be built either from wood using a CNC router or by 3D printing the parts, most everything can be printed on a 200mm x 200 mm bed except for the Front and back frames which will need to be split at the neck with the Top section then solvent bonded or super glued with a stiffening plate behind.
DXF files, and the IGS-STP and STL files that can be used with your CNC machine and 3D printer can be downloaded here for $26. You also get the unrestricted version of the PDF files that can be printed at full size and in this clock only the STL files if you need them.
Drawings for this clock in PDF format can be downloaded here. These free files are low resolution and not to scale and only a sample of the full set that comes in the paid for version. Clicking here will download the PDF file directly to your browser, may take a few moments so please be patient.
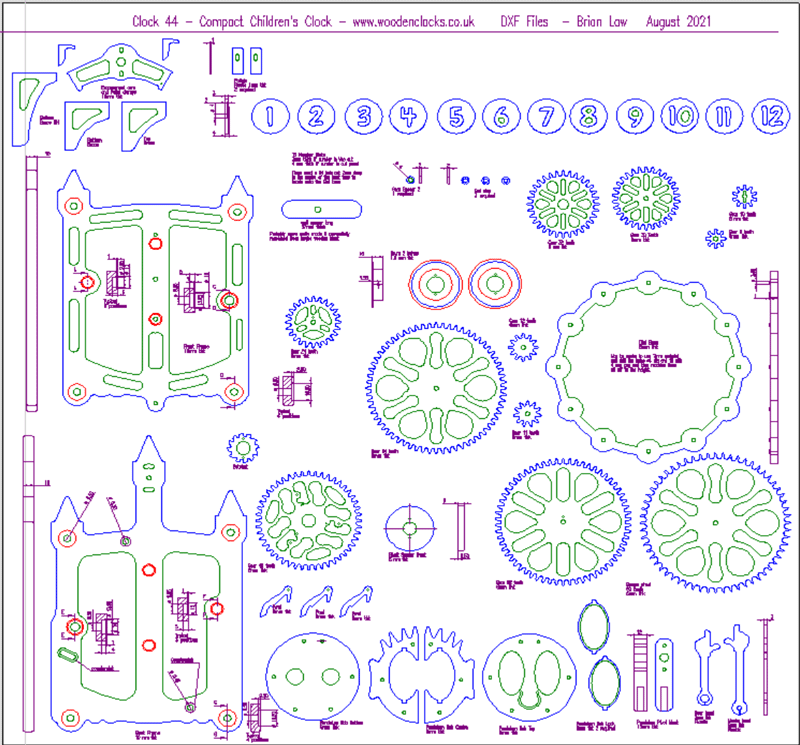
A sample from the DXF file – the file is purposely low resolution, with no vector data. The actual files purchased above are included on one large sheet so that they may be directly loaded into your CAM program.
To print only a single item of the drawing to scale using Adobe Acrobat Reader, do the following:
Go to Edit, then click on Take a snapshot, move the cursor to the top left of the item you want to print and hold down the left mouse button whilst you drag a box around the item. The inside of the box turns blue and you can now go to File and then click on Print. This brings up the print dialogue, make sure Selected graphic is selected and that the Page scaling is set to None and the click on OK. As long as your printer is connected you will have printed the item at size. Do this for each item you want to cut out.