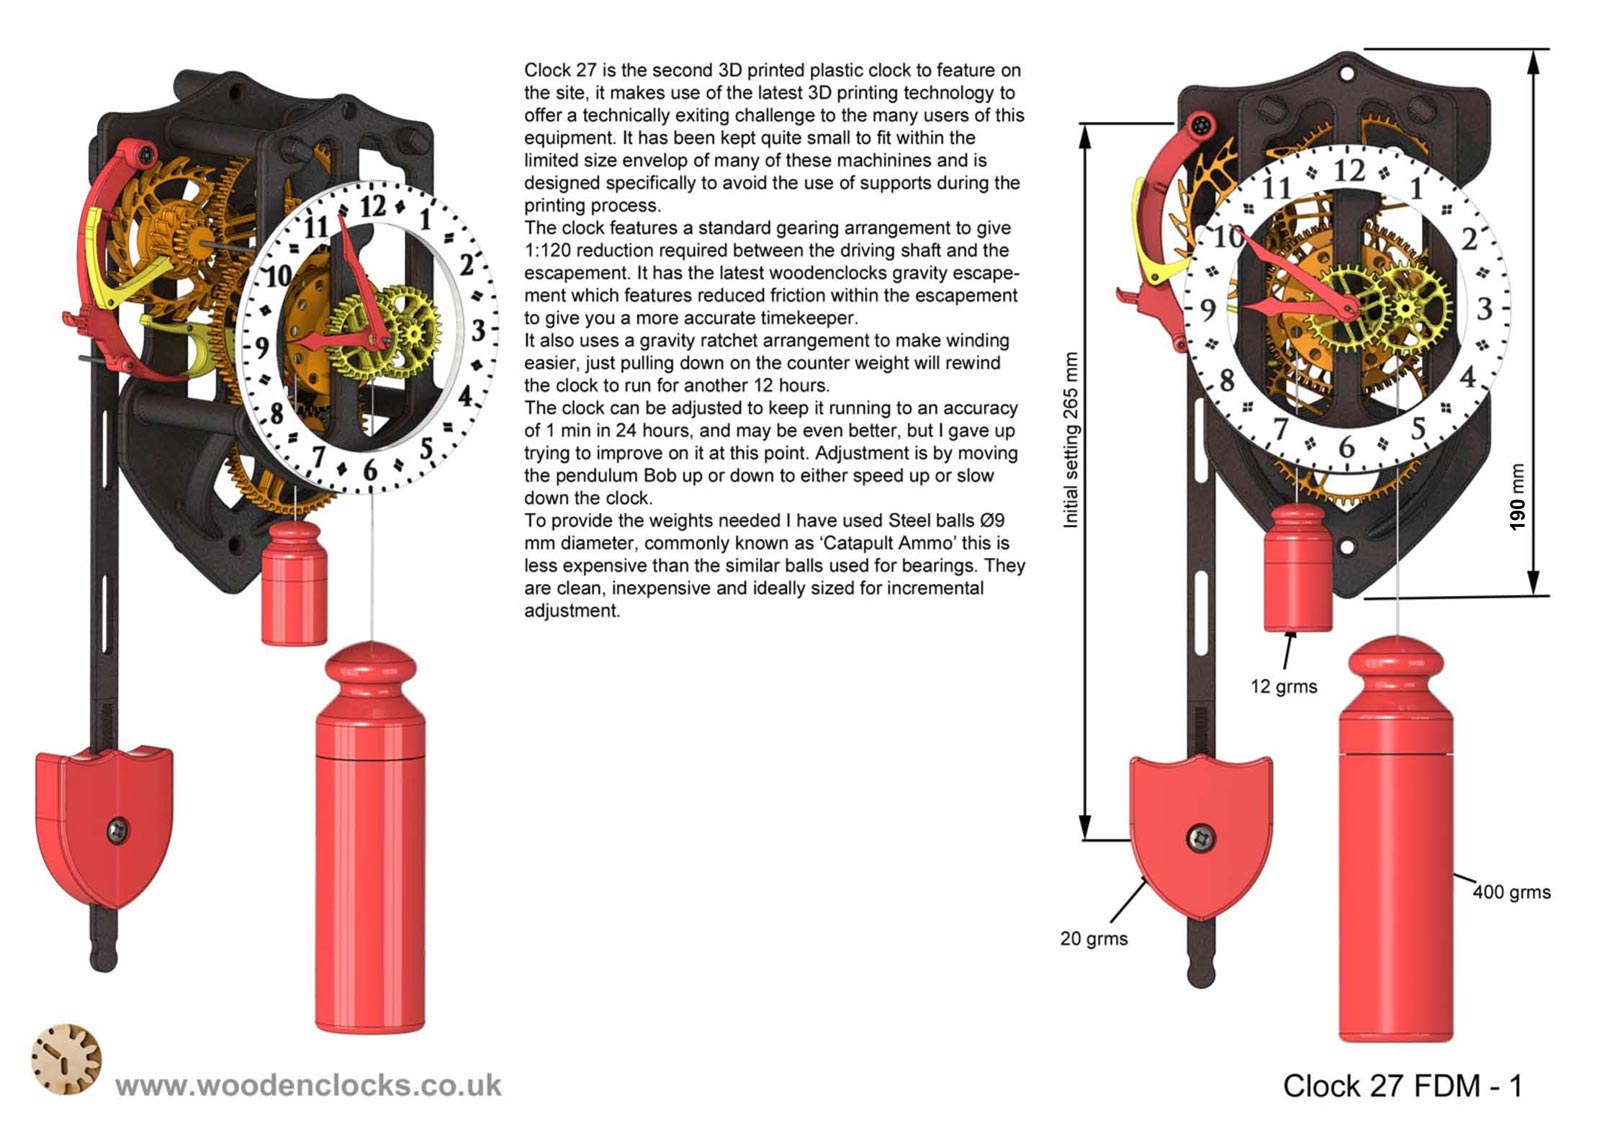


Clock 27 FDM. This the second 3D printed plastic clock to feature on the site, it makes use of the latest 3D printing technology to offer a technically exiting challenge to the many users of this equipment. It has been kept quite small to fit within the limited size envelop of many of these machines and is designed specifically to avoid the use of supports during the printing process.
The clock features a standard gearing arrangement to give 1:120 reduction required between the driving shaft and the escapement. It has the latest Woodenclocks gravity escapement which features reduced friction within the escapement to give you a more accurate timekeeper. It also uses a gravity ratchet arrangement to make winding easier, just pulling down on the counter weight will rewind the clock to run for another 12 hours.
The clock can be adjusted to keep it running to an accuracy of 1 min in 24 hours, and maybe even better, but I gave up trying to improve on it at this point. Adjustment is by moving the pendulum Bob up or down to either speed up or slow down the clock.
Many of the parts have been split into 2 or more components to reduce the need to add supports during the printing of the part. Liquid solvent bonding is used to glue all the necessary parts together.
I printed the dial in 2 colours as the machine I was using (Zortrax) although not fitted with two printing heads allowed printing to be paused and the filament changed. If you can’t do that then you will need to paint the top face of the upstanding numerals.
I have sized the parts mainly so that the small holes come out under size to allow you to drill out the part to get the correct fit. You are going to need tight and loose fits at different points in the assembly so you will need to have Ø1.9 mm, Ø2 mm and Ø2.1mm drills. In the case of the bearings, the holes are sized to give a press fit, so you may need to adjust that for your printer.
NB! I have added DXF files for those who wish to make the clock using CNC machining. The design has had to change slightly to accommodate this, but the build instructions are essentially the same. You can download the additional files after making the PayPal payment.
STL files, and the IGS files
that can be used with your 3D printer
can be downloaded here for $26.
Drawings for this clock in PDF format can be downloaded here. These free files are restricted so that you can only view them on screen but not print them. Clicking here will download the PDF file directly to your browser, may take a few moments so please be patient.
To view
the assembly instructions for the clock
click here.
Hints and Tips for this clock in PDF format can be downloaded here. Clicking to the left here will download the PDF file directly to your browser, may take a few moments so please be patient.
Download a sample part here,
so you can try the file before deciding to build
the whole of the clock.
To print only a single item of the drawing to scale using Adobe Acrobat Reader, do the following:
Go to Edit, then click on Take a snapshot, move the cursor to the top left of the item you want to print and hold down the left mouse button whilst you drag a box around the item. The inside of the box turns blue and you can now go to File and then click on Print. This brings up the print dialogue, make sure Selected graphic is selected and that the Page scaling is set to None and the click on OK. As long as your printer is connected you will have printed the item at size. Do this for each item you want to cut out.