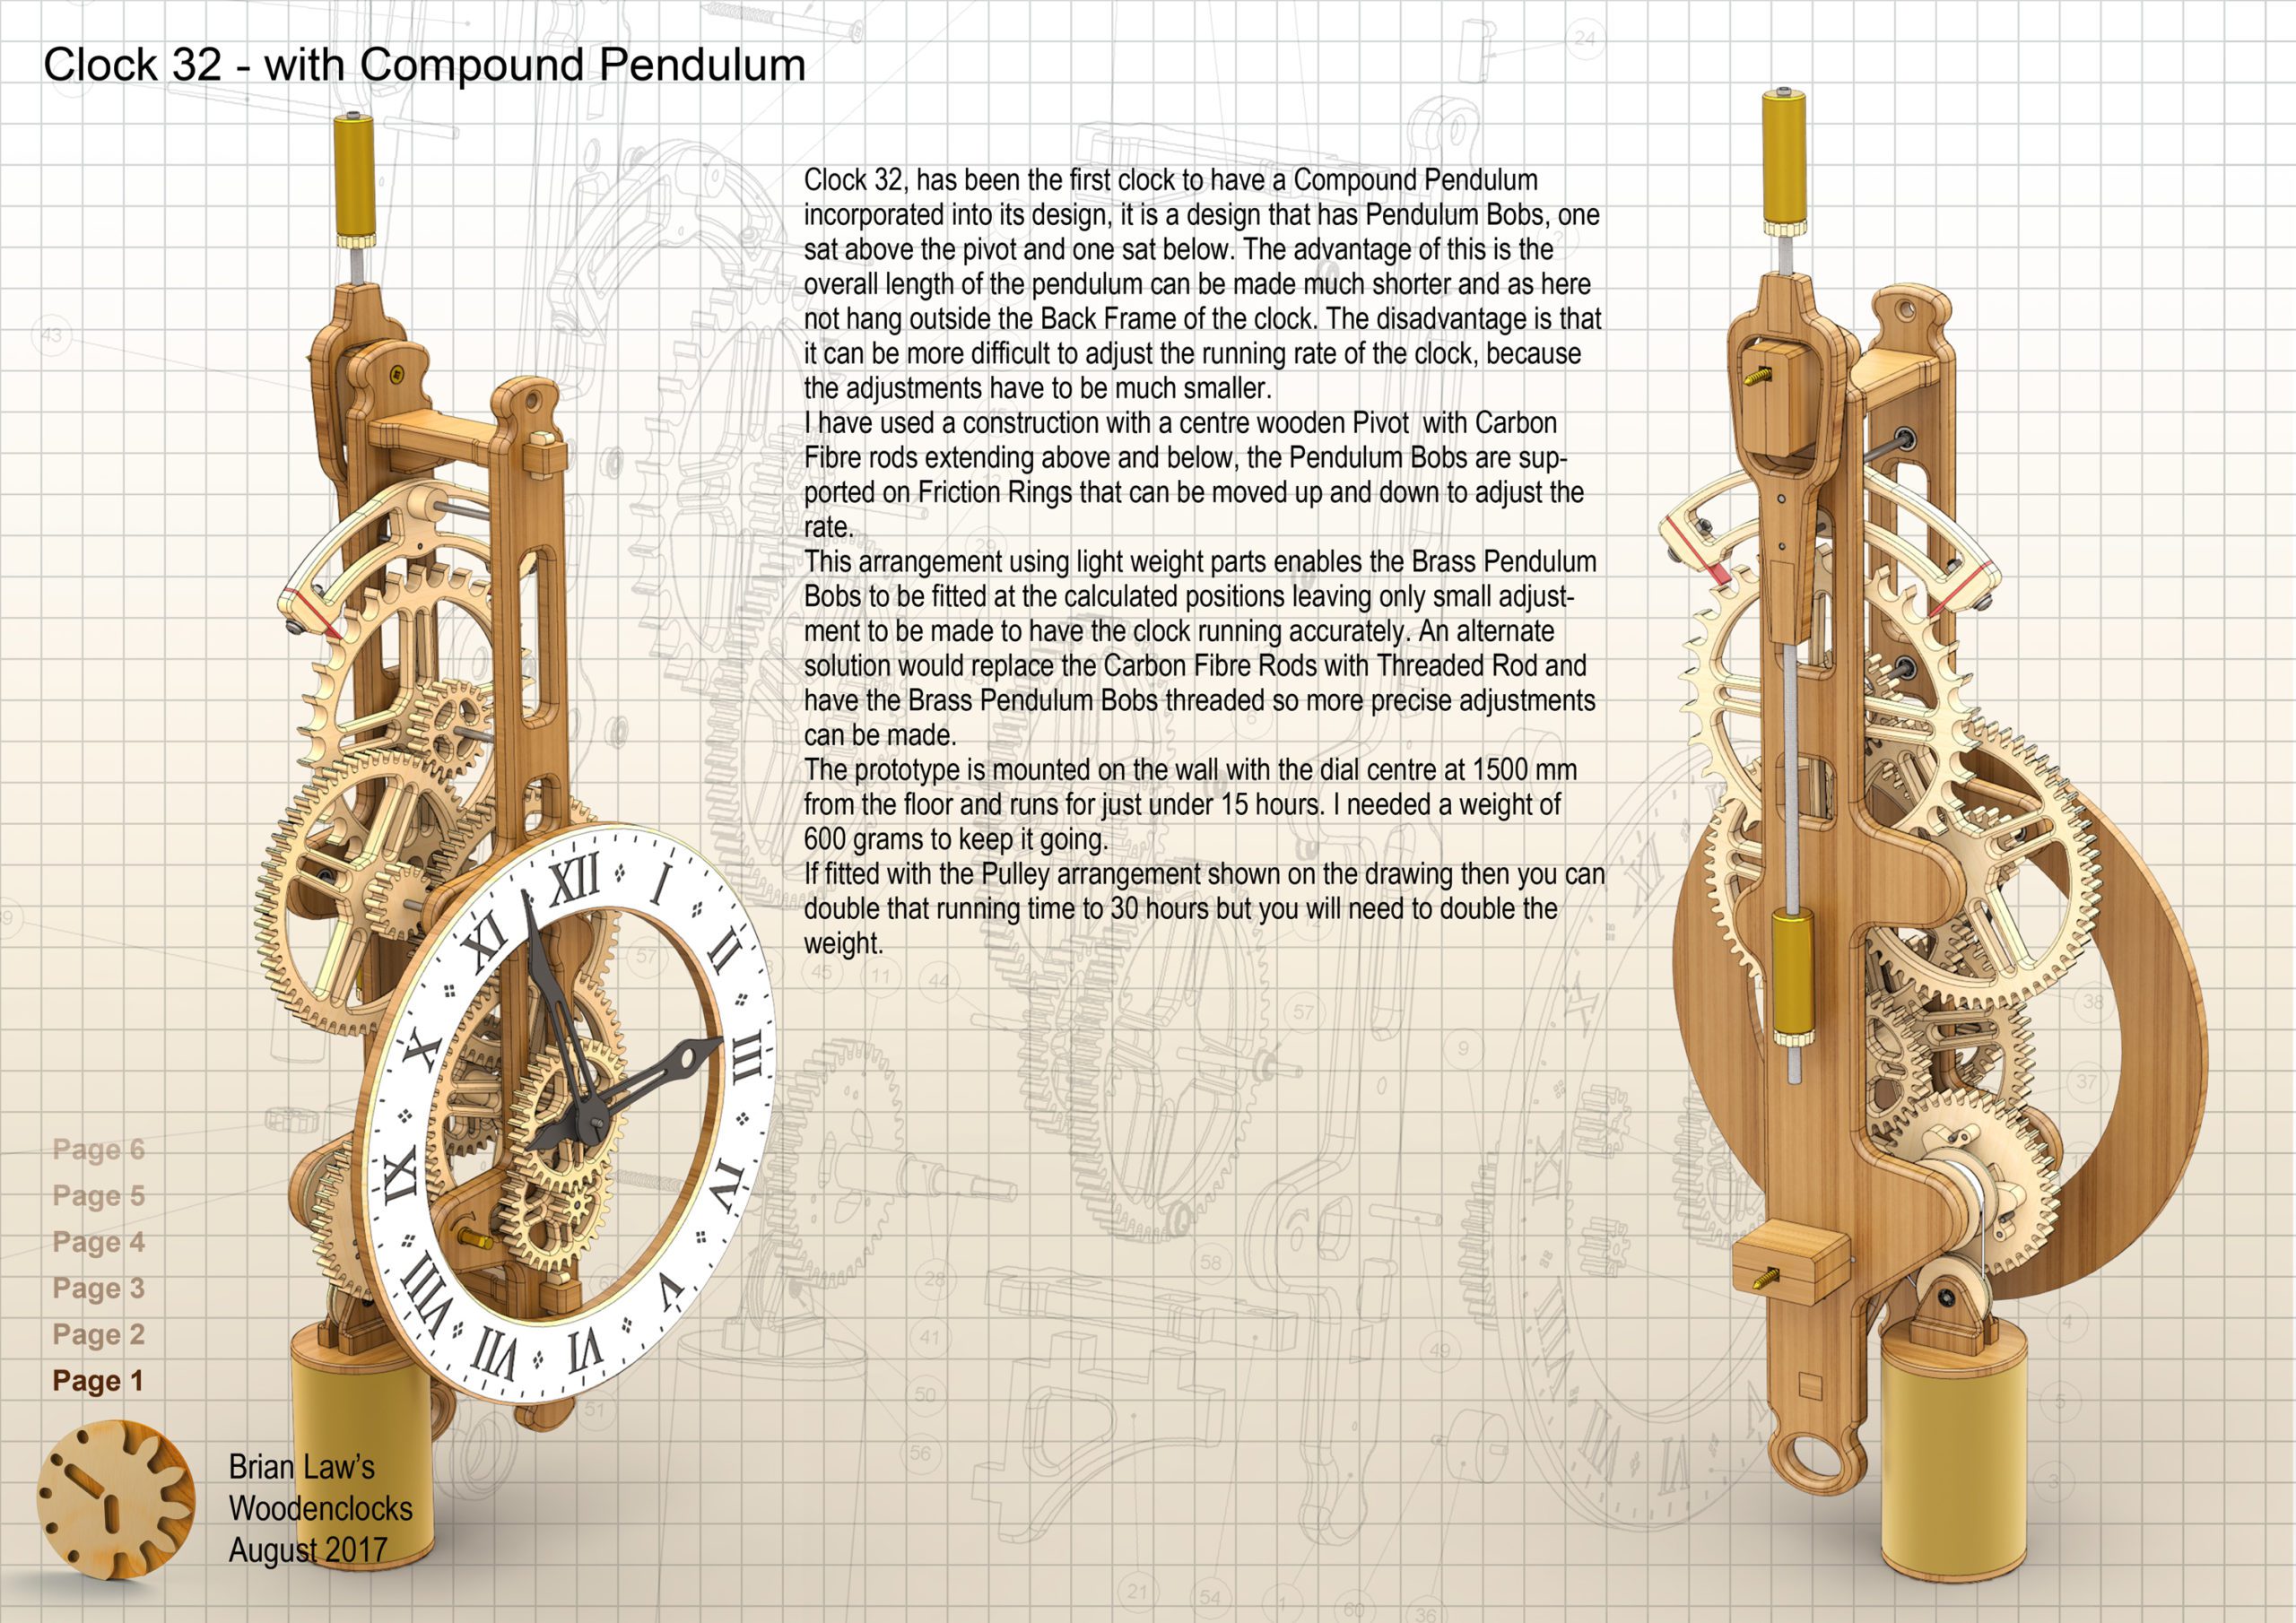
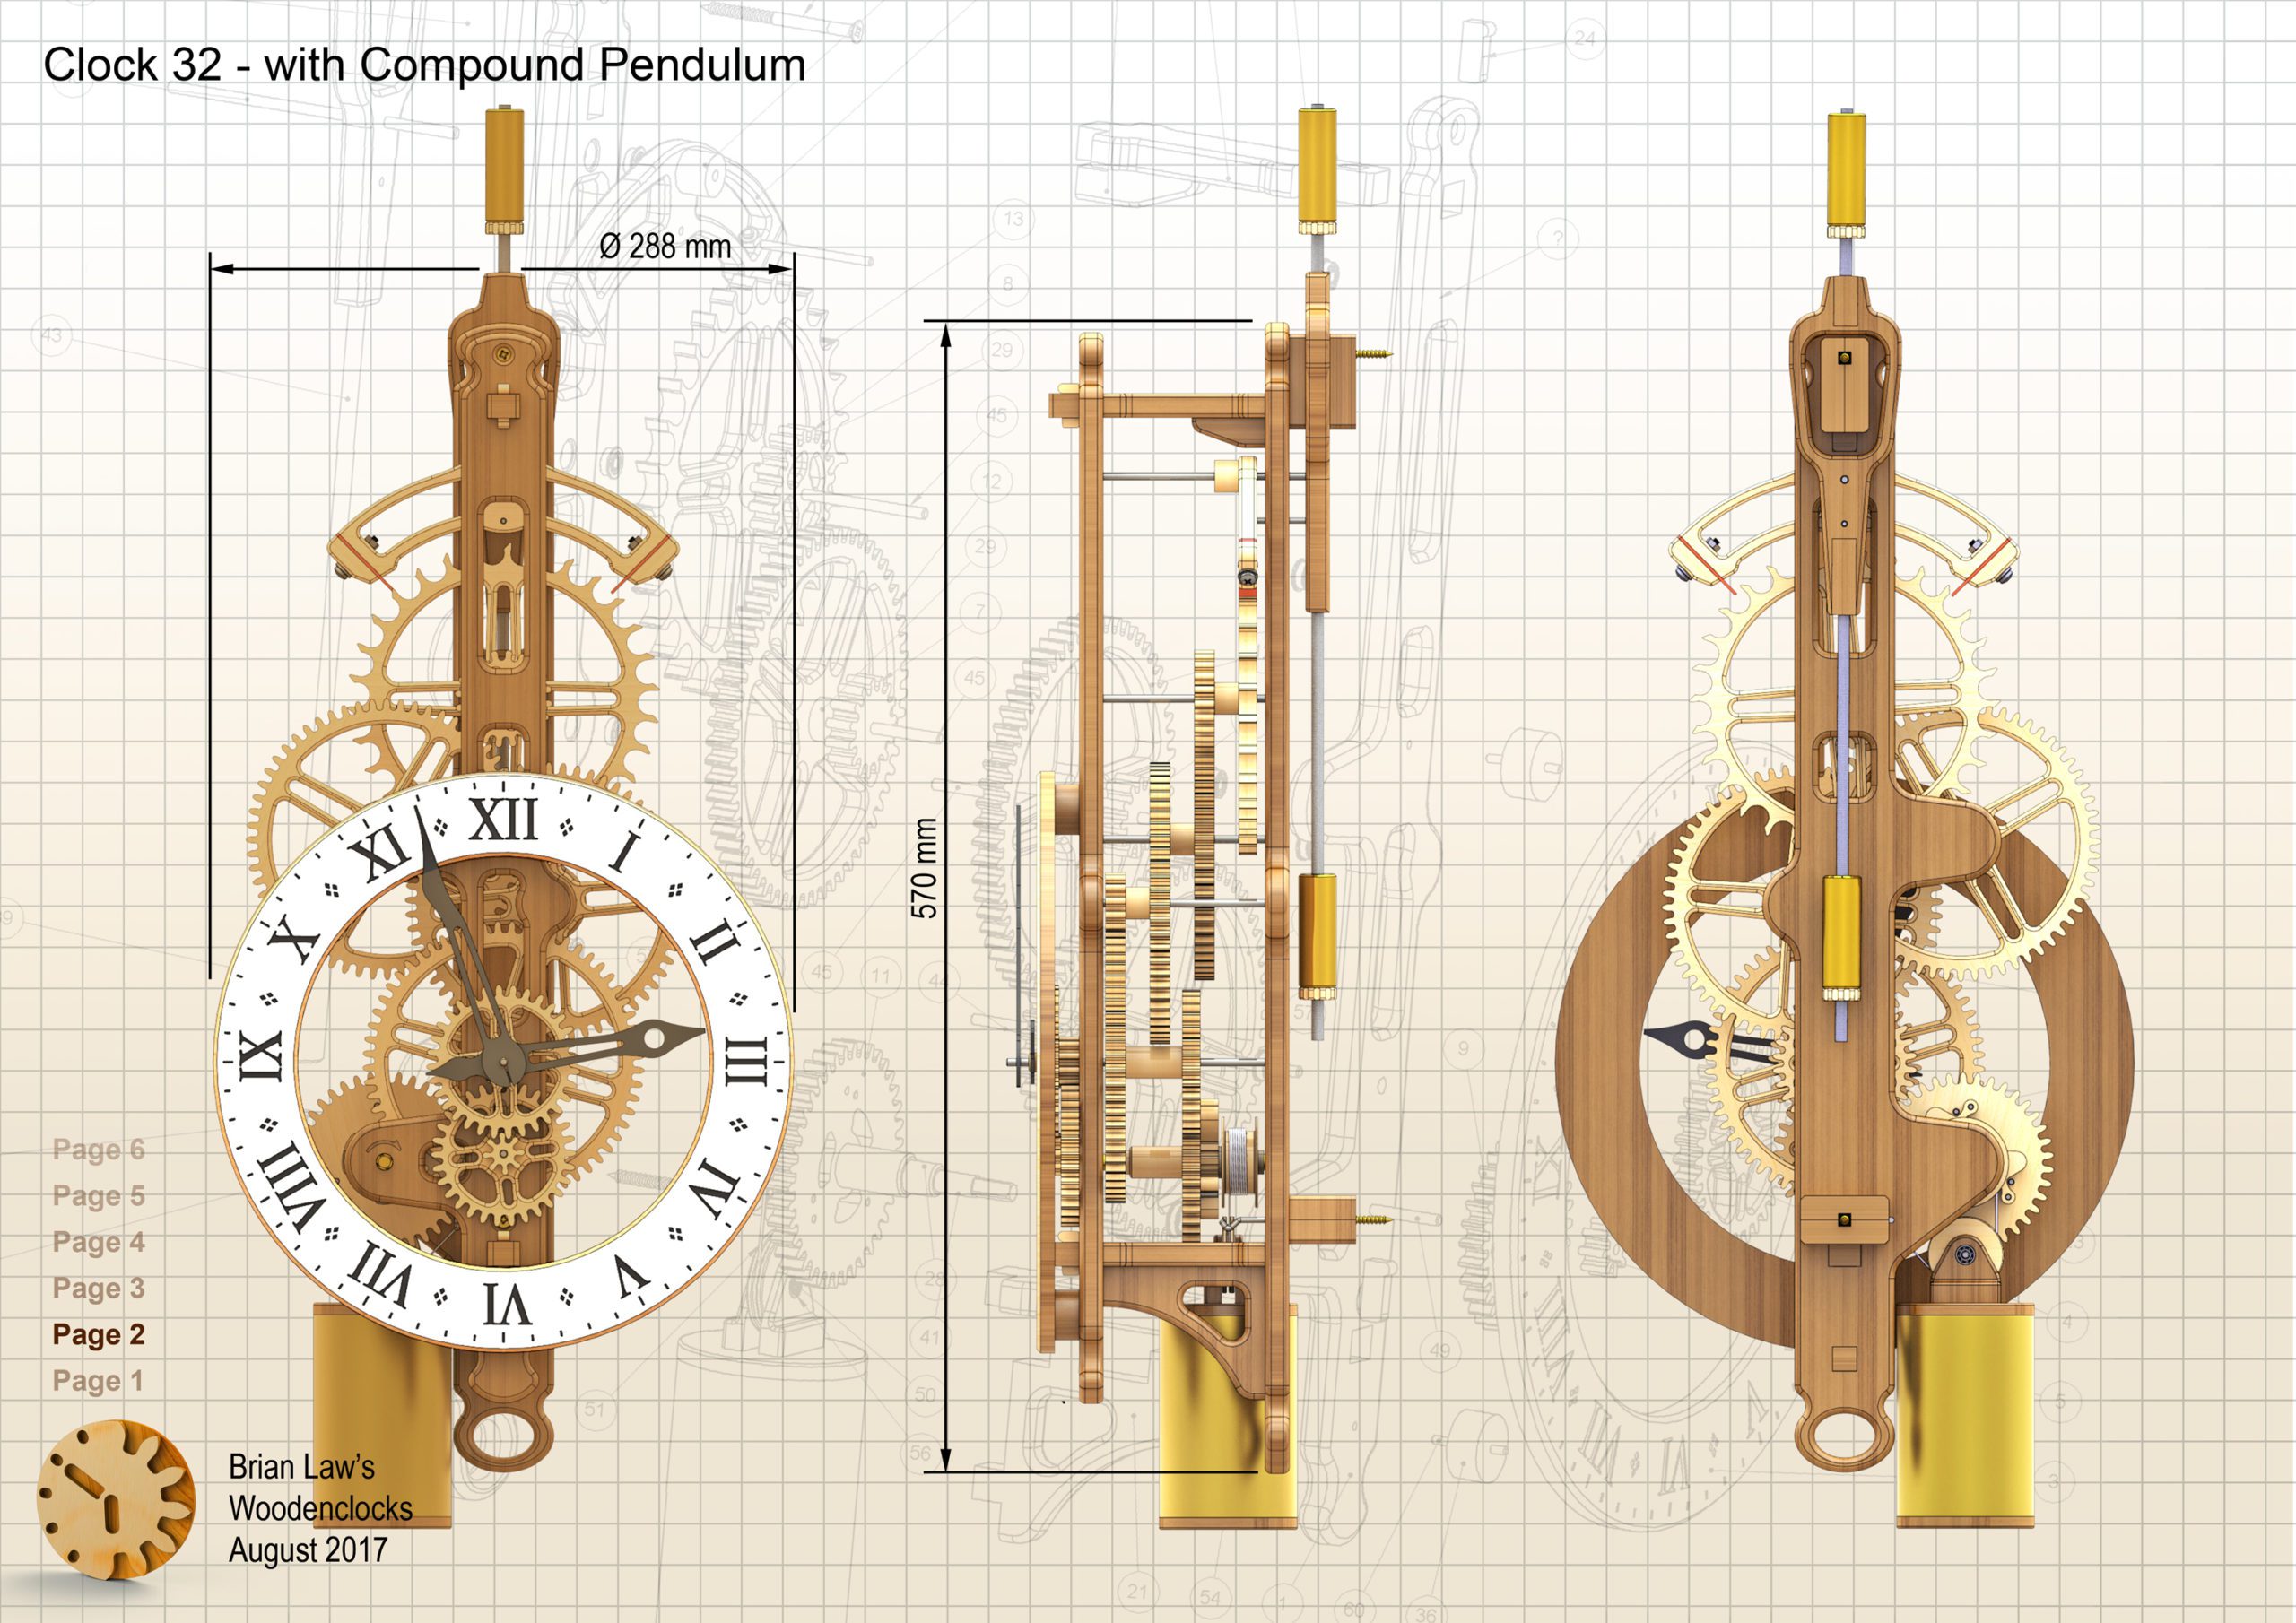
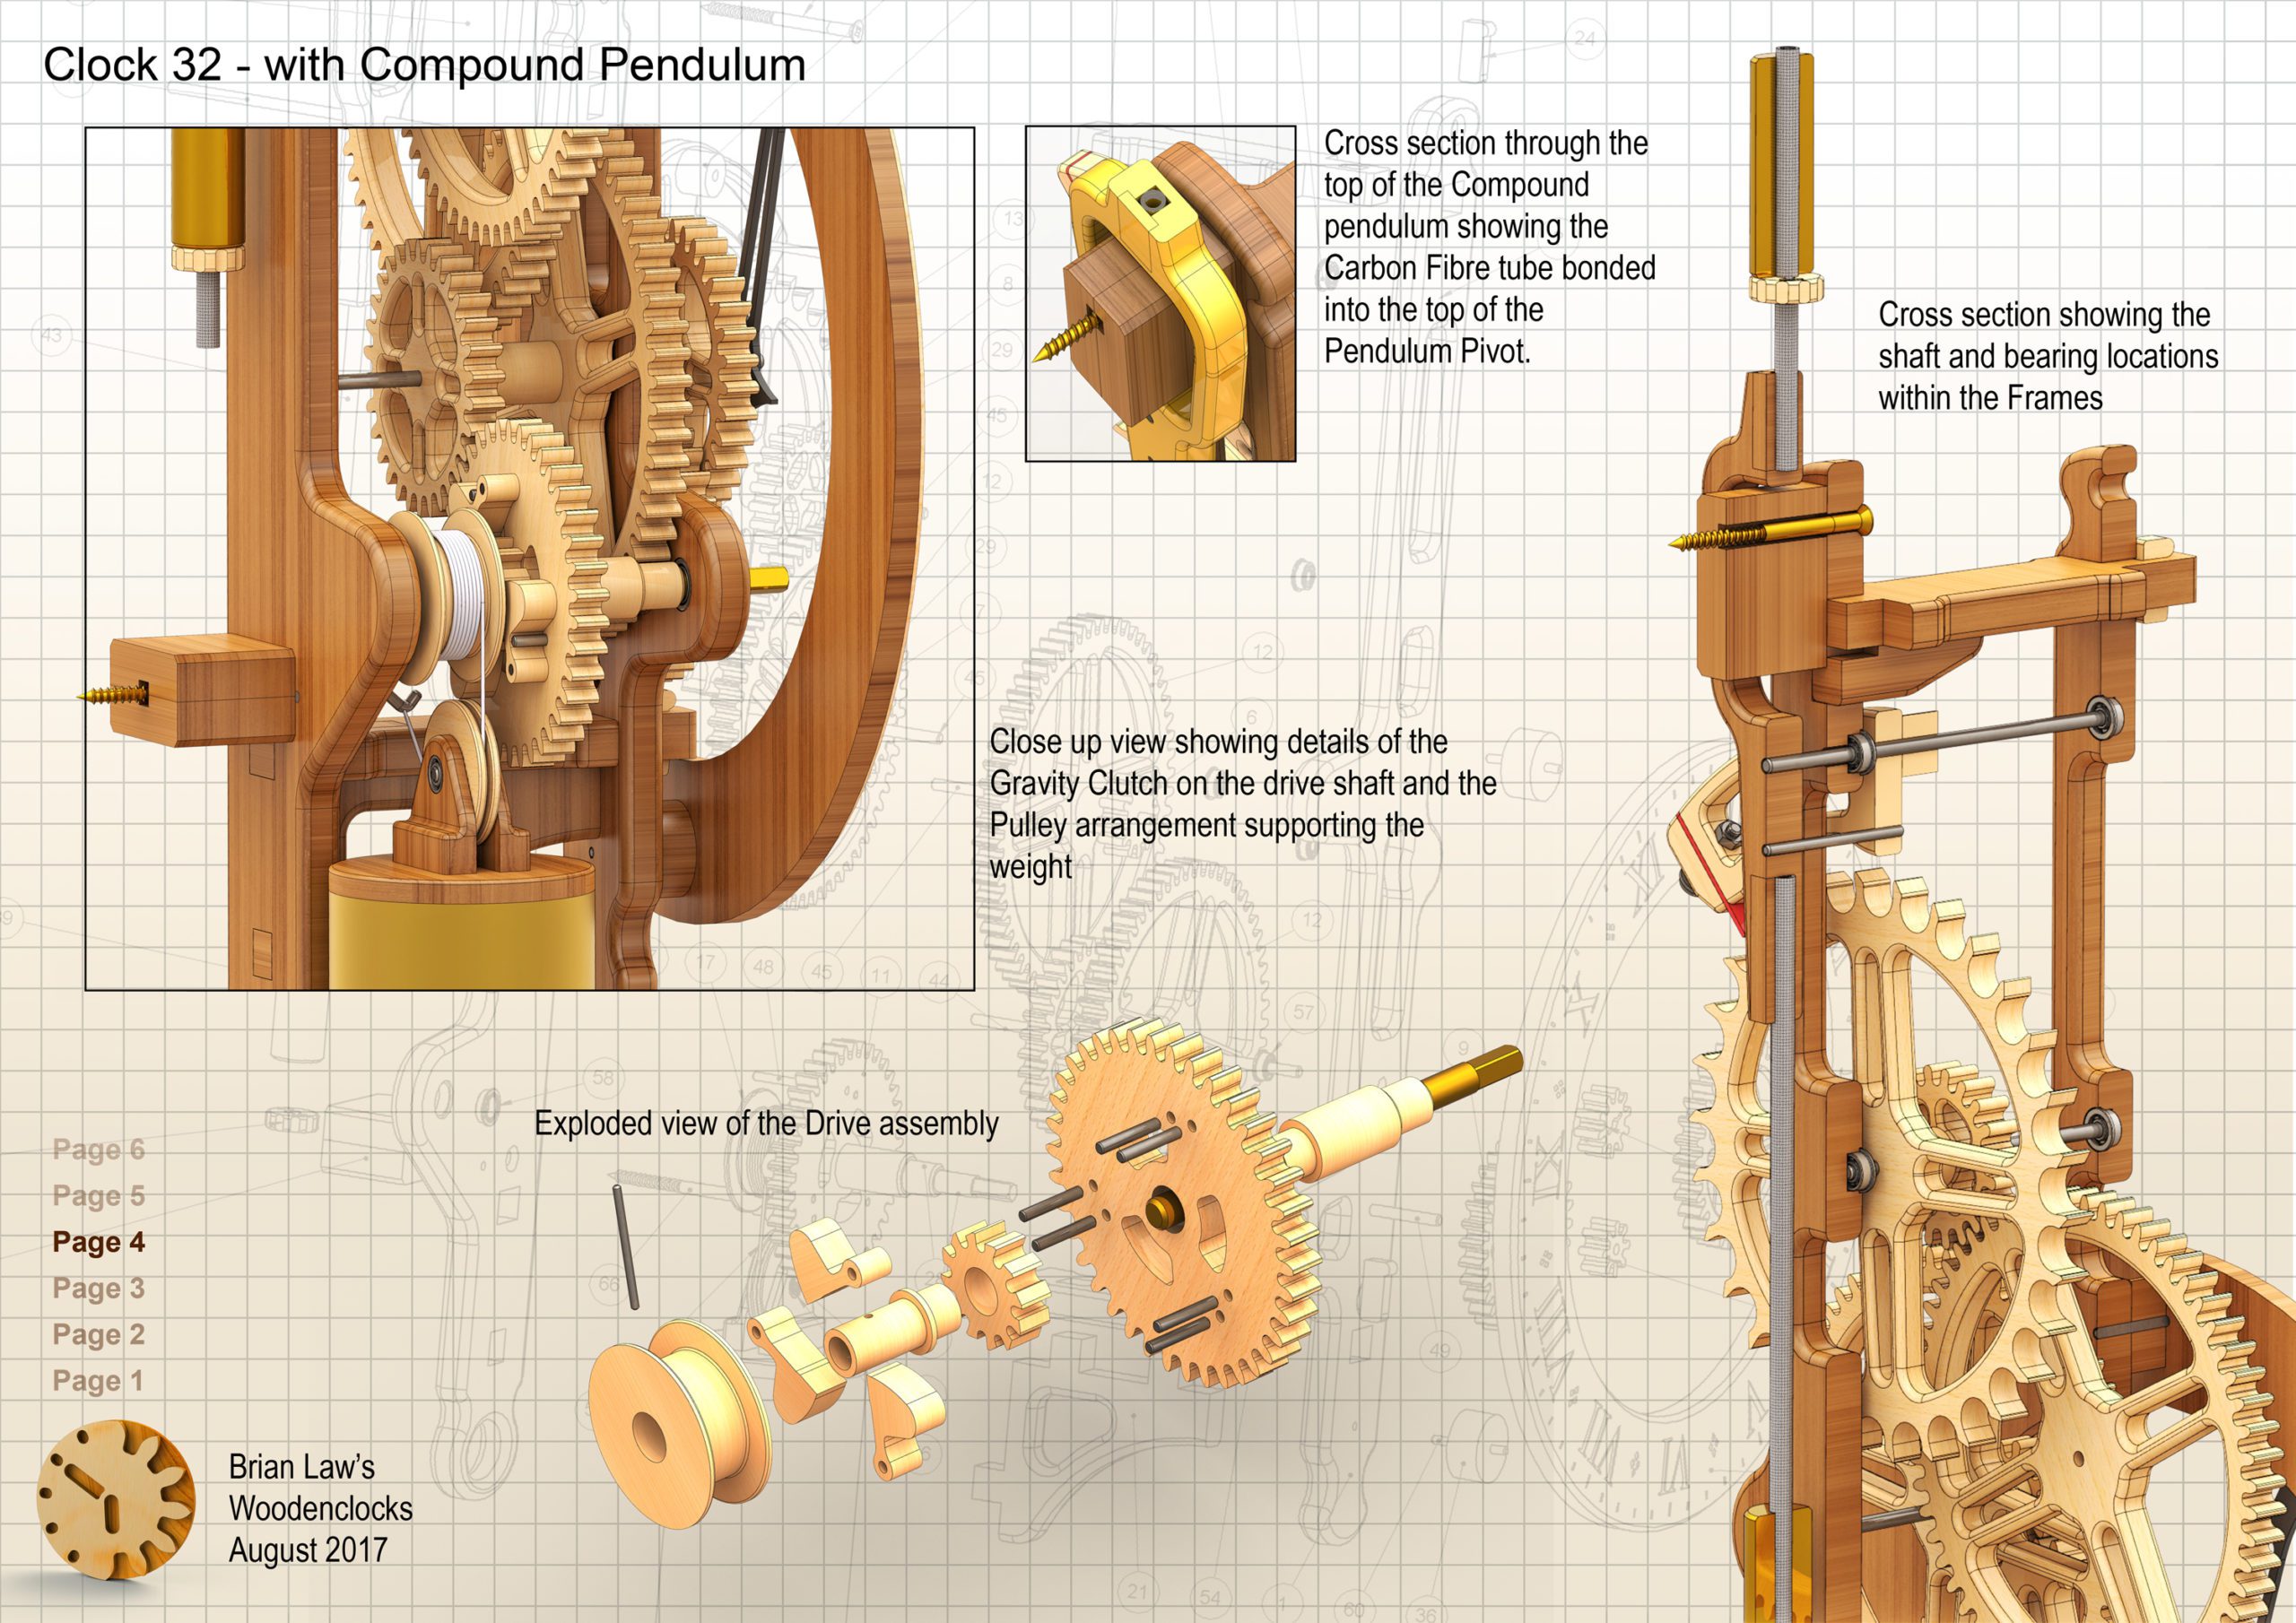
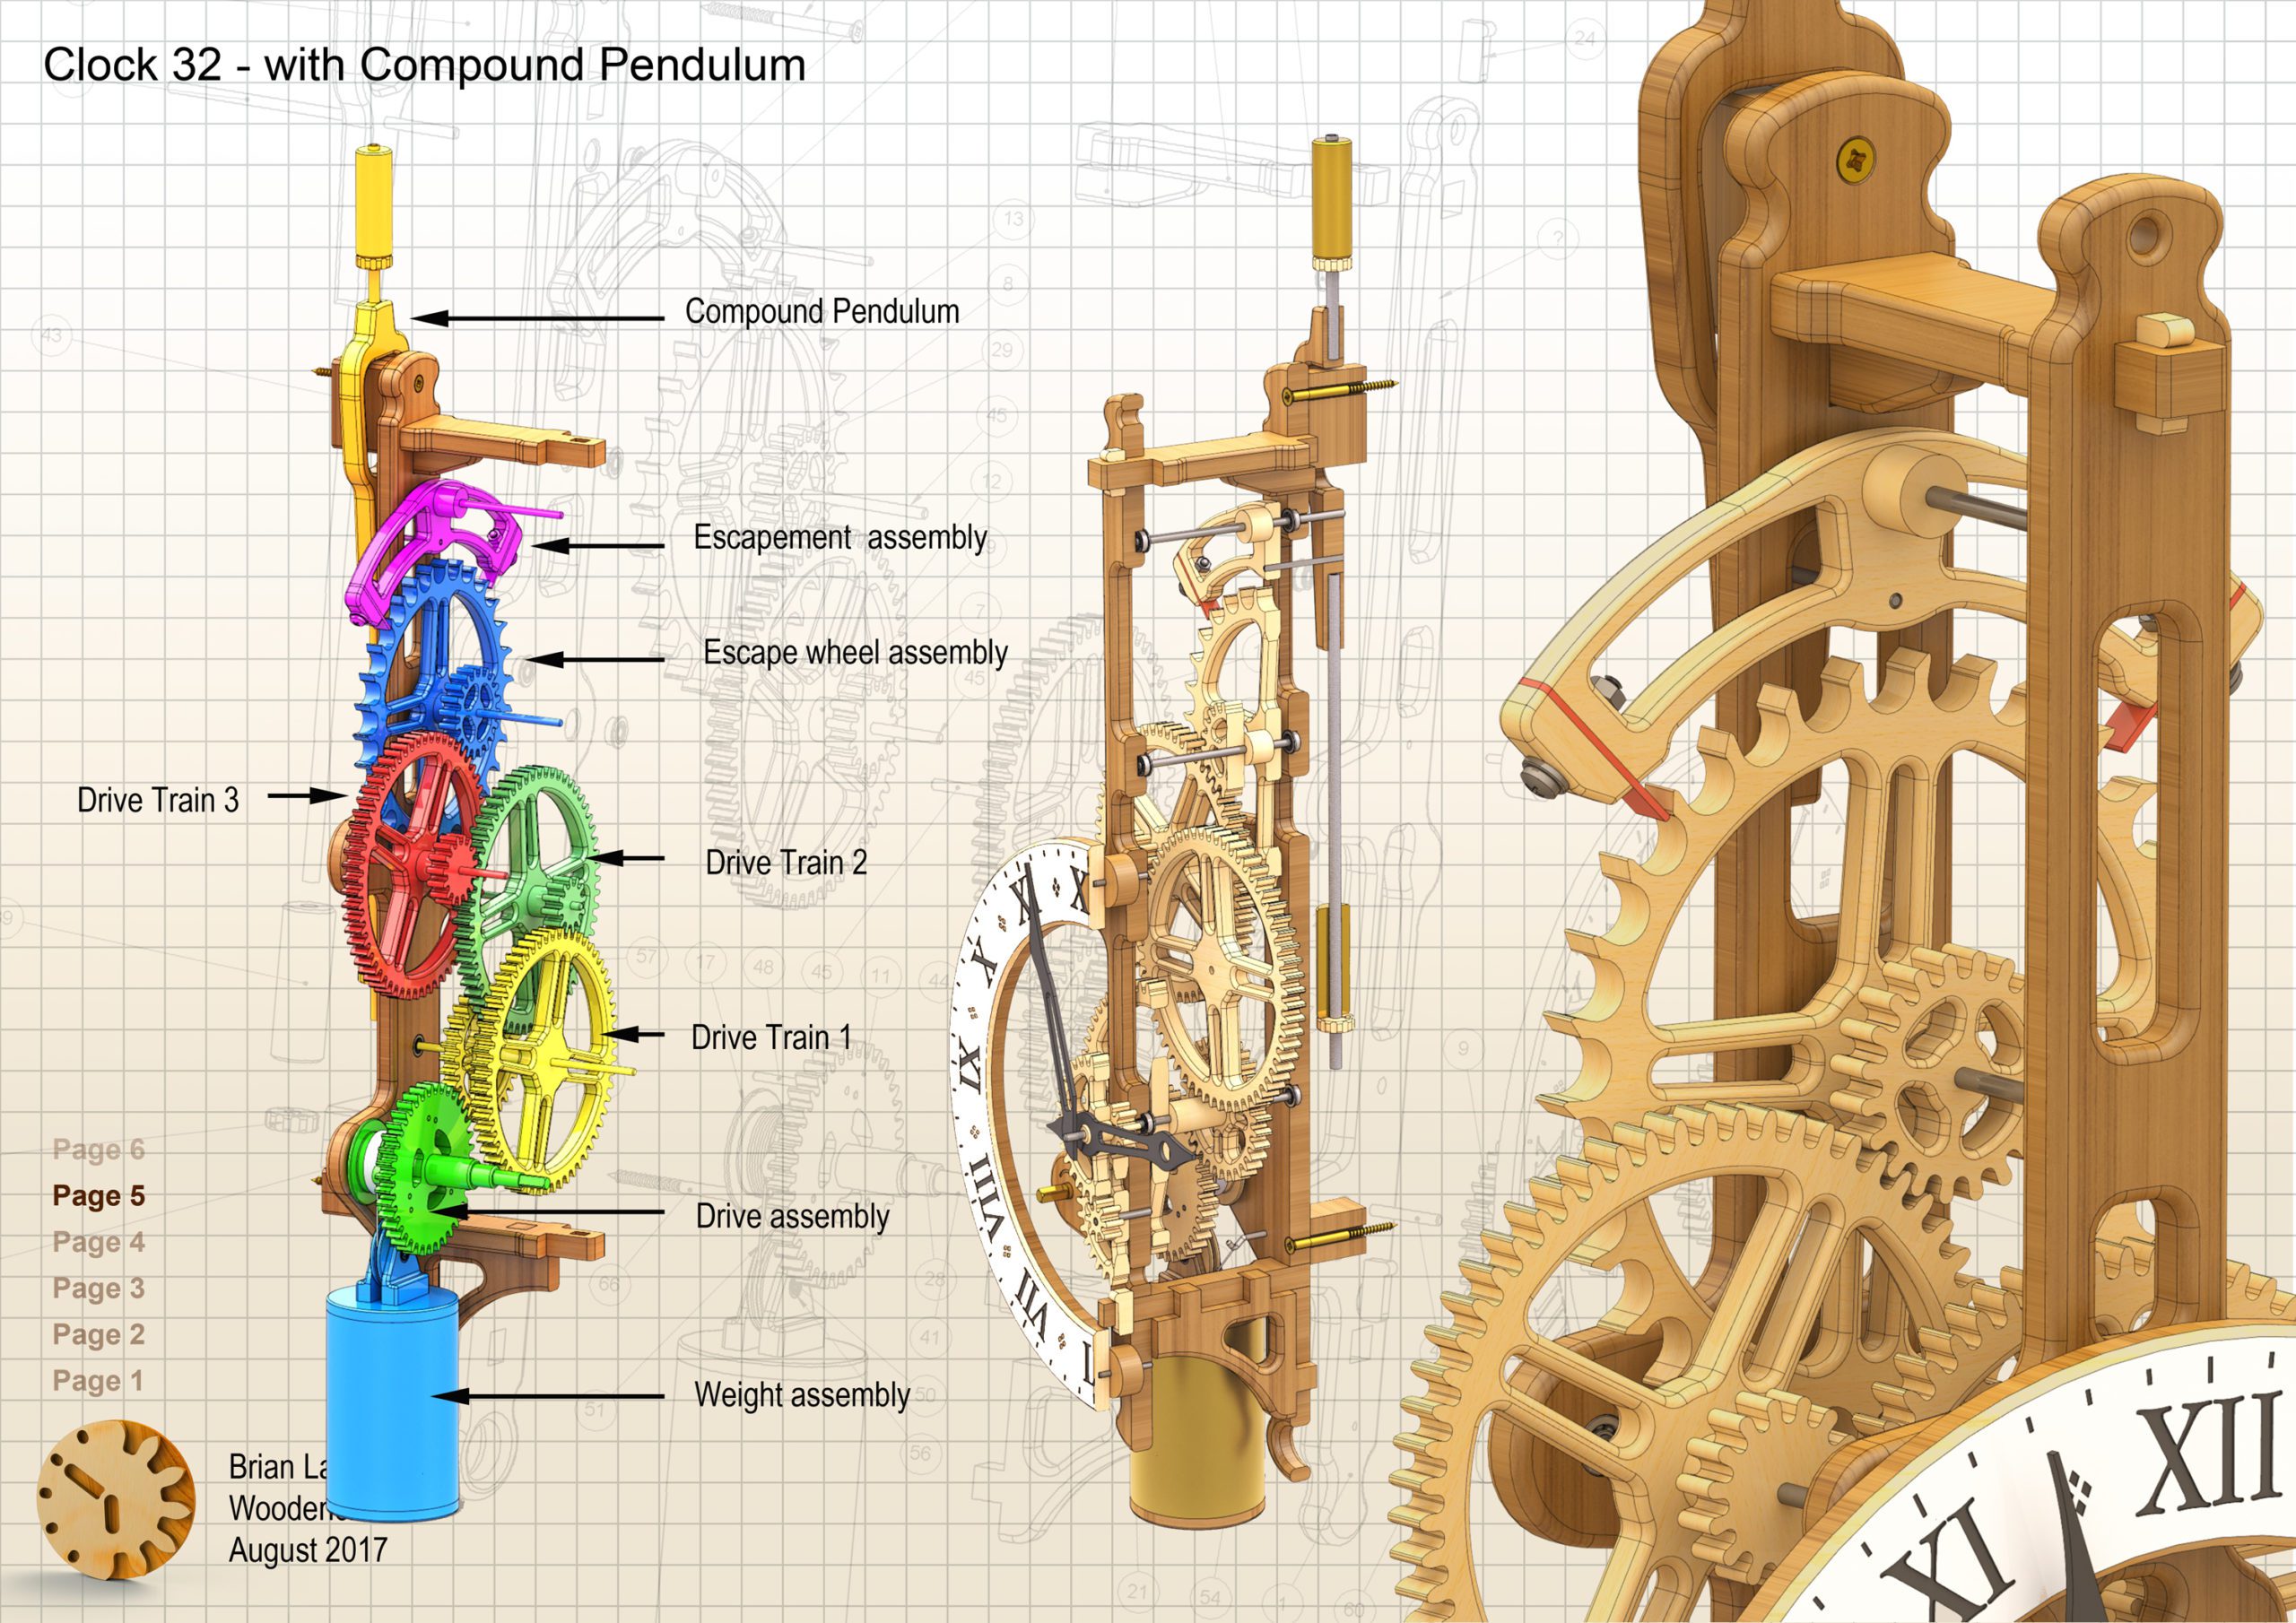
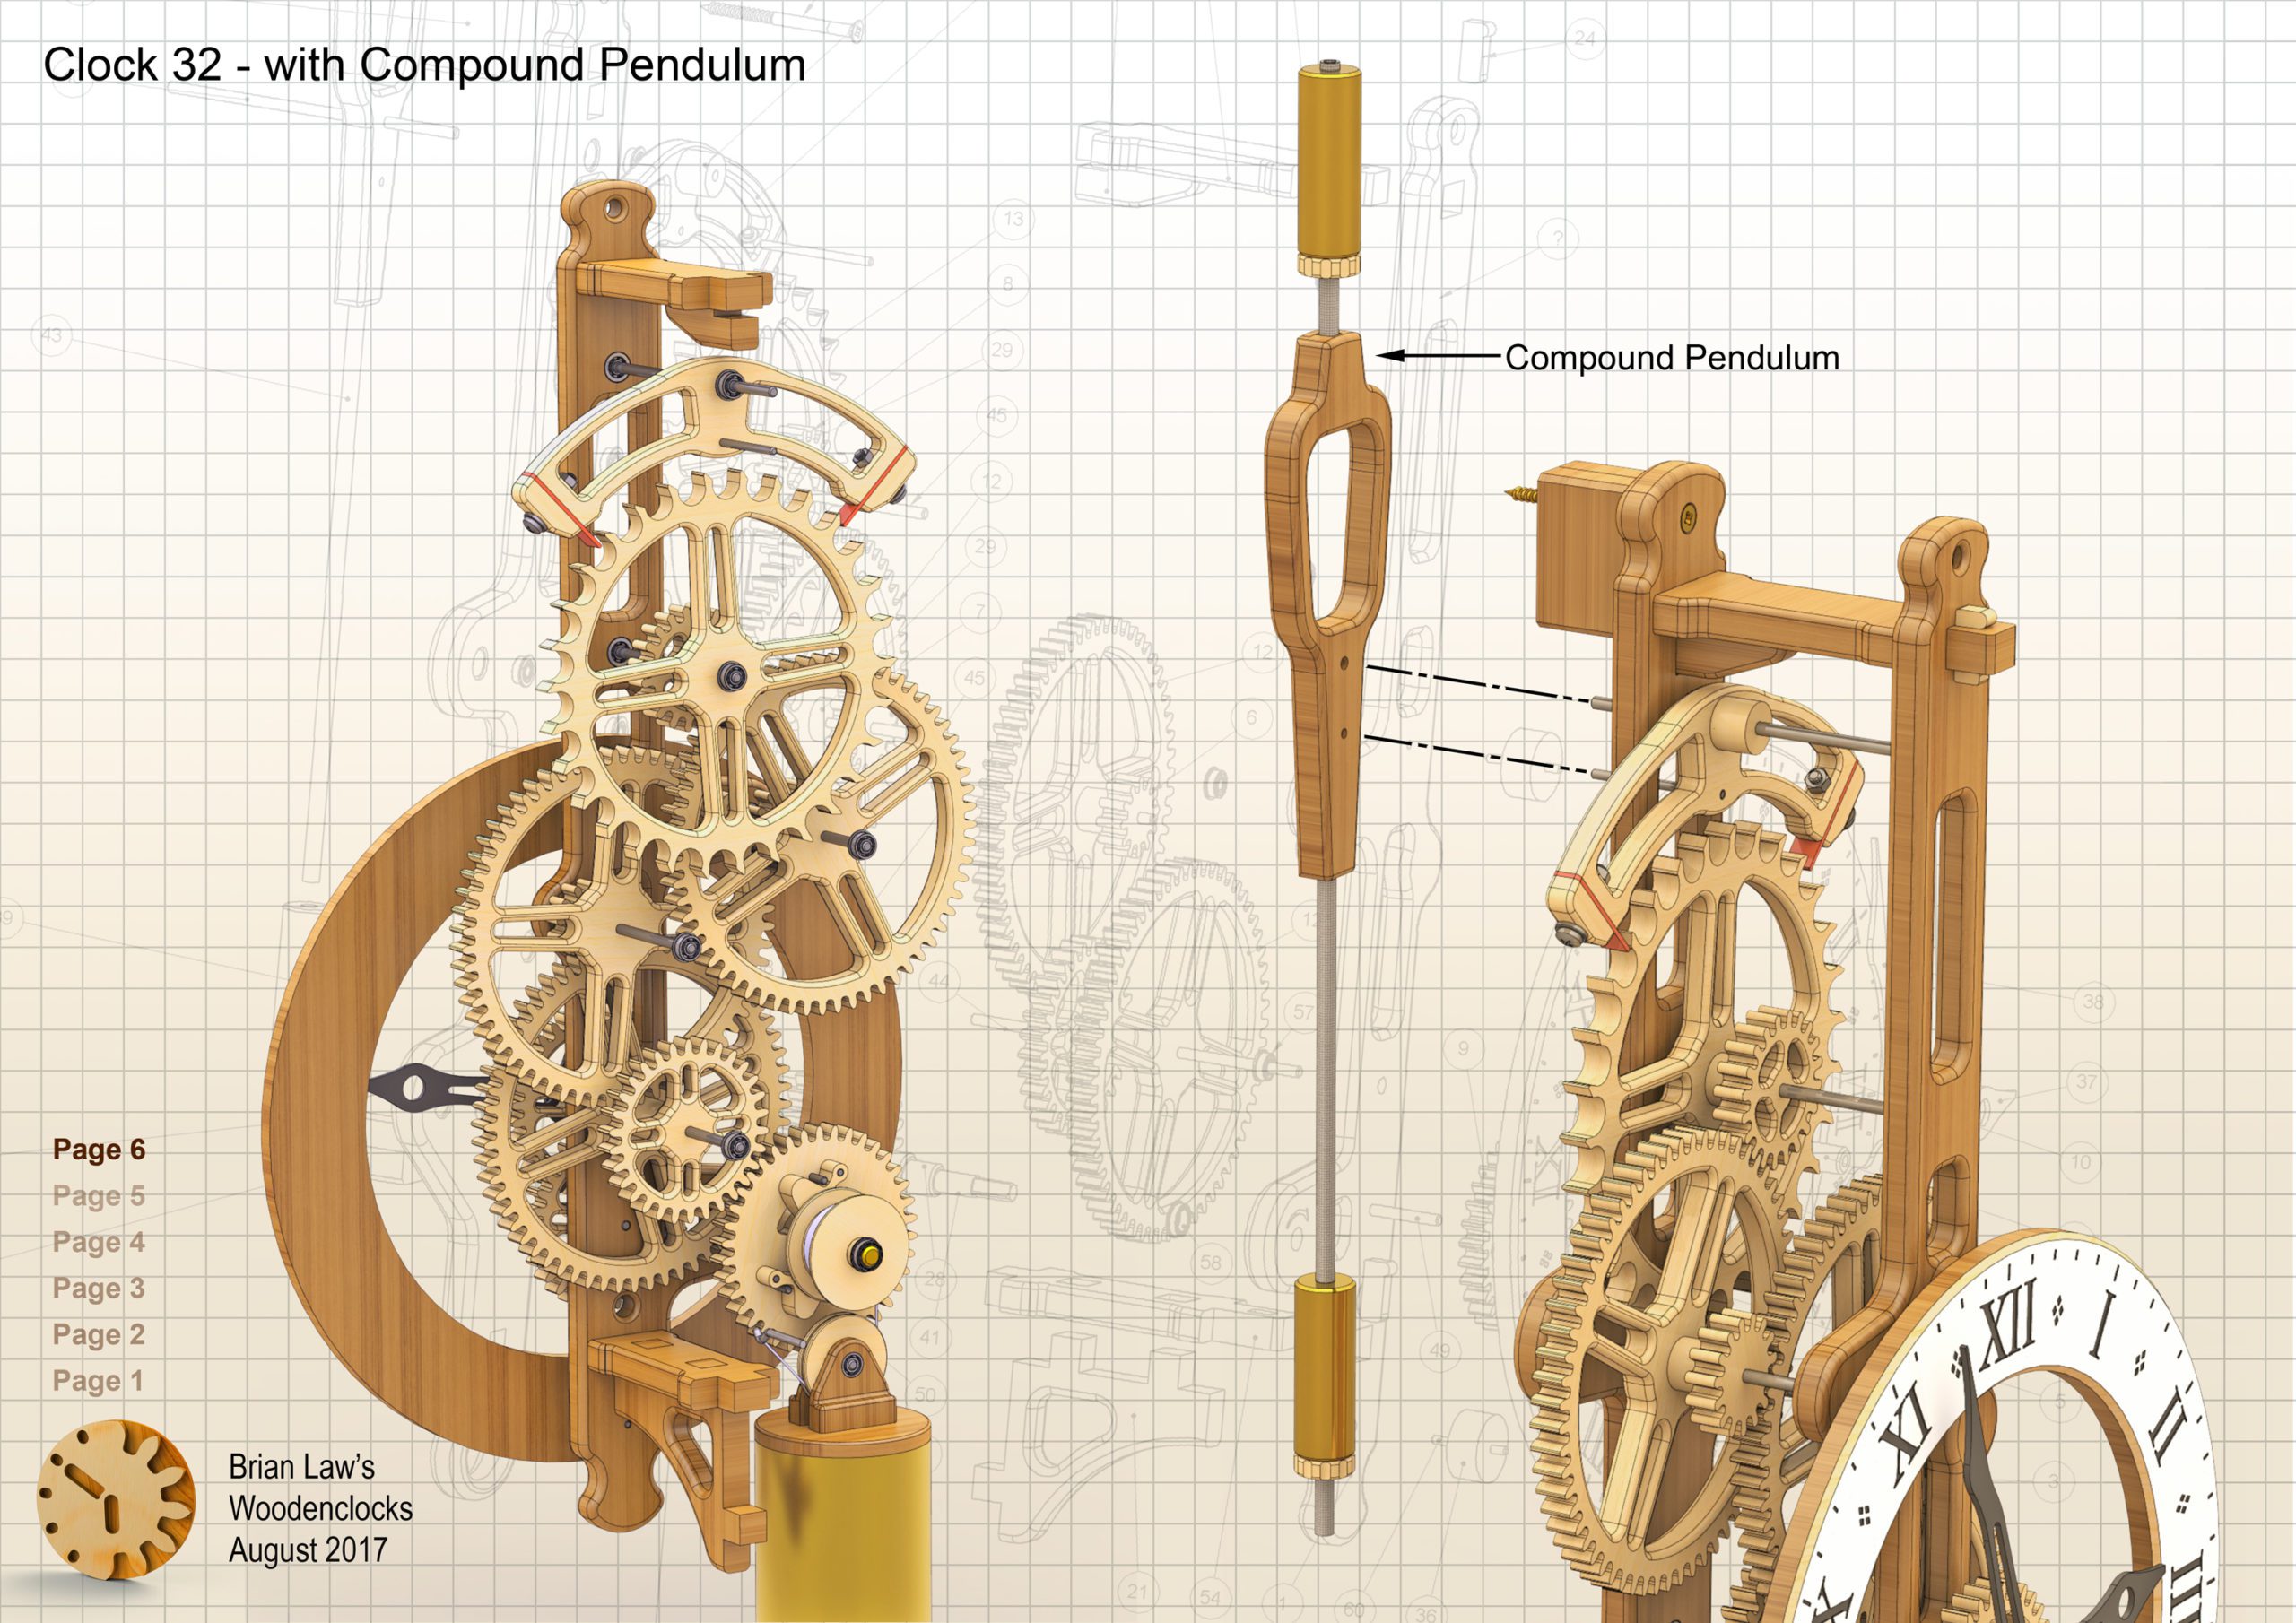
Clock 32, has been the first clock to have a Compound Pendulum incorporated into its design, it is a design that has Pendulum Bobs, one sat above the pivot and one sat below. The advantage of this is the overall length of the pendulum can be made much shorter and as here not hang below the Back Frame of the clock. The disadvantage is that it can be more difficult to adjust the running rate of the clock, because the adjustments have to be much smaller. I have used a construction with a centre wooden Pivot with Carbon Fibre rods extending above and below. The Pendulum Bobs are supported on Friction Rings that can be moved up and down to adjust the rate.This arrangement using light weight parts enables the Brass Pendulum Bobs to be fitted at the calculated positions leaving only small adjustment to be made to have the clock running accurately. An alternate solution would replace the Carbon Fibre Rods with Threaded Rod and have the Brass Pendulum Bobs threaded so more precise adjustments can be made. The prototype is mounted on the wall with the dial centre at 1500 mm from the floor and runs for just under 15 hours. I needed a weight of 600 grams to keep it going.If fitted with the Pulley arrangement shown on the drawing then you can double that running time to 30 hours but you will need to double the weight.
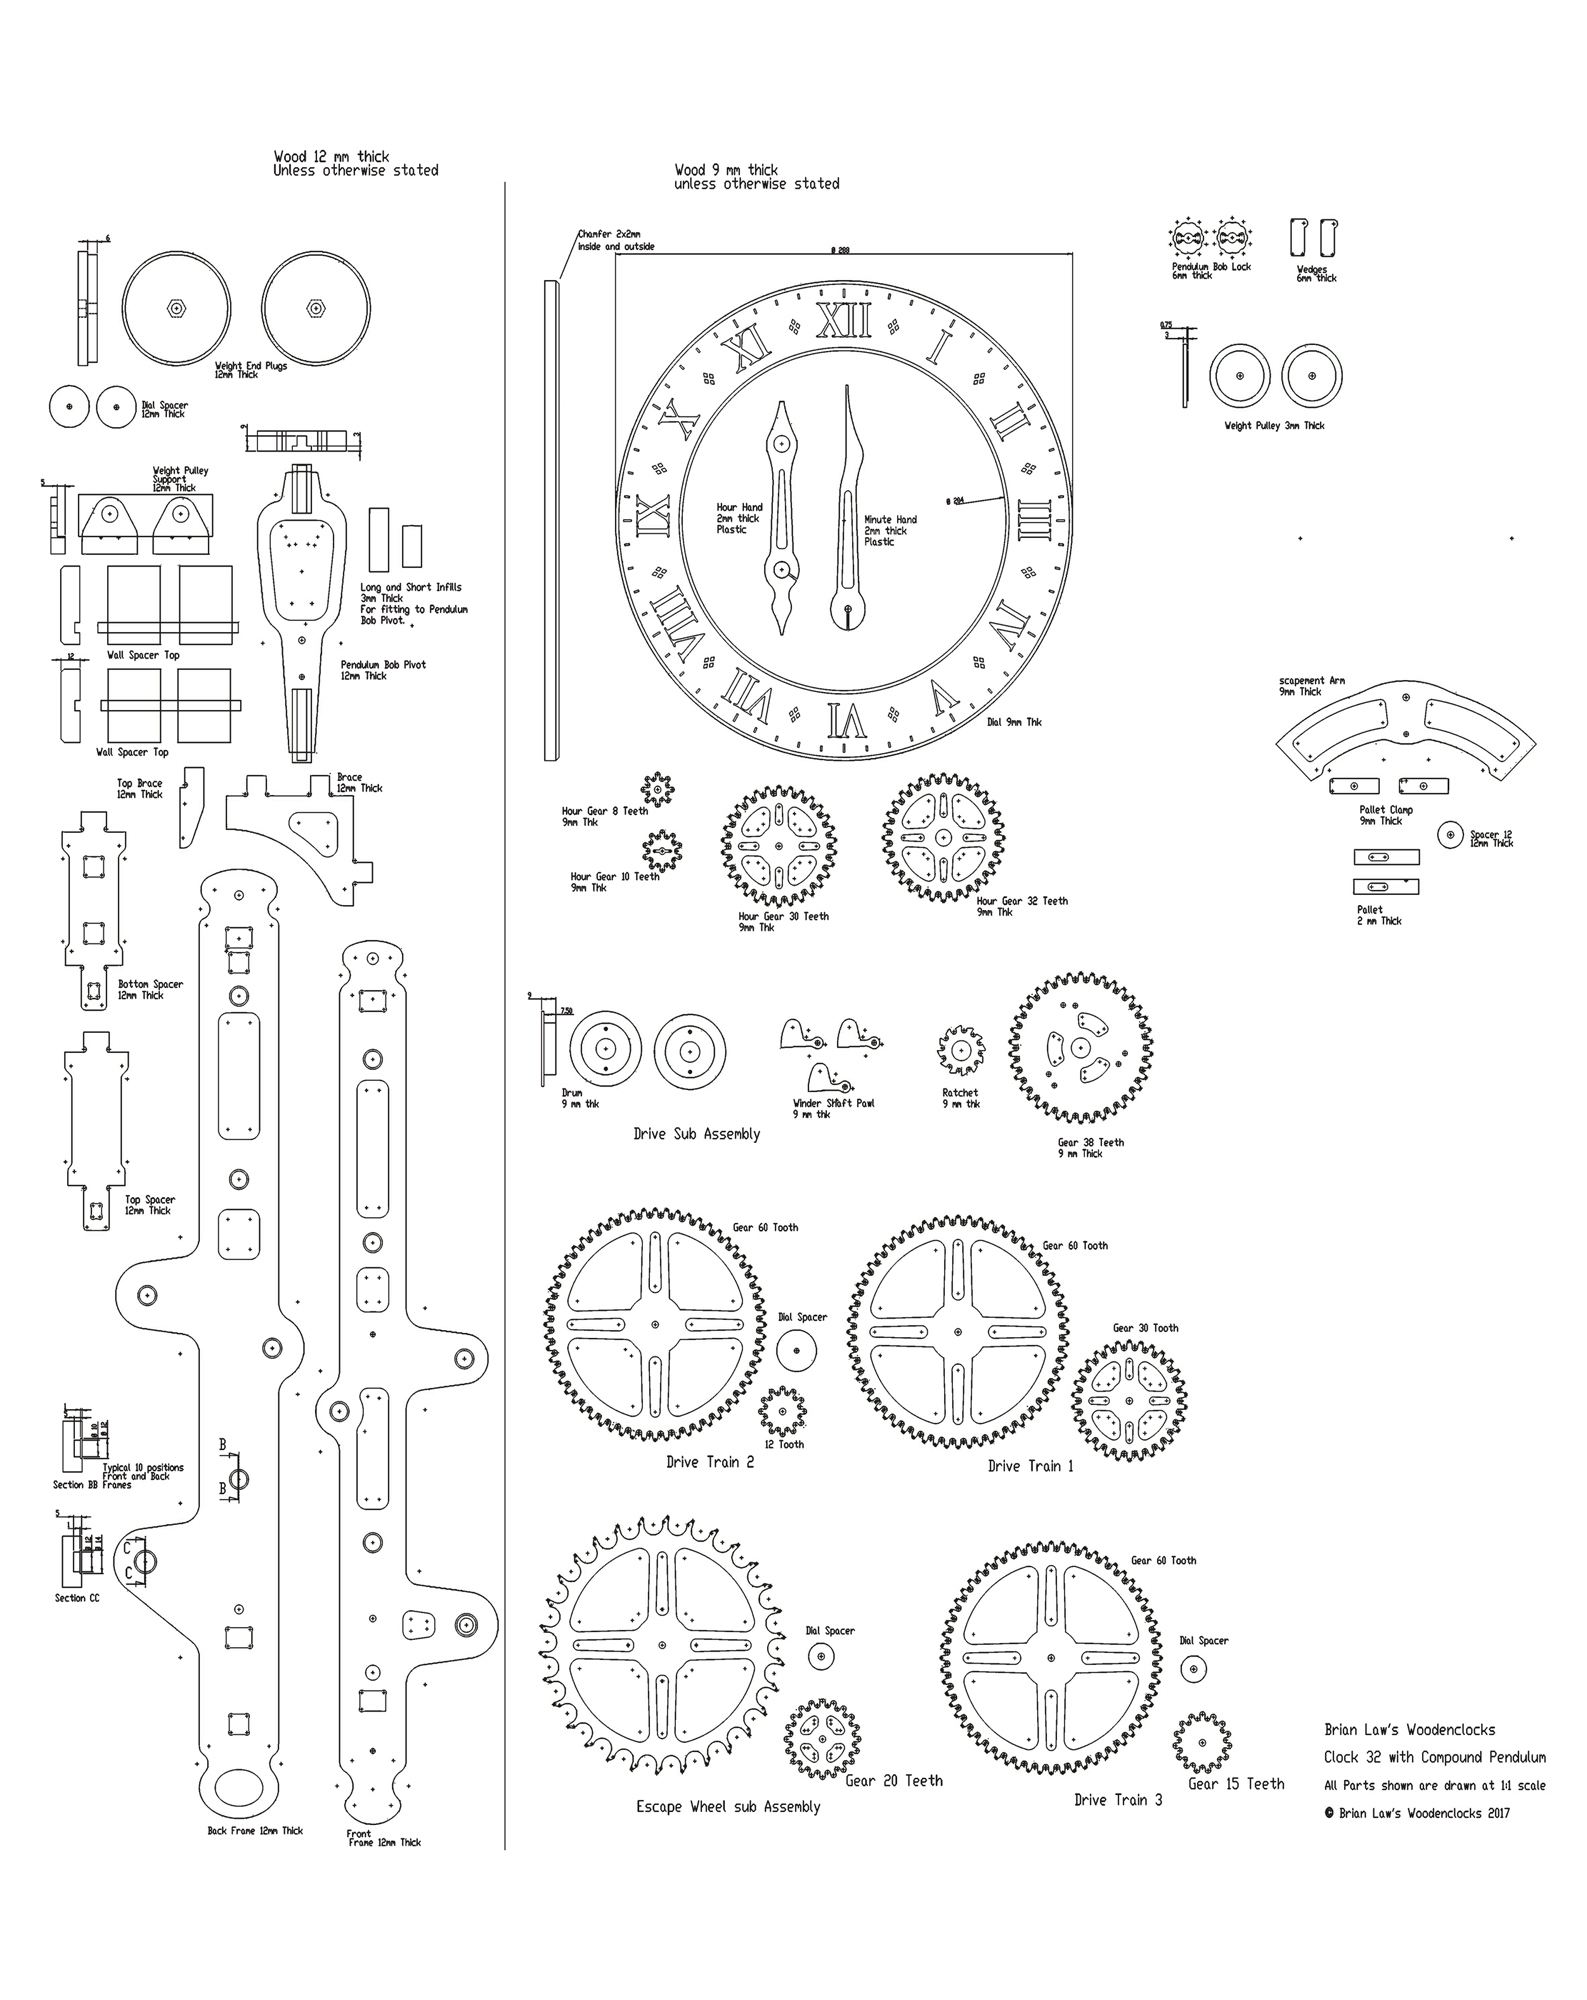
If you want to cut out parts on a scroll saw you can use the the PDF file included with the purchased downloads to do this. This PDF is one big sheet of all the parts so you will need to follow the PDF printing instructions below.
DXF files, and the IGS and STP files that can be used with your CNC machine can be downloaded here for $26. You also get the unrestricted version of the PDF files that can be printed at full size.
Drawings for this clock in PDF format can be downloaded here. These free files are low resolution and not to scale and only a sample of the full set that comes in the paid for version. Clicking here will download the PDF file directly to your browser, may take a few moments so please be patient.
Details of the materials and equipment needed to build this clock, along with Hints and Tips.
Instructions for assembling the clock components.
A sample from the DXF file – the file is purposely low resolution, with no vector data. The actual files purchased above are included on one large sheet so that they may be directly loaded into your CAM program.
To print only a single item of the drawing to scale using Adobe Acrobat Reader, do the following:
Go to Edit, then click on Take a snapshot, move the cursor to the top left of the item you want to print and hold down the left mouse button whilst you drag a box around the item. The inside of the box turns blue and you can now go to File and then click on Print. This brings up the print dialogue, make sure Selected graphic is selected and that the Page scaling is set to None and the click on OK. As long as your printer is connected you will have printed the item at size. Do this for each item you want to cut out.