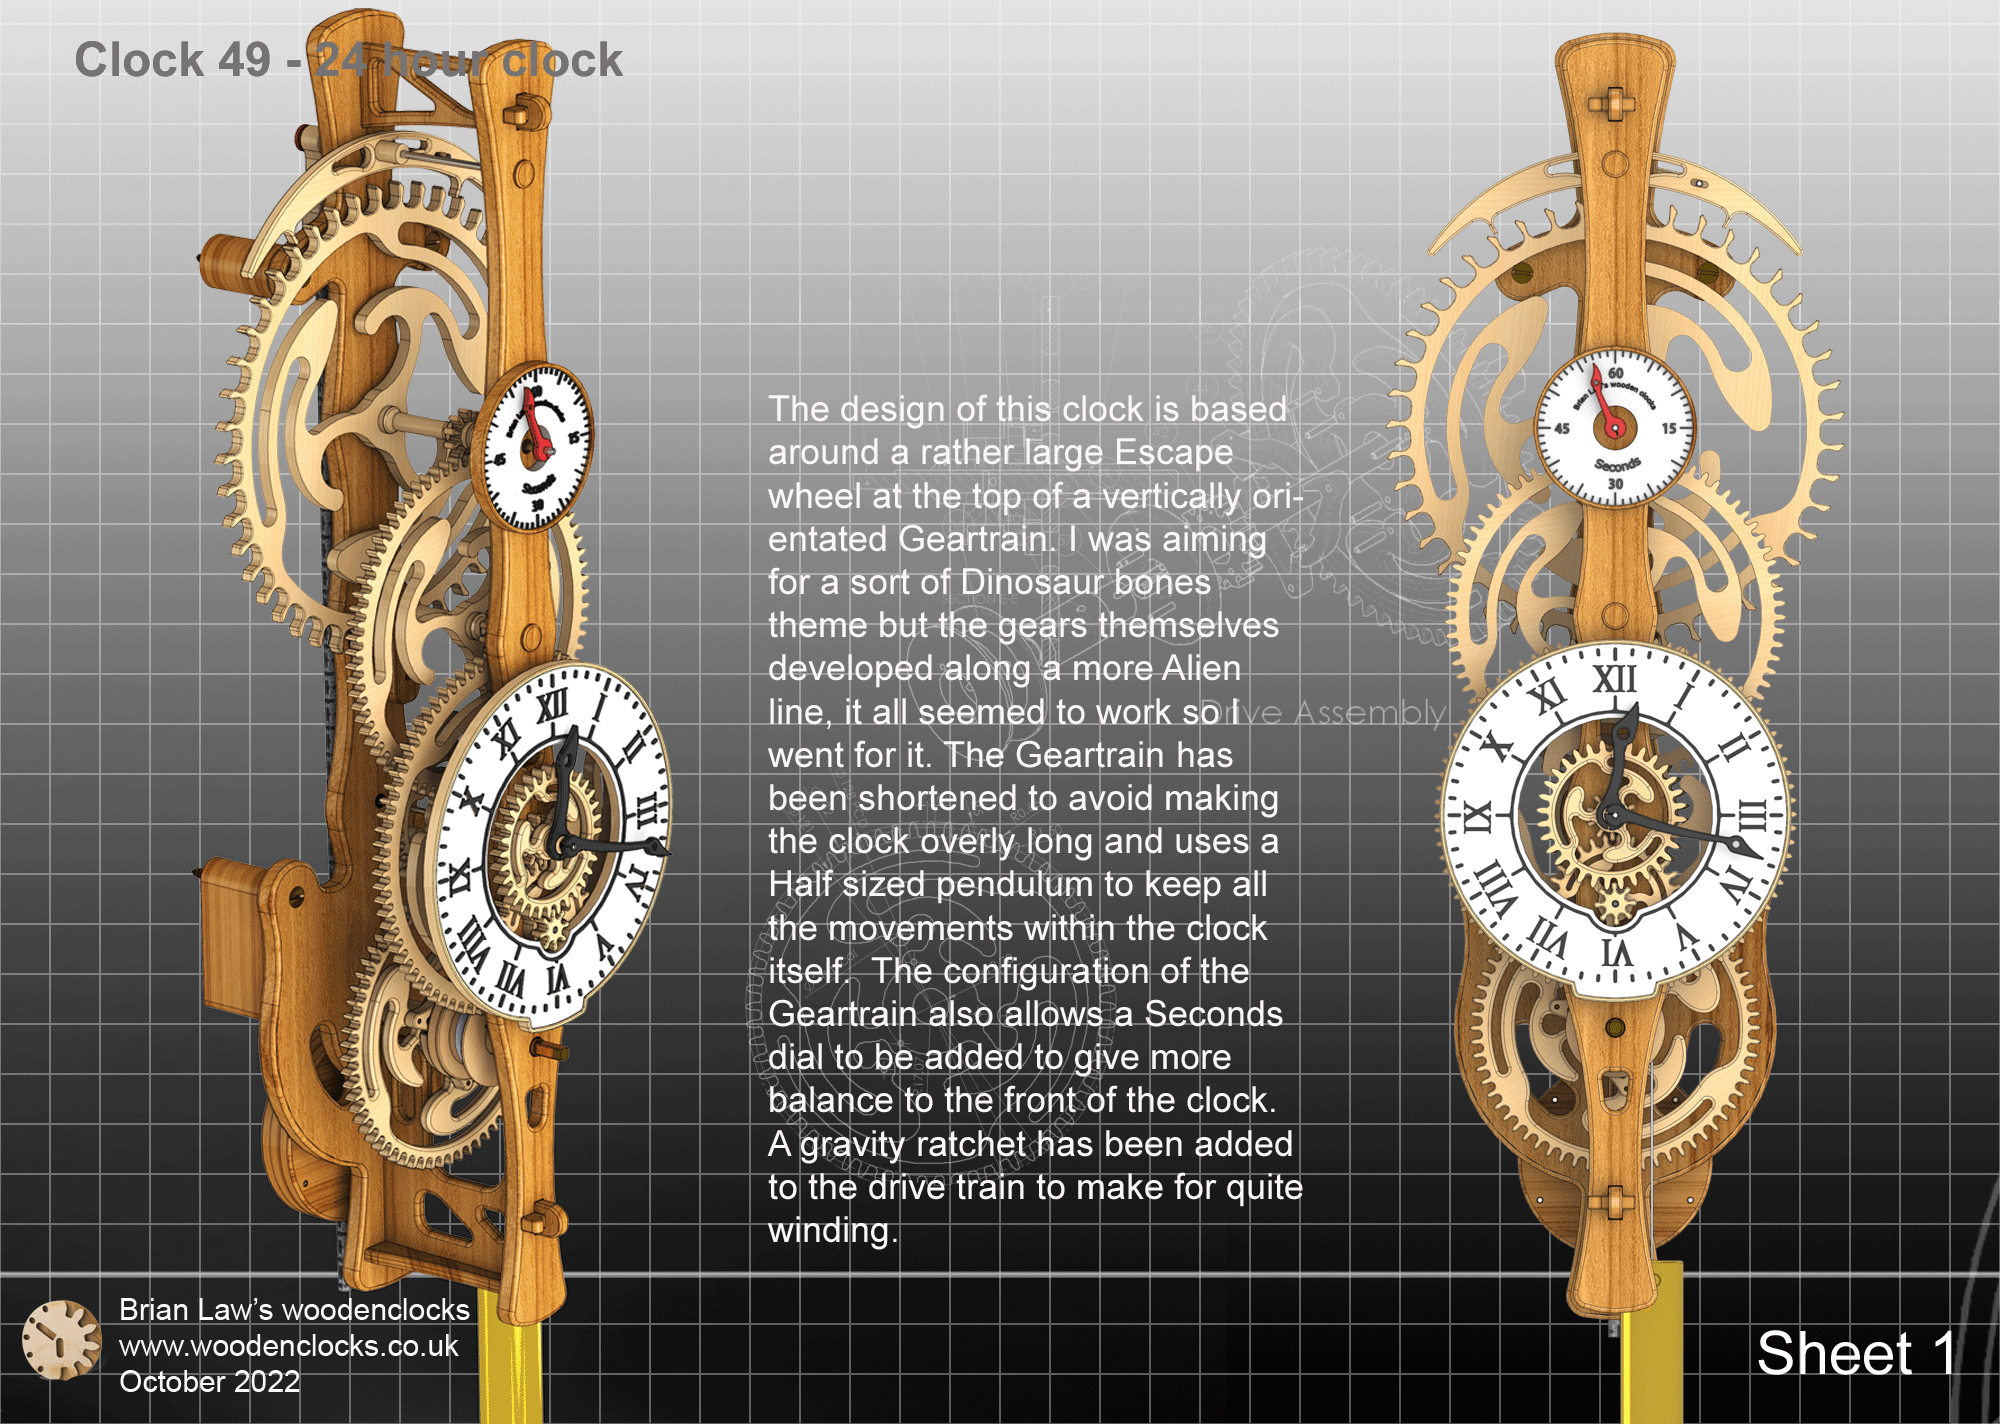
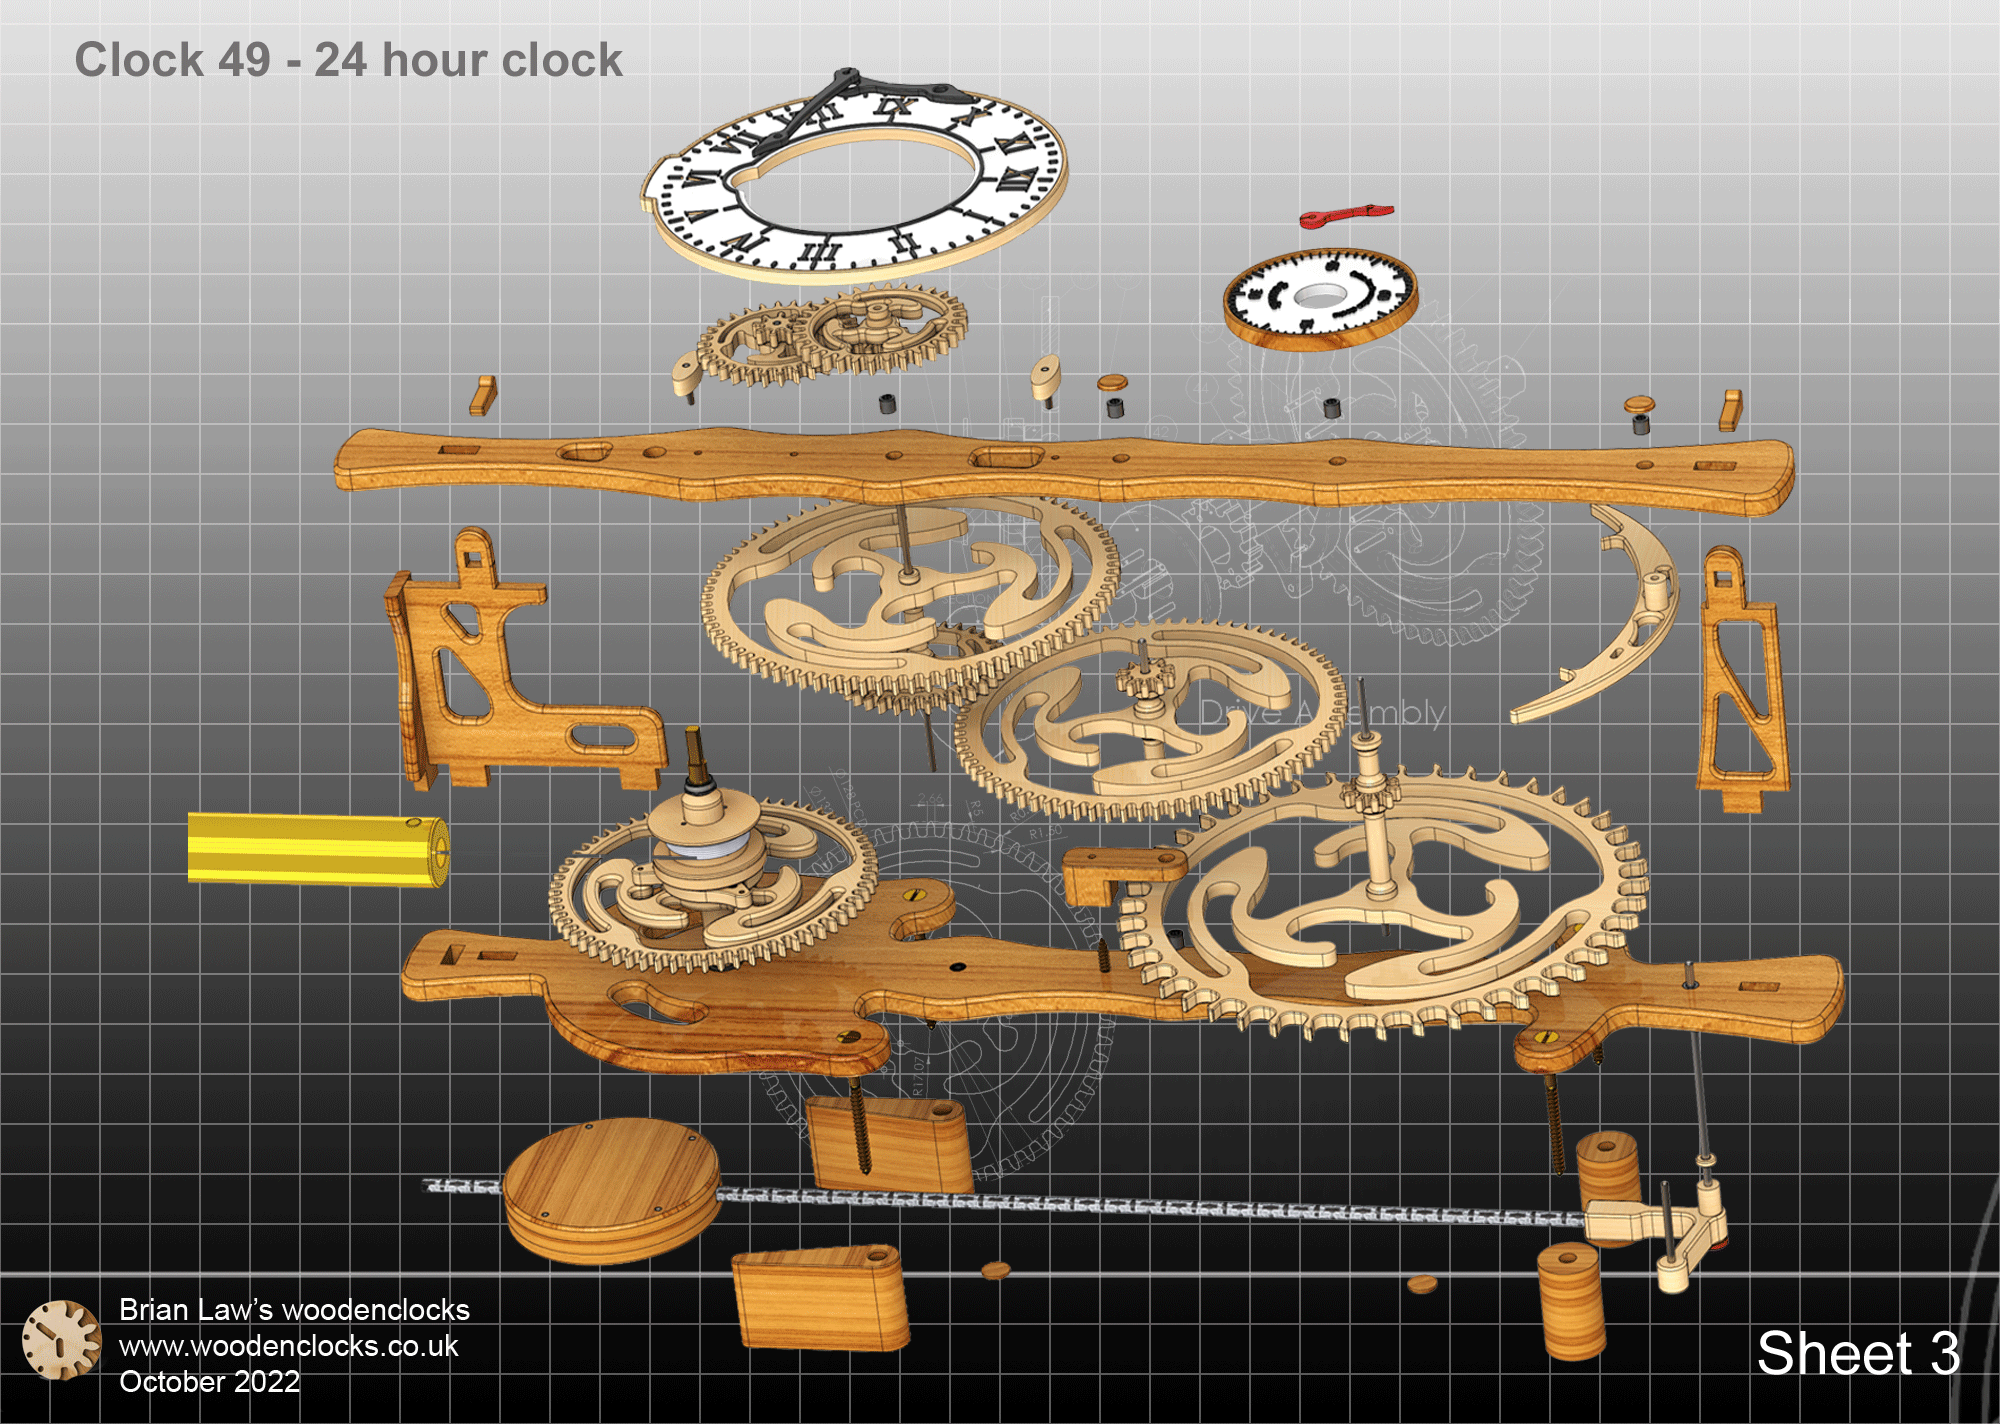
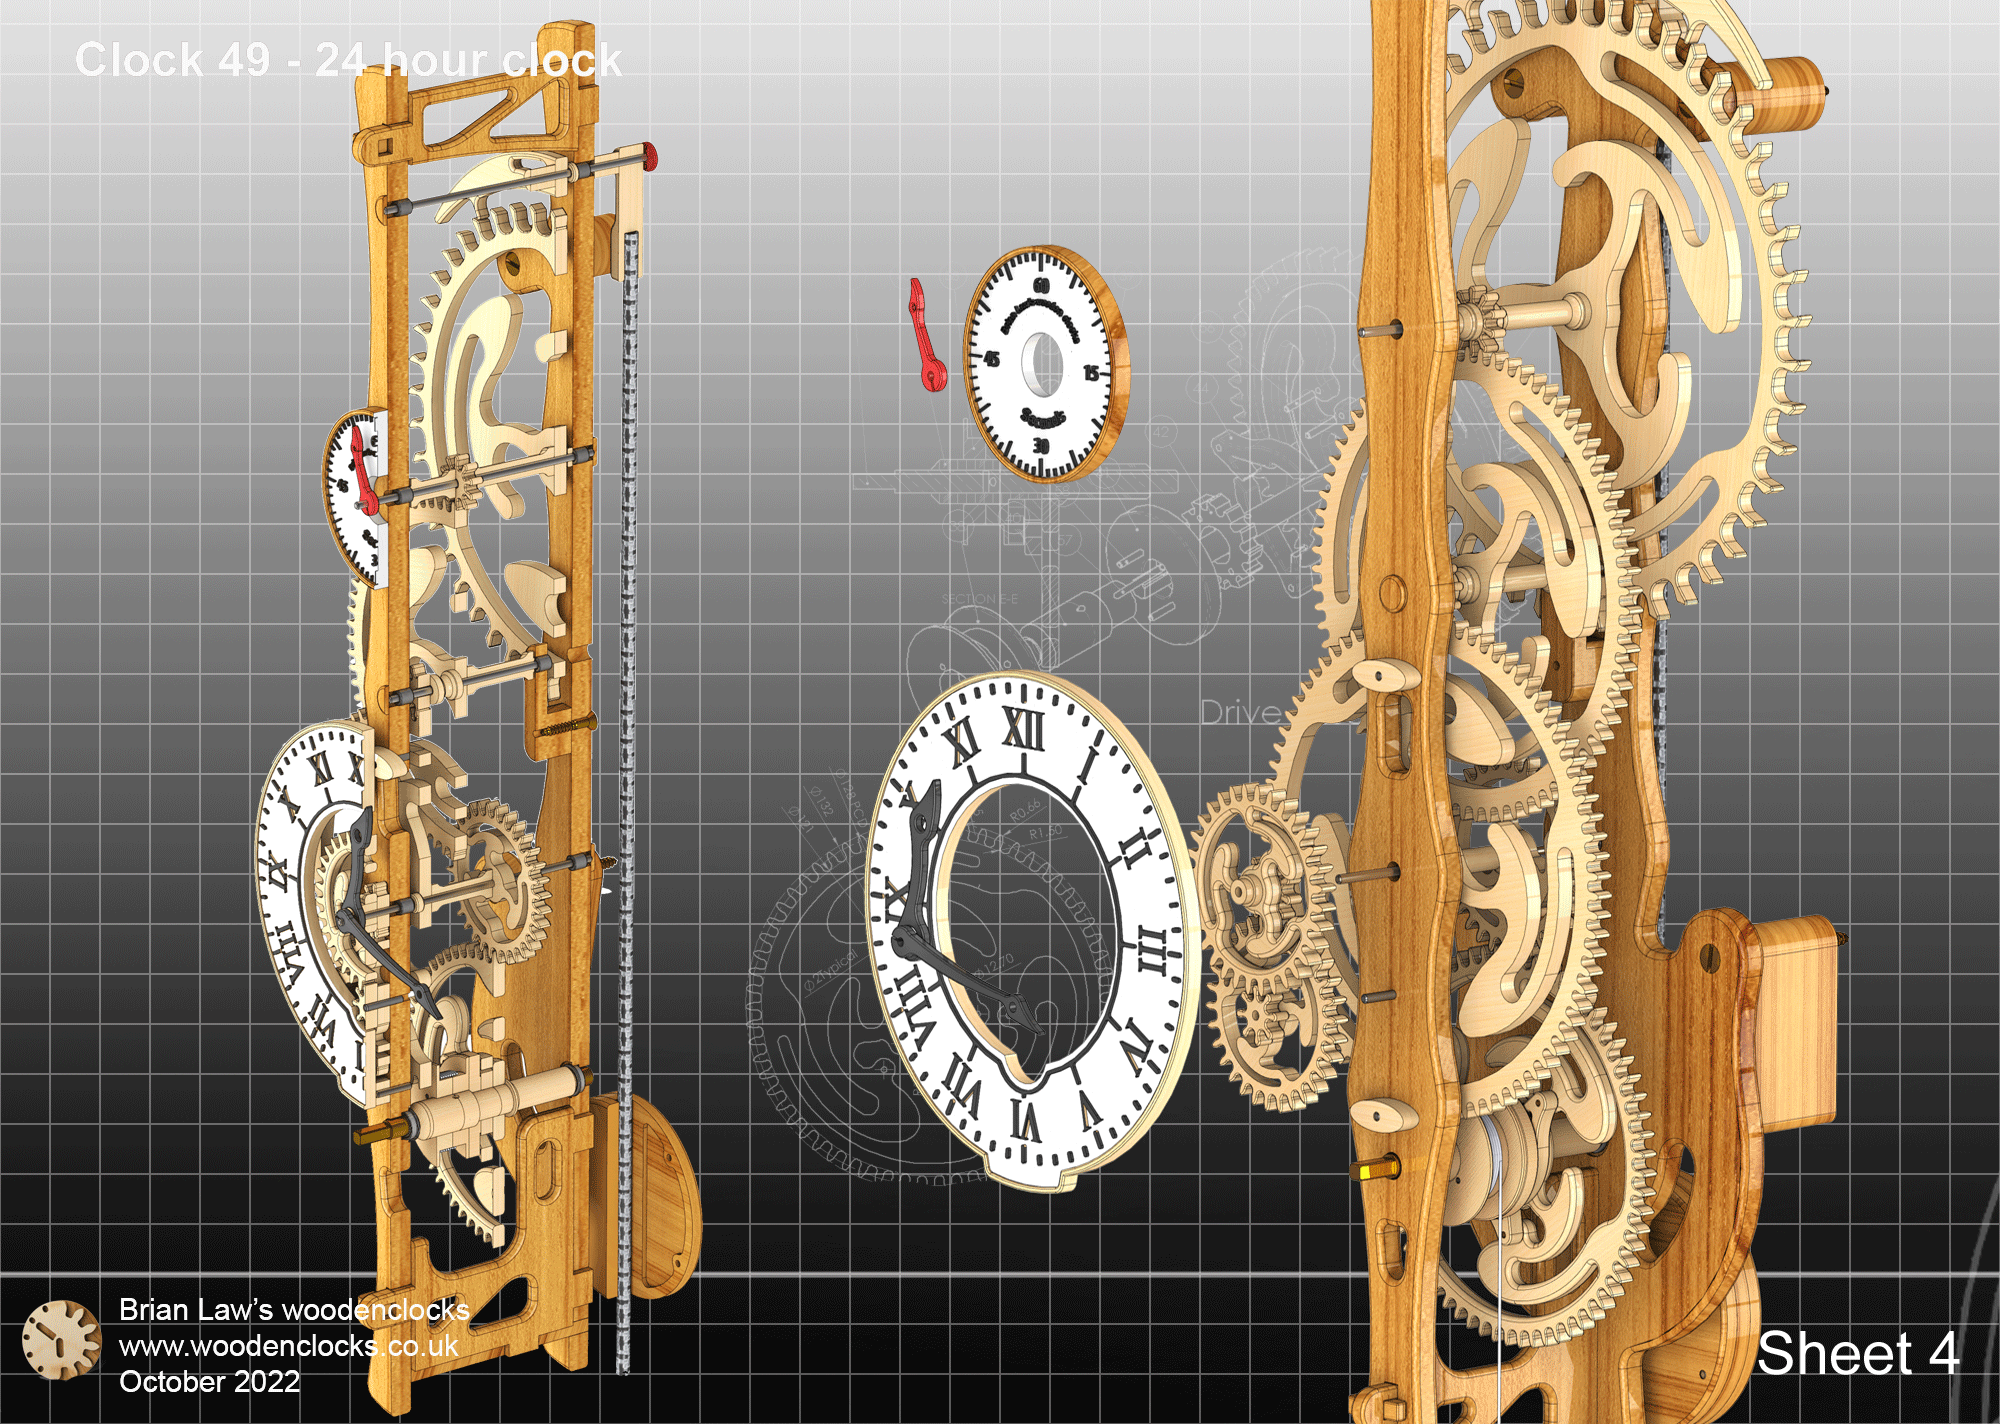
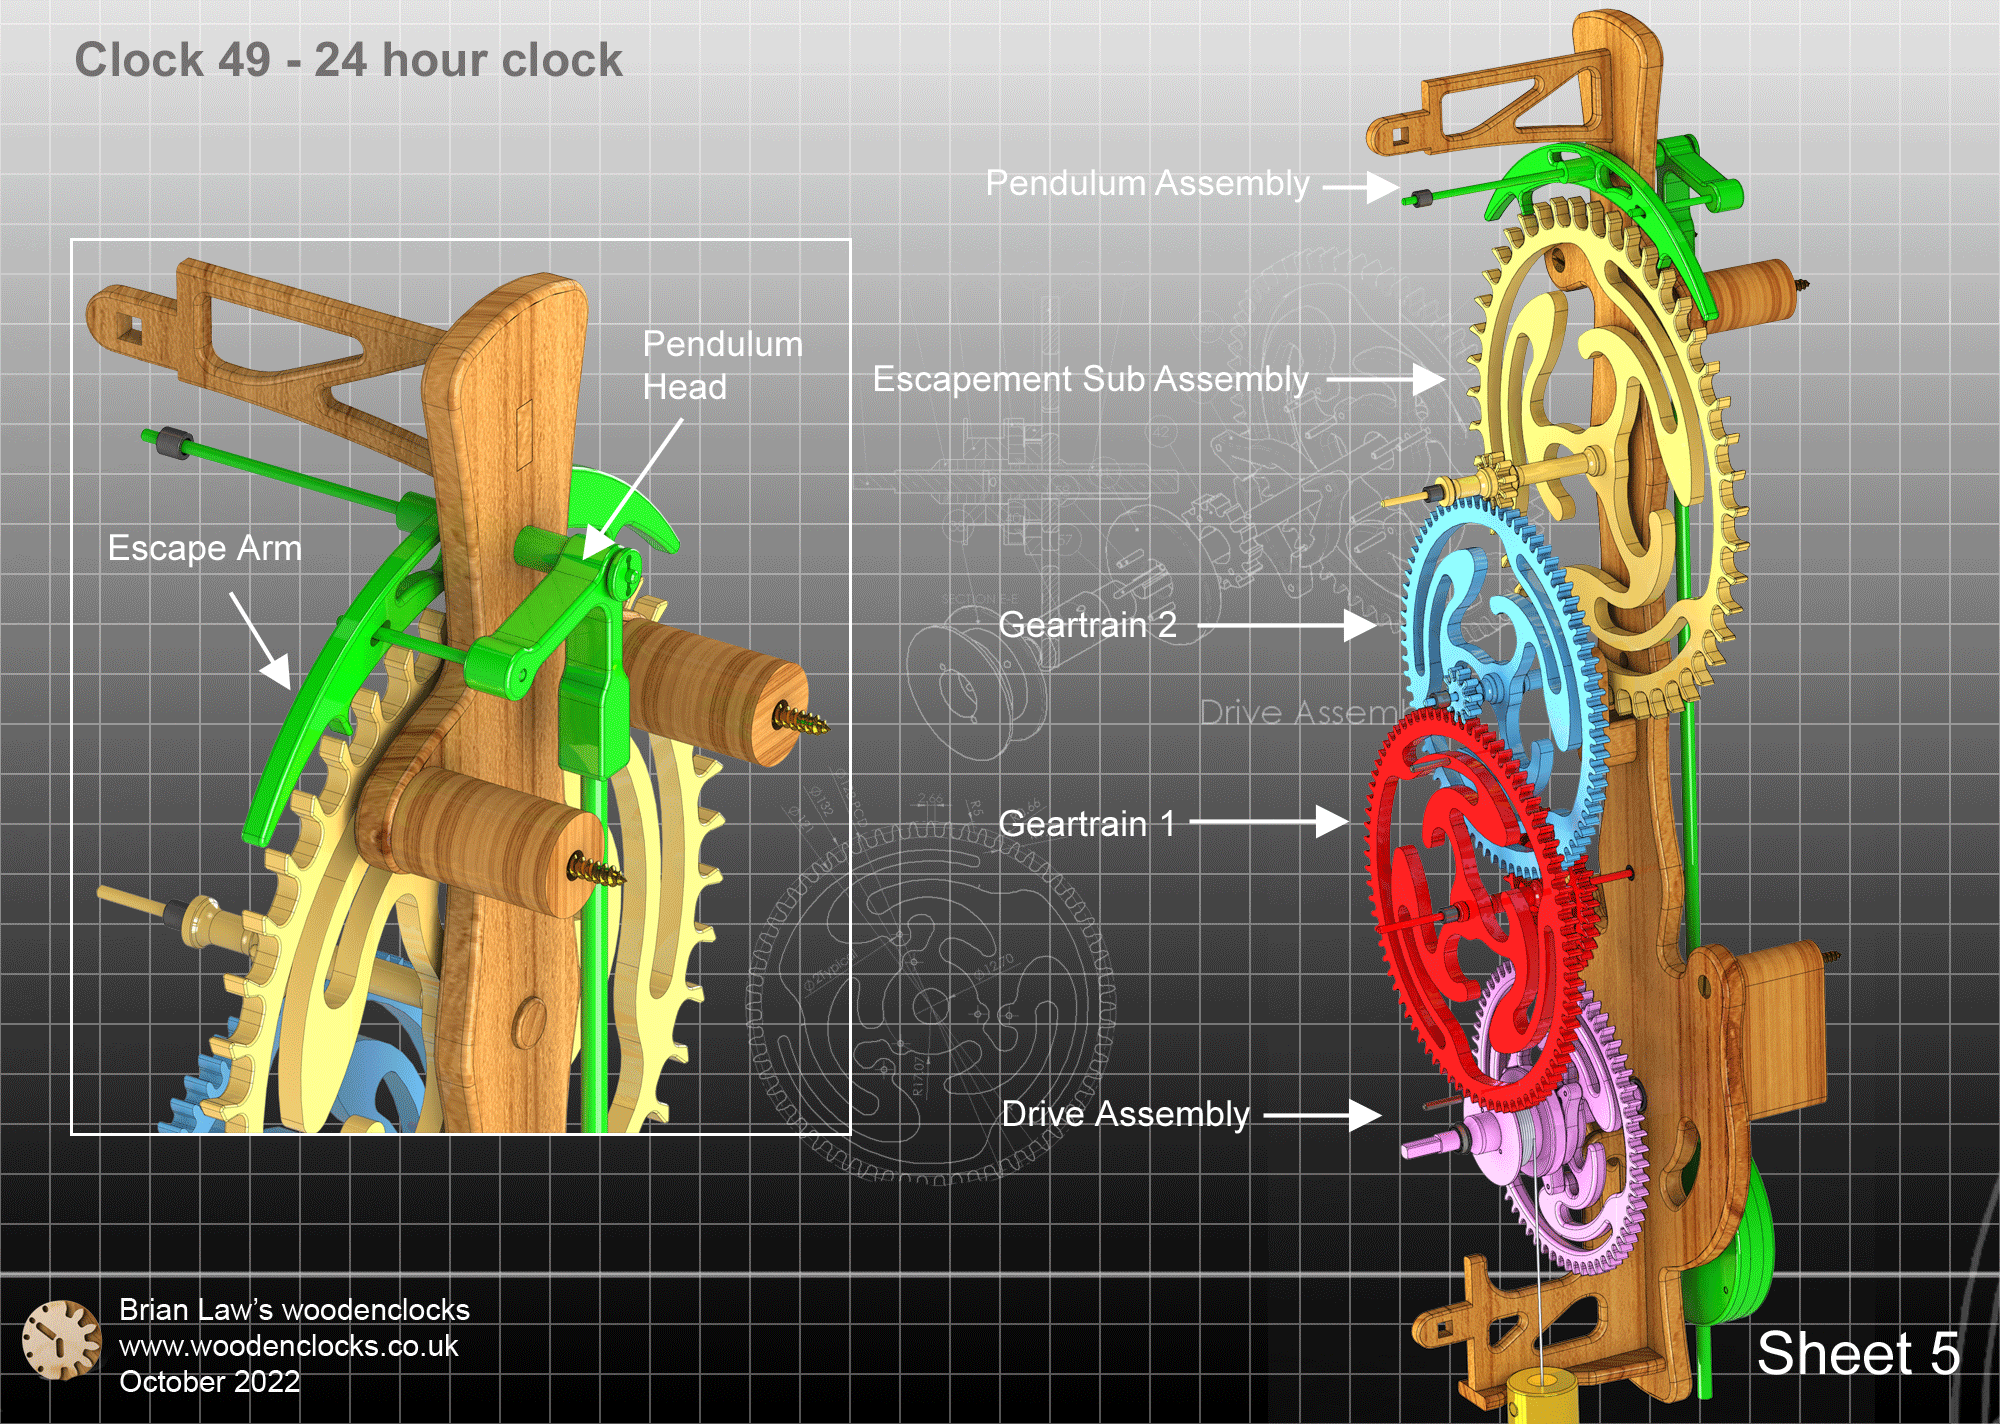
The design of this clock is based around a rather large Escape wheel at the top of a vertically orientated Geartrain. I was aiming for a sort of Dinosaur bones theme but the gears themselves developed along a more Alien line, it all seemed to work so I went for it. The Geartrain has been shortened to avoid making the clock overly long and uses a Half sized pendulum to keep all the movements within the clock itself. The configuration of the Geartrain also allows a Seconds dial to be added to give more balance to the front of the clock.
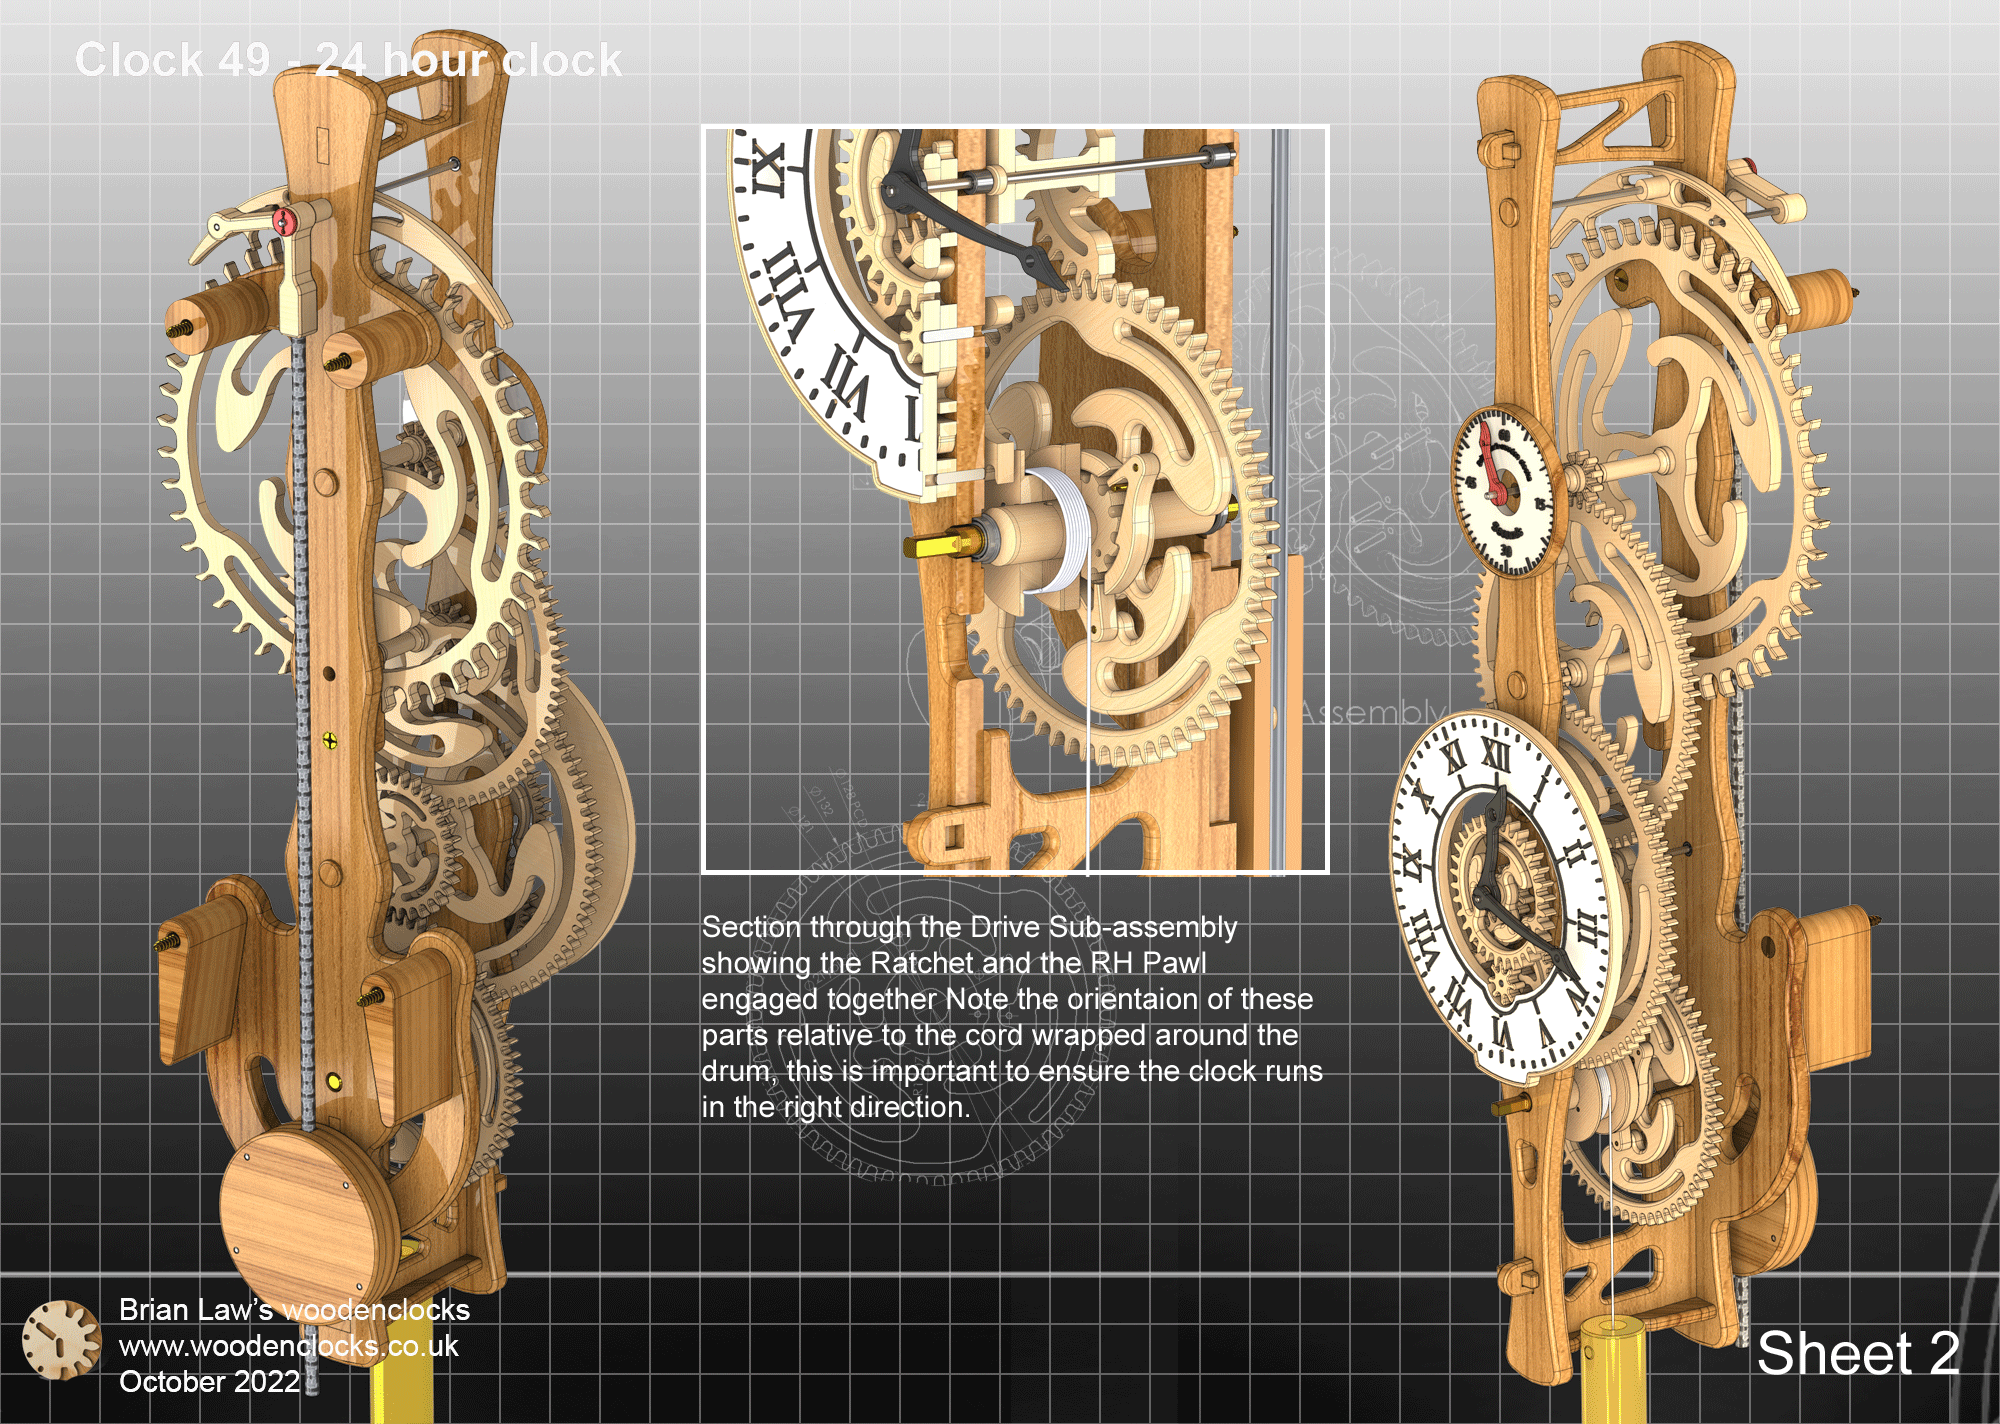
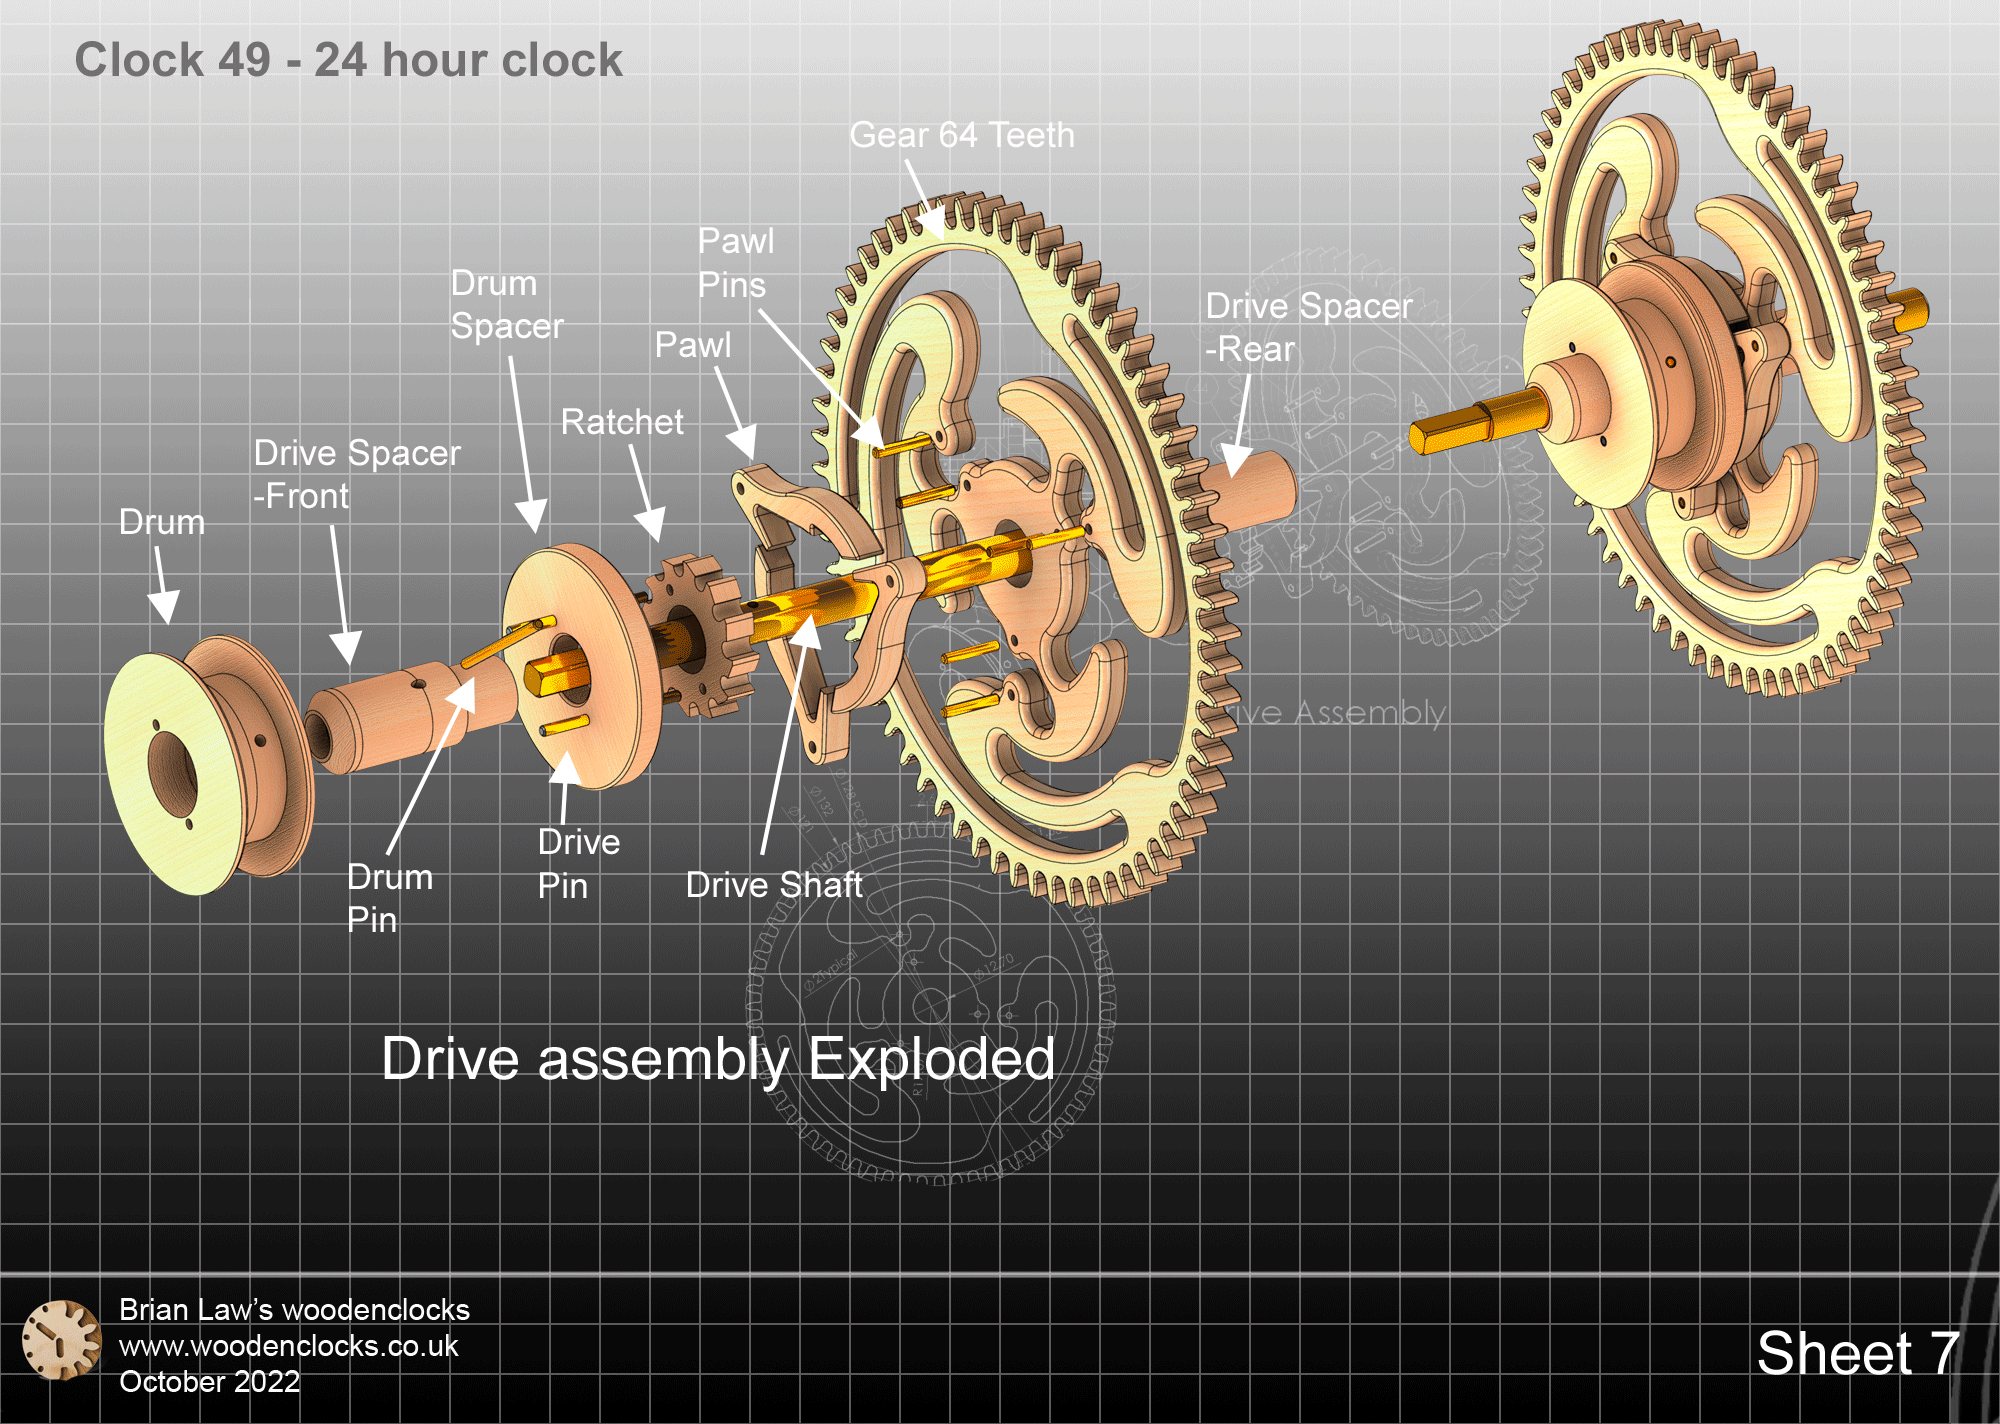
A gravity ratchet has been added to the drive train to make for quite winding.
DXF files, and the STP and STL files that can be used with your CNC machine and 3D printer can be downloaded here for $26. You also get the unrestricted version of the PDF files that can be printed at full size and in this clock only the STL files if you need them.
Drawings for this clock in PDF format can be downloaded here. These free files are low resolution and not to scale and only a sample of the full set that comes in the paid for version. Clicking here will download the PDF file directly to your browser, may take a few moments so please be patient.
A sample from the DXF file – the file is purposely low resolution, with no vector data. The actual files purchased above are included on one large sheet so that they may be directly loaded into your CAM program.
To print only a single item of the drawing to scale using Adobe Acrobat Reader, do the following:
Go to Edit, then click on Take a snapshot, move the cursor to the top left of the item you want to print and hold down the left mouse button whilst you drag a box around the item. The inside of the box turns blue and you can now go to File and then click on Print. This brings up the print dialogue, make sure Selected graphic is selected and that the Page scaling is set to None and the click on OK. As long as your printer is connected you will have printed the item at size. Do this for each item you want to cut out.