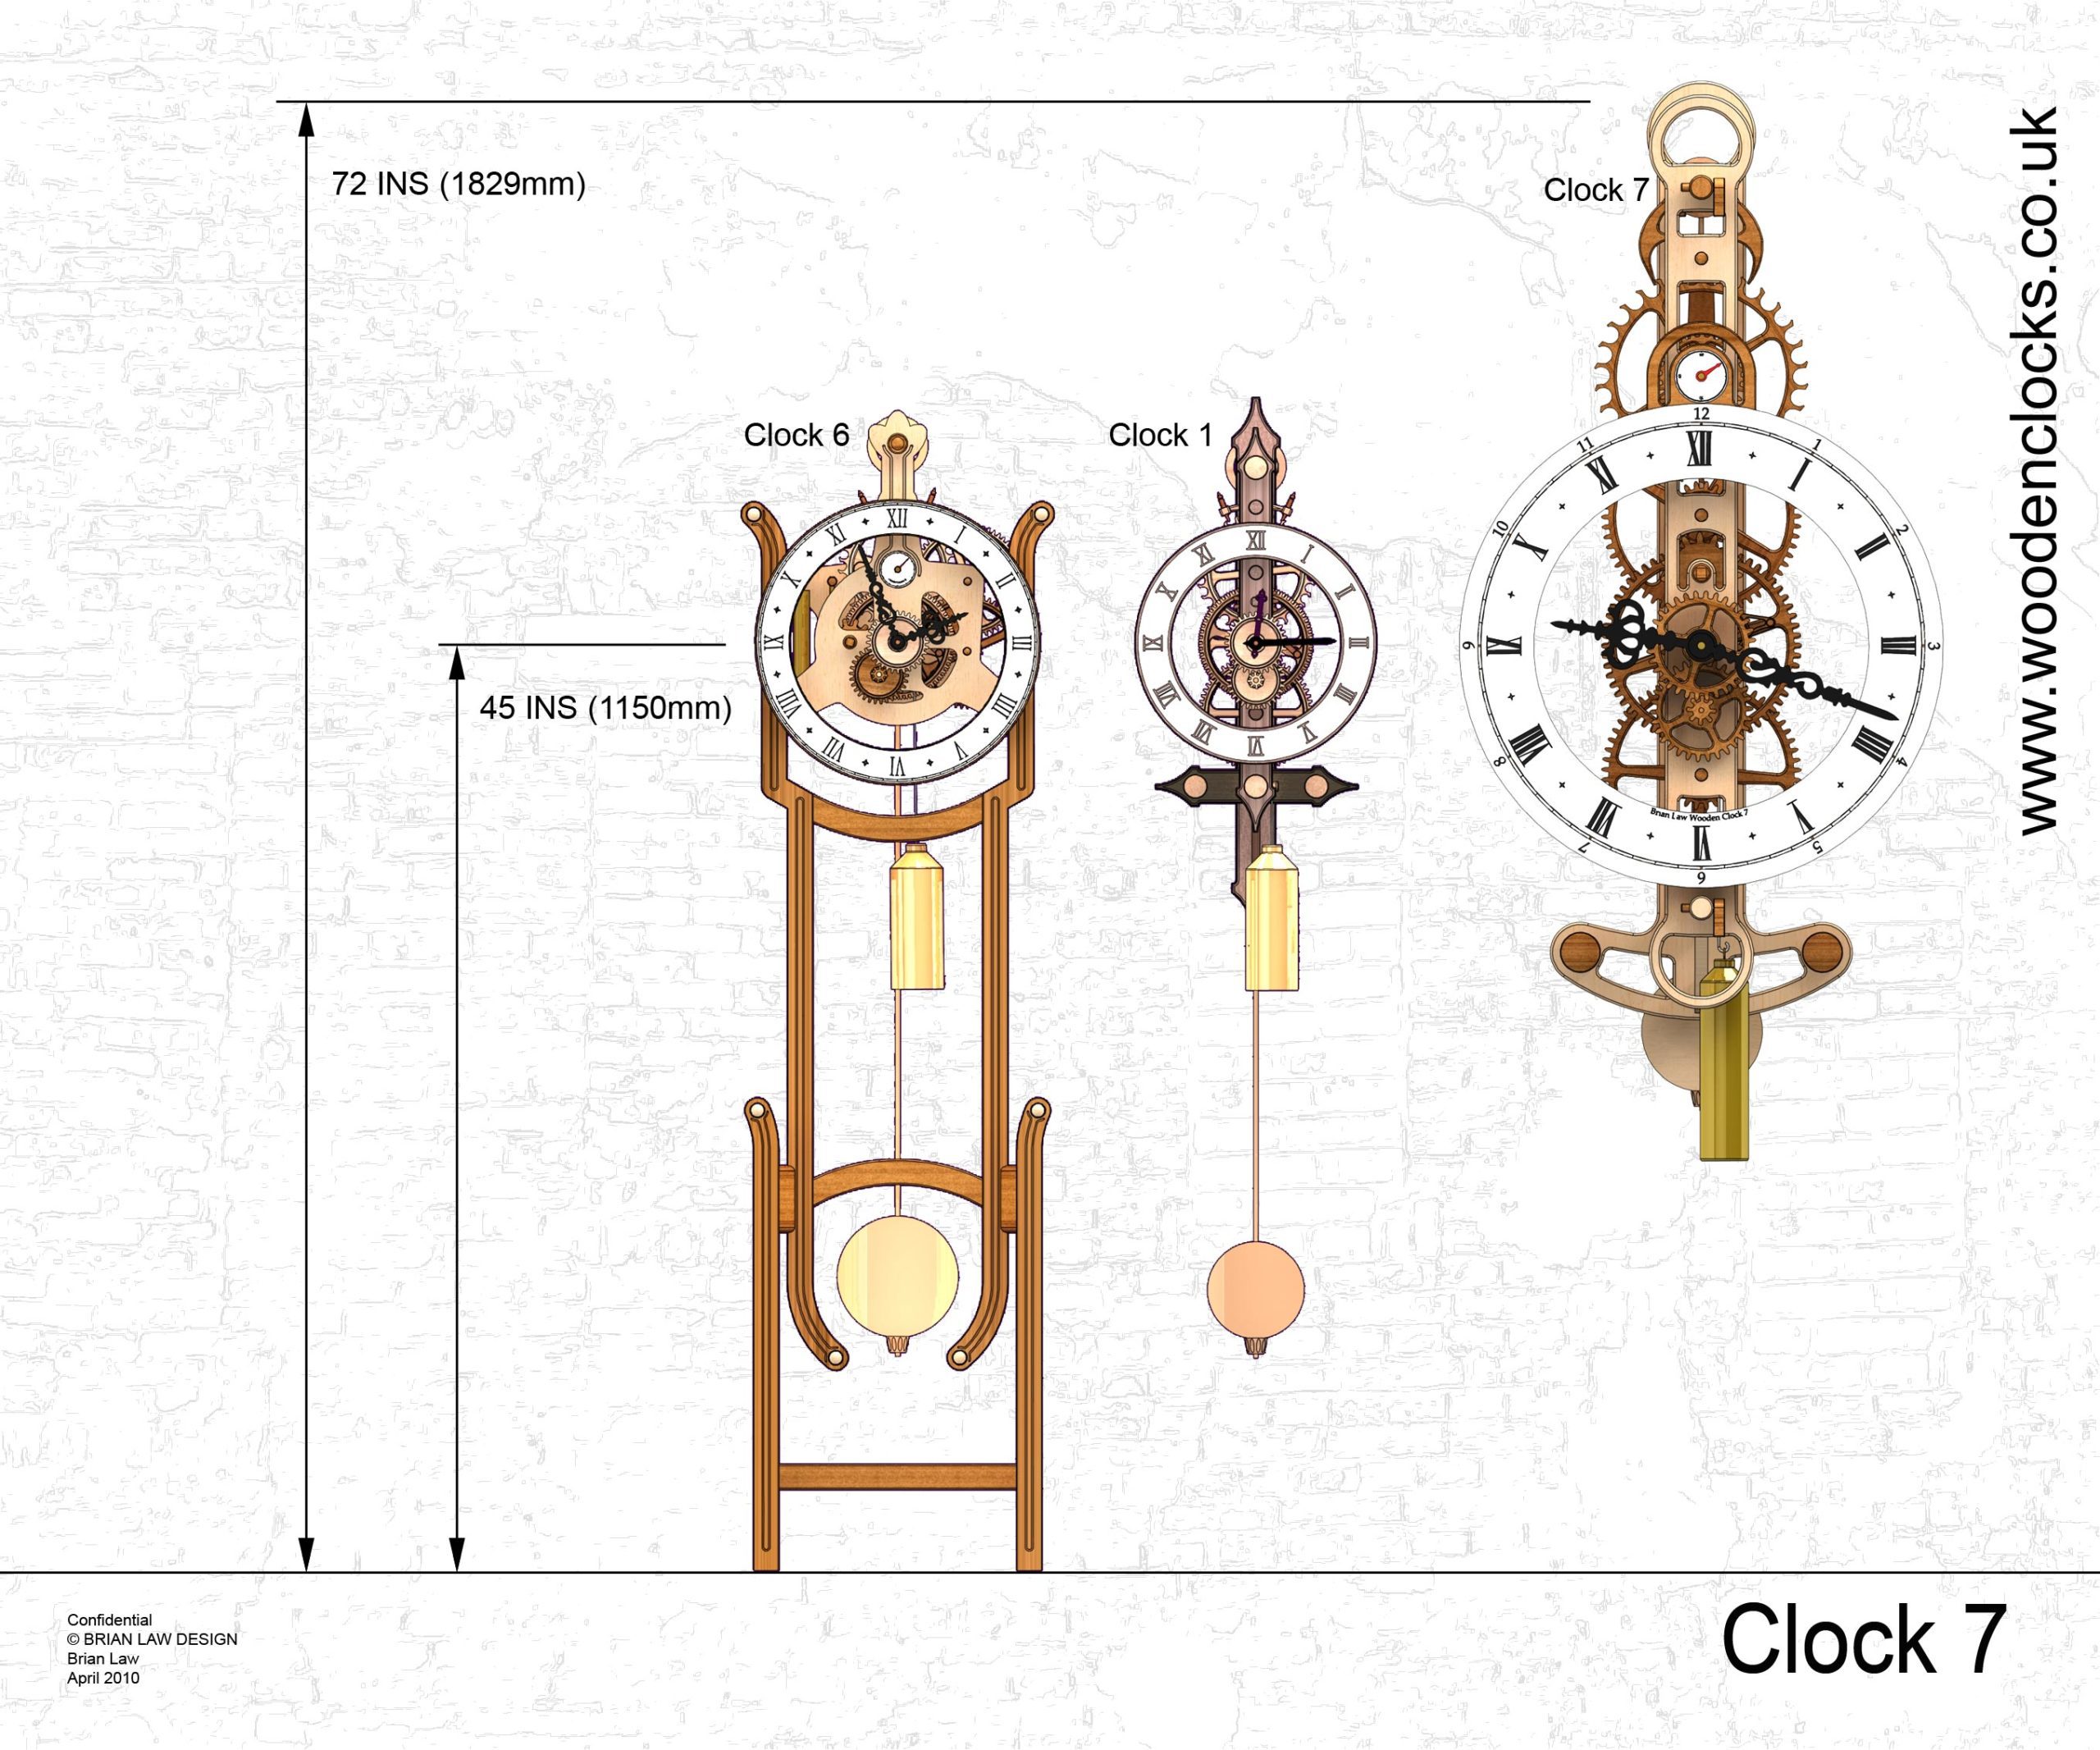
This clock was designed in inches and is the largest clock so far. I have been asked many times if it is possible to double the size of the clocks without compromising their function and the answer is always yes as long as you do not change the length of the pendulum, as this controls the accuracy of the clock. This new clock is my attempt to produce a larger clock, nearly twice as big, and large enough to work in a large room.
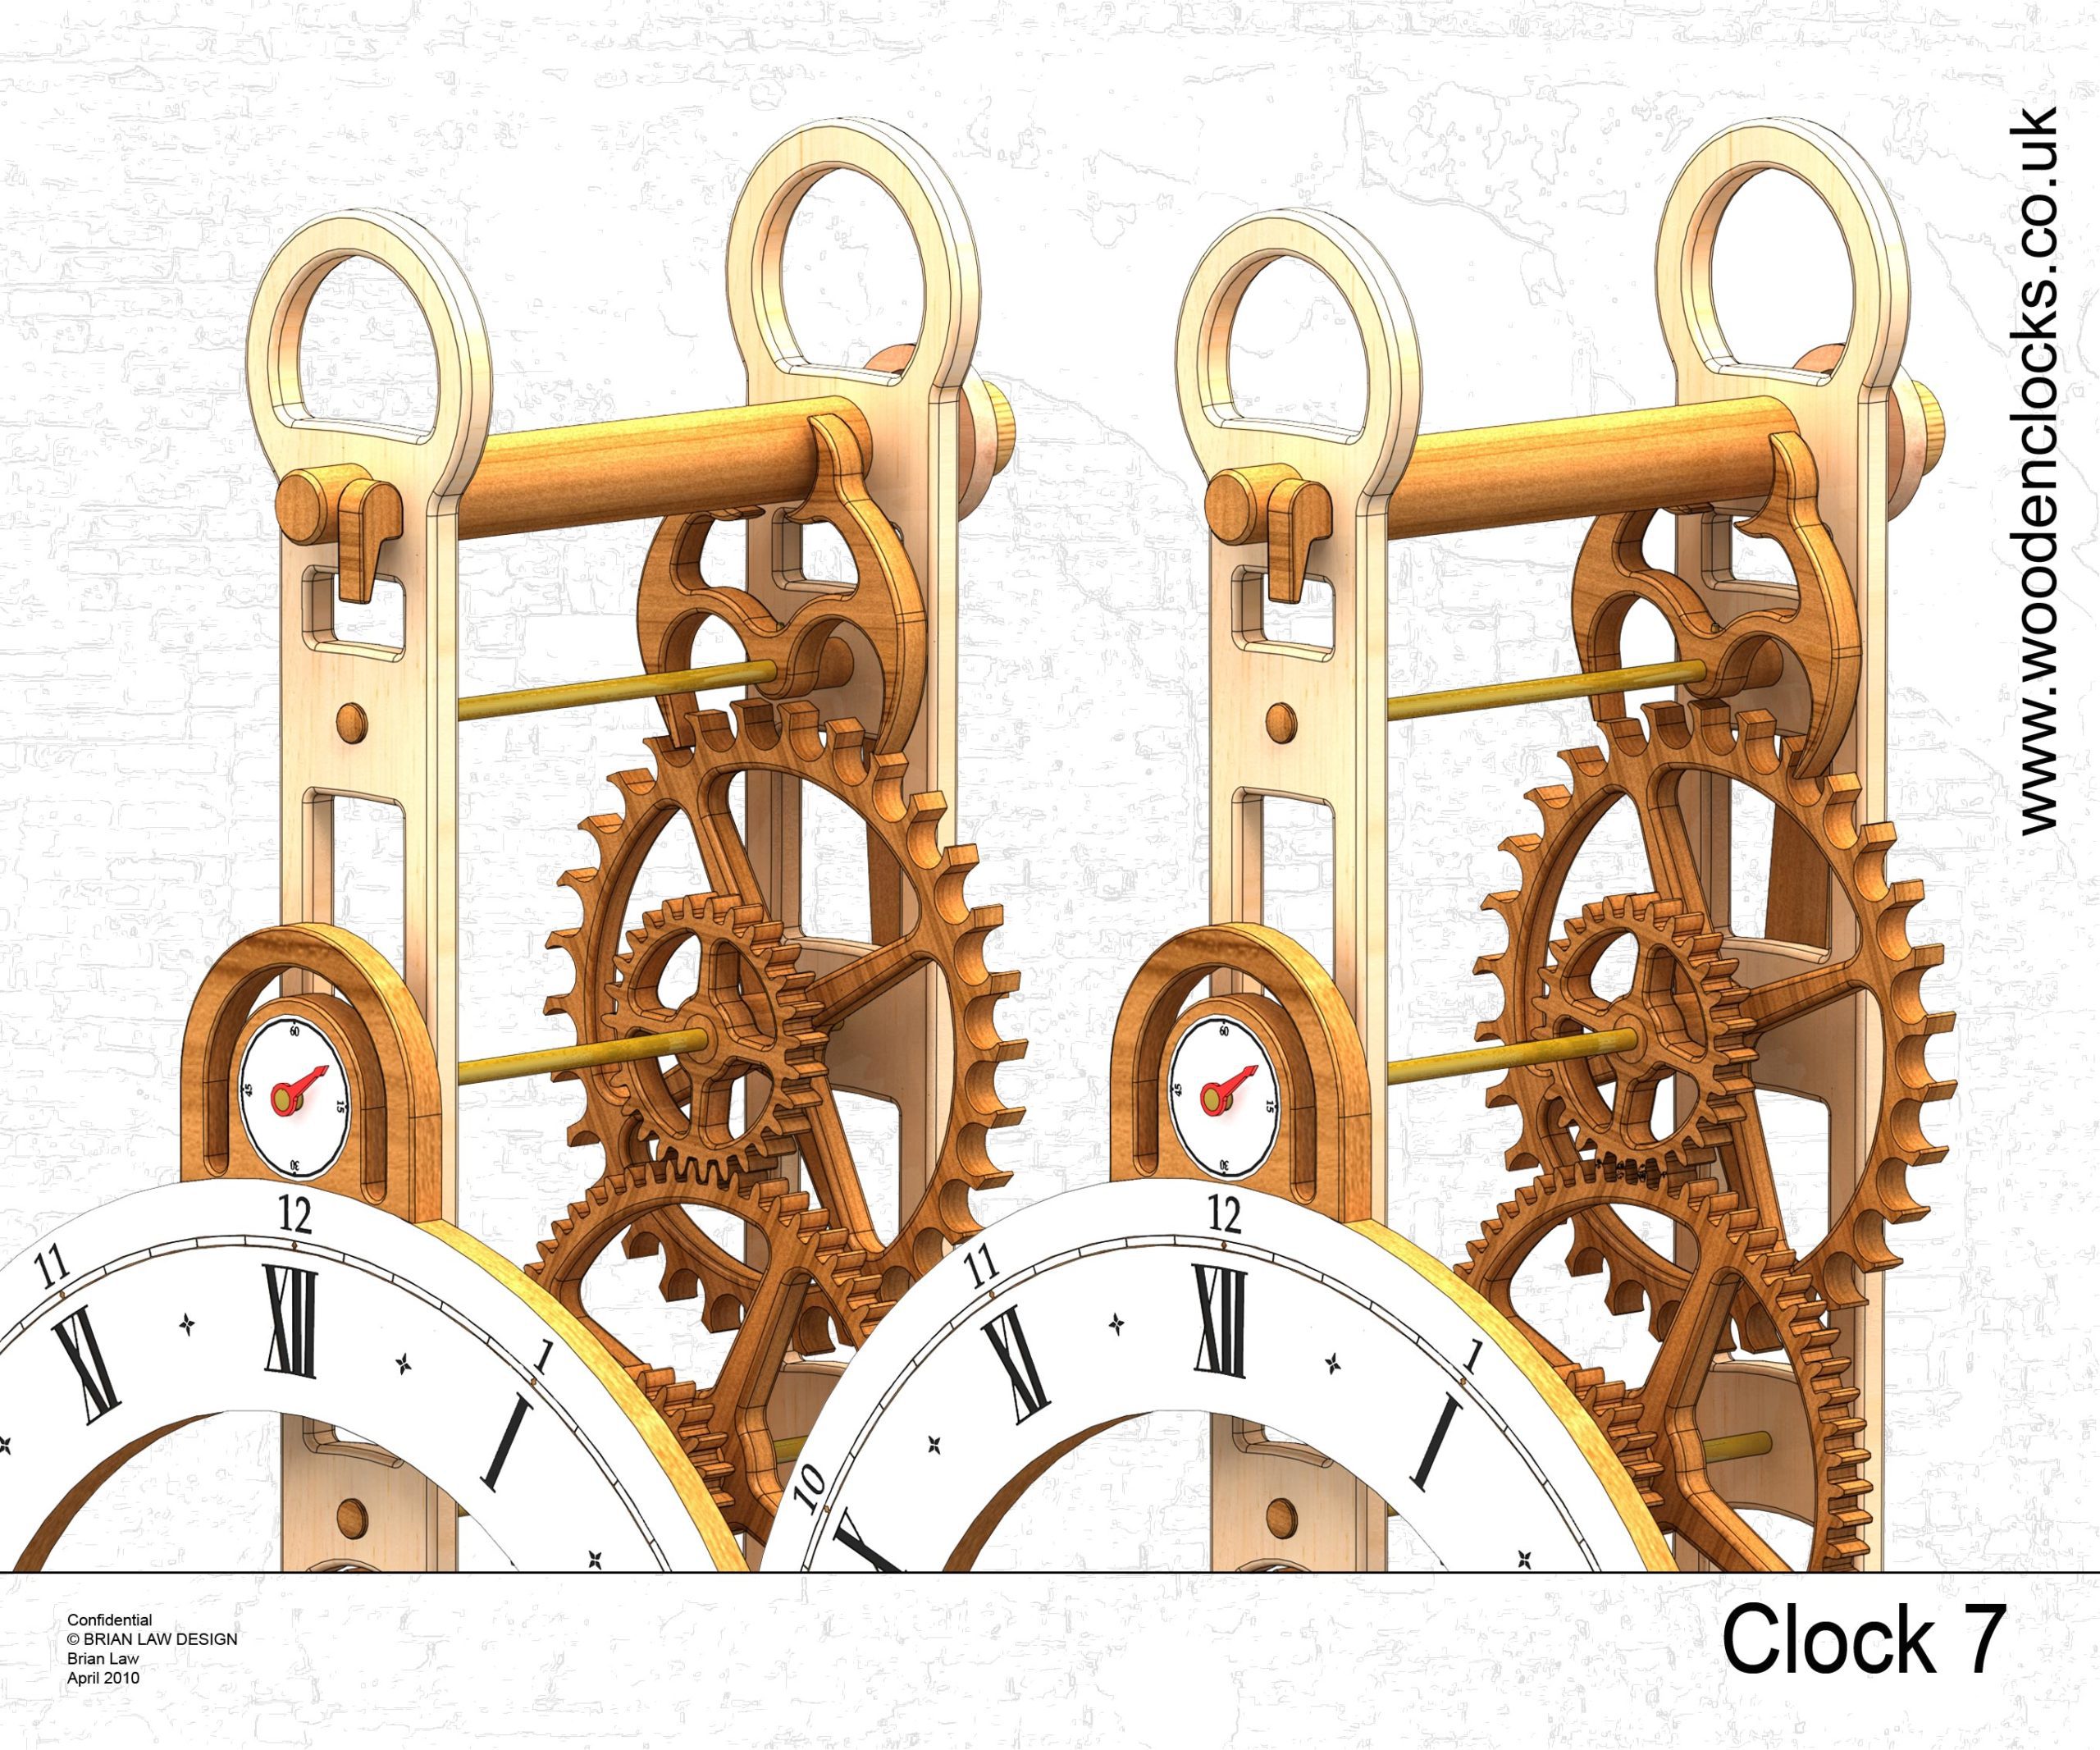
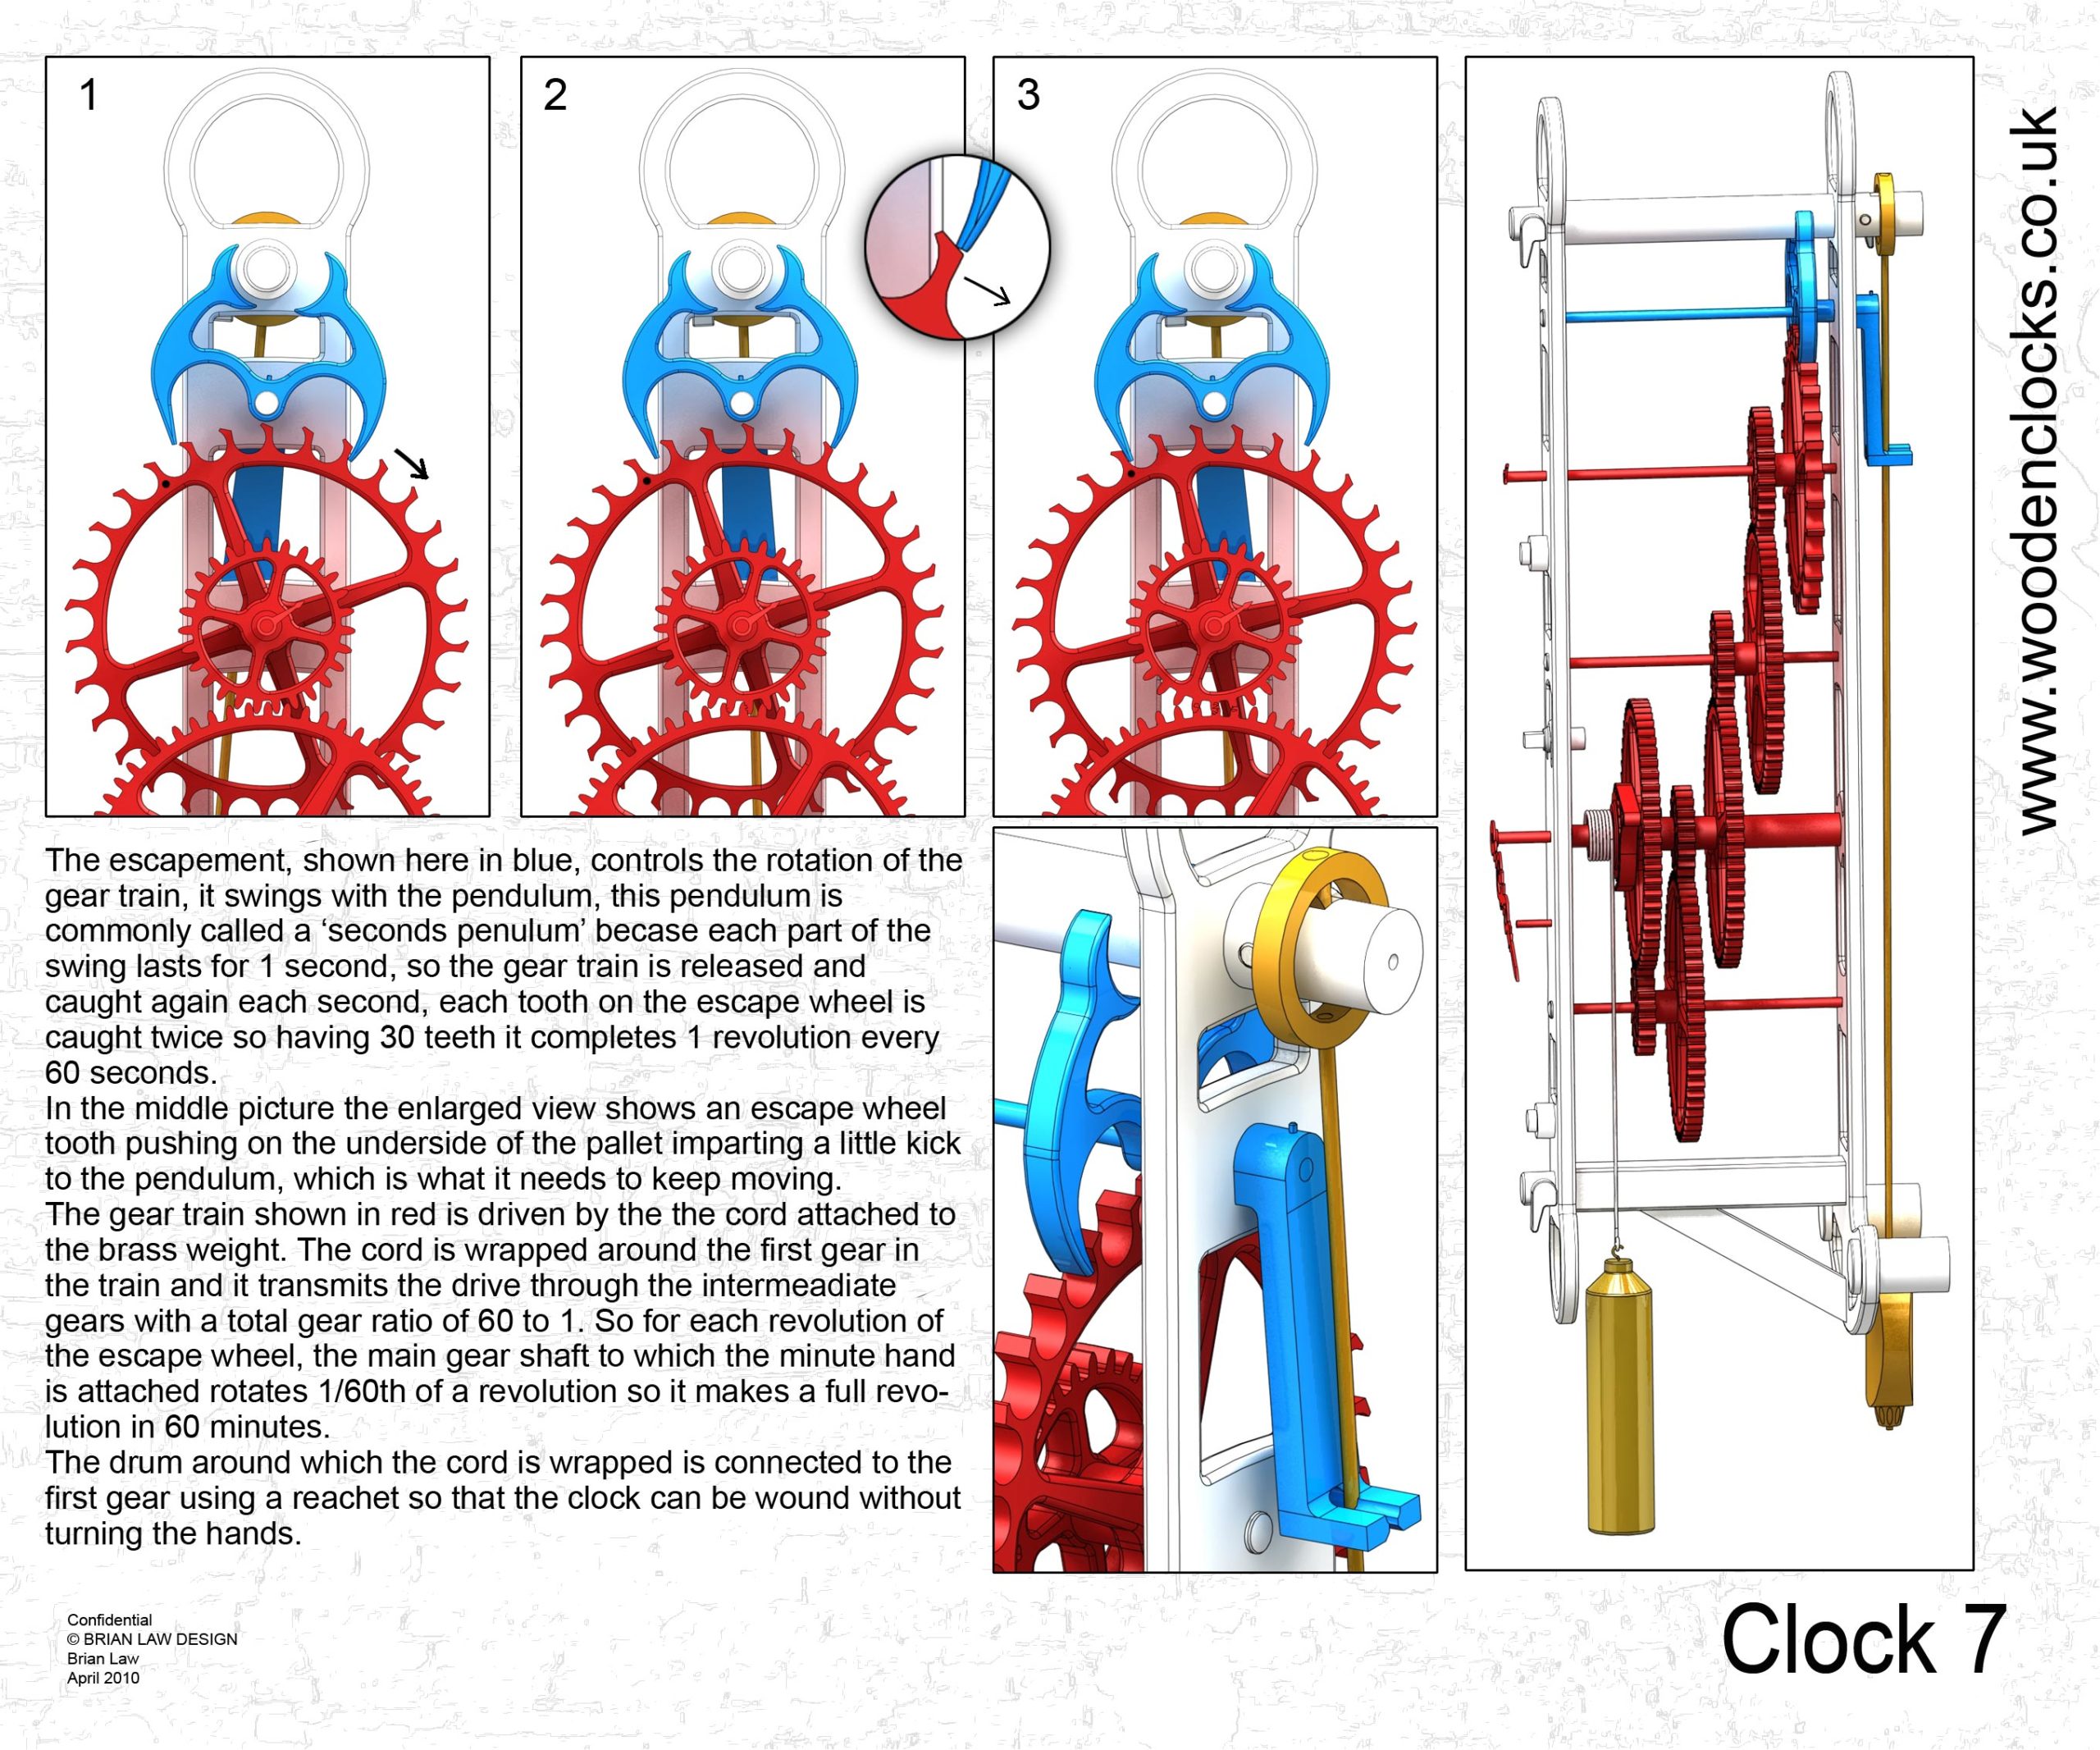
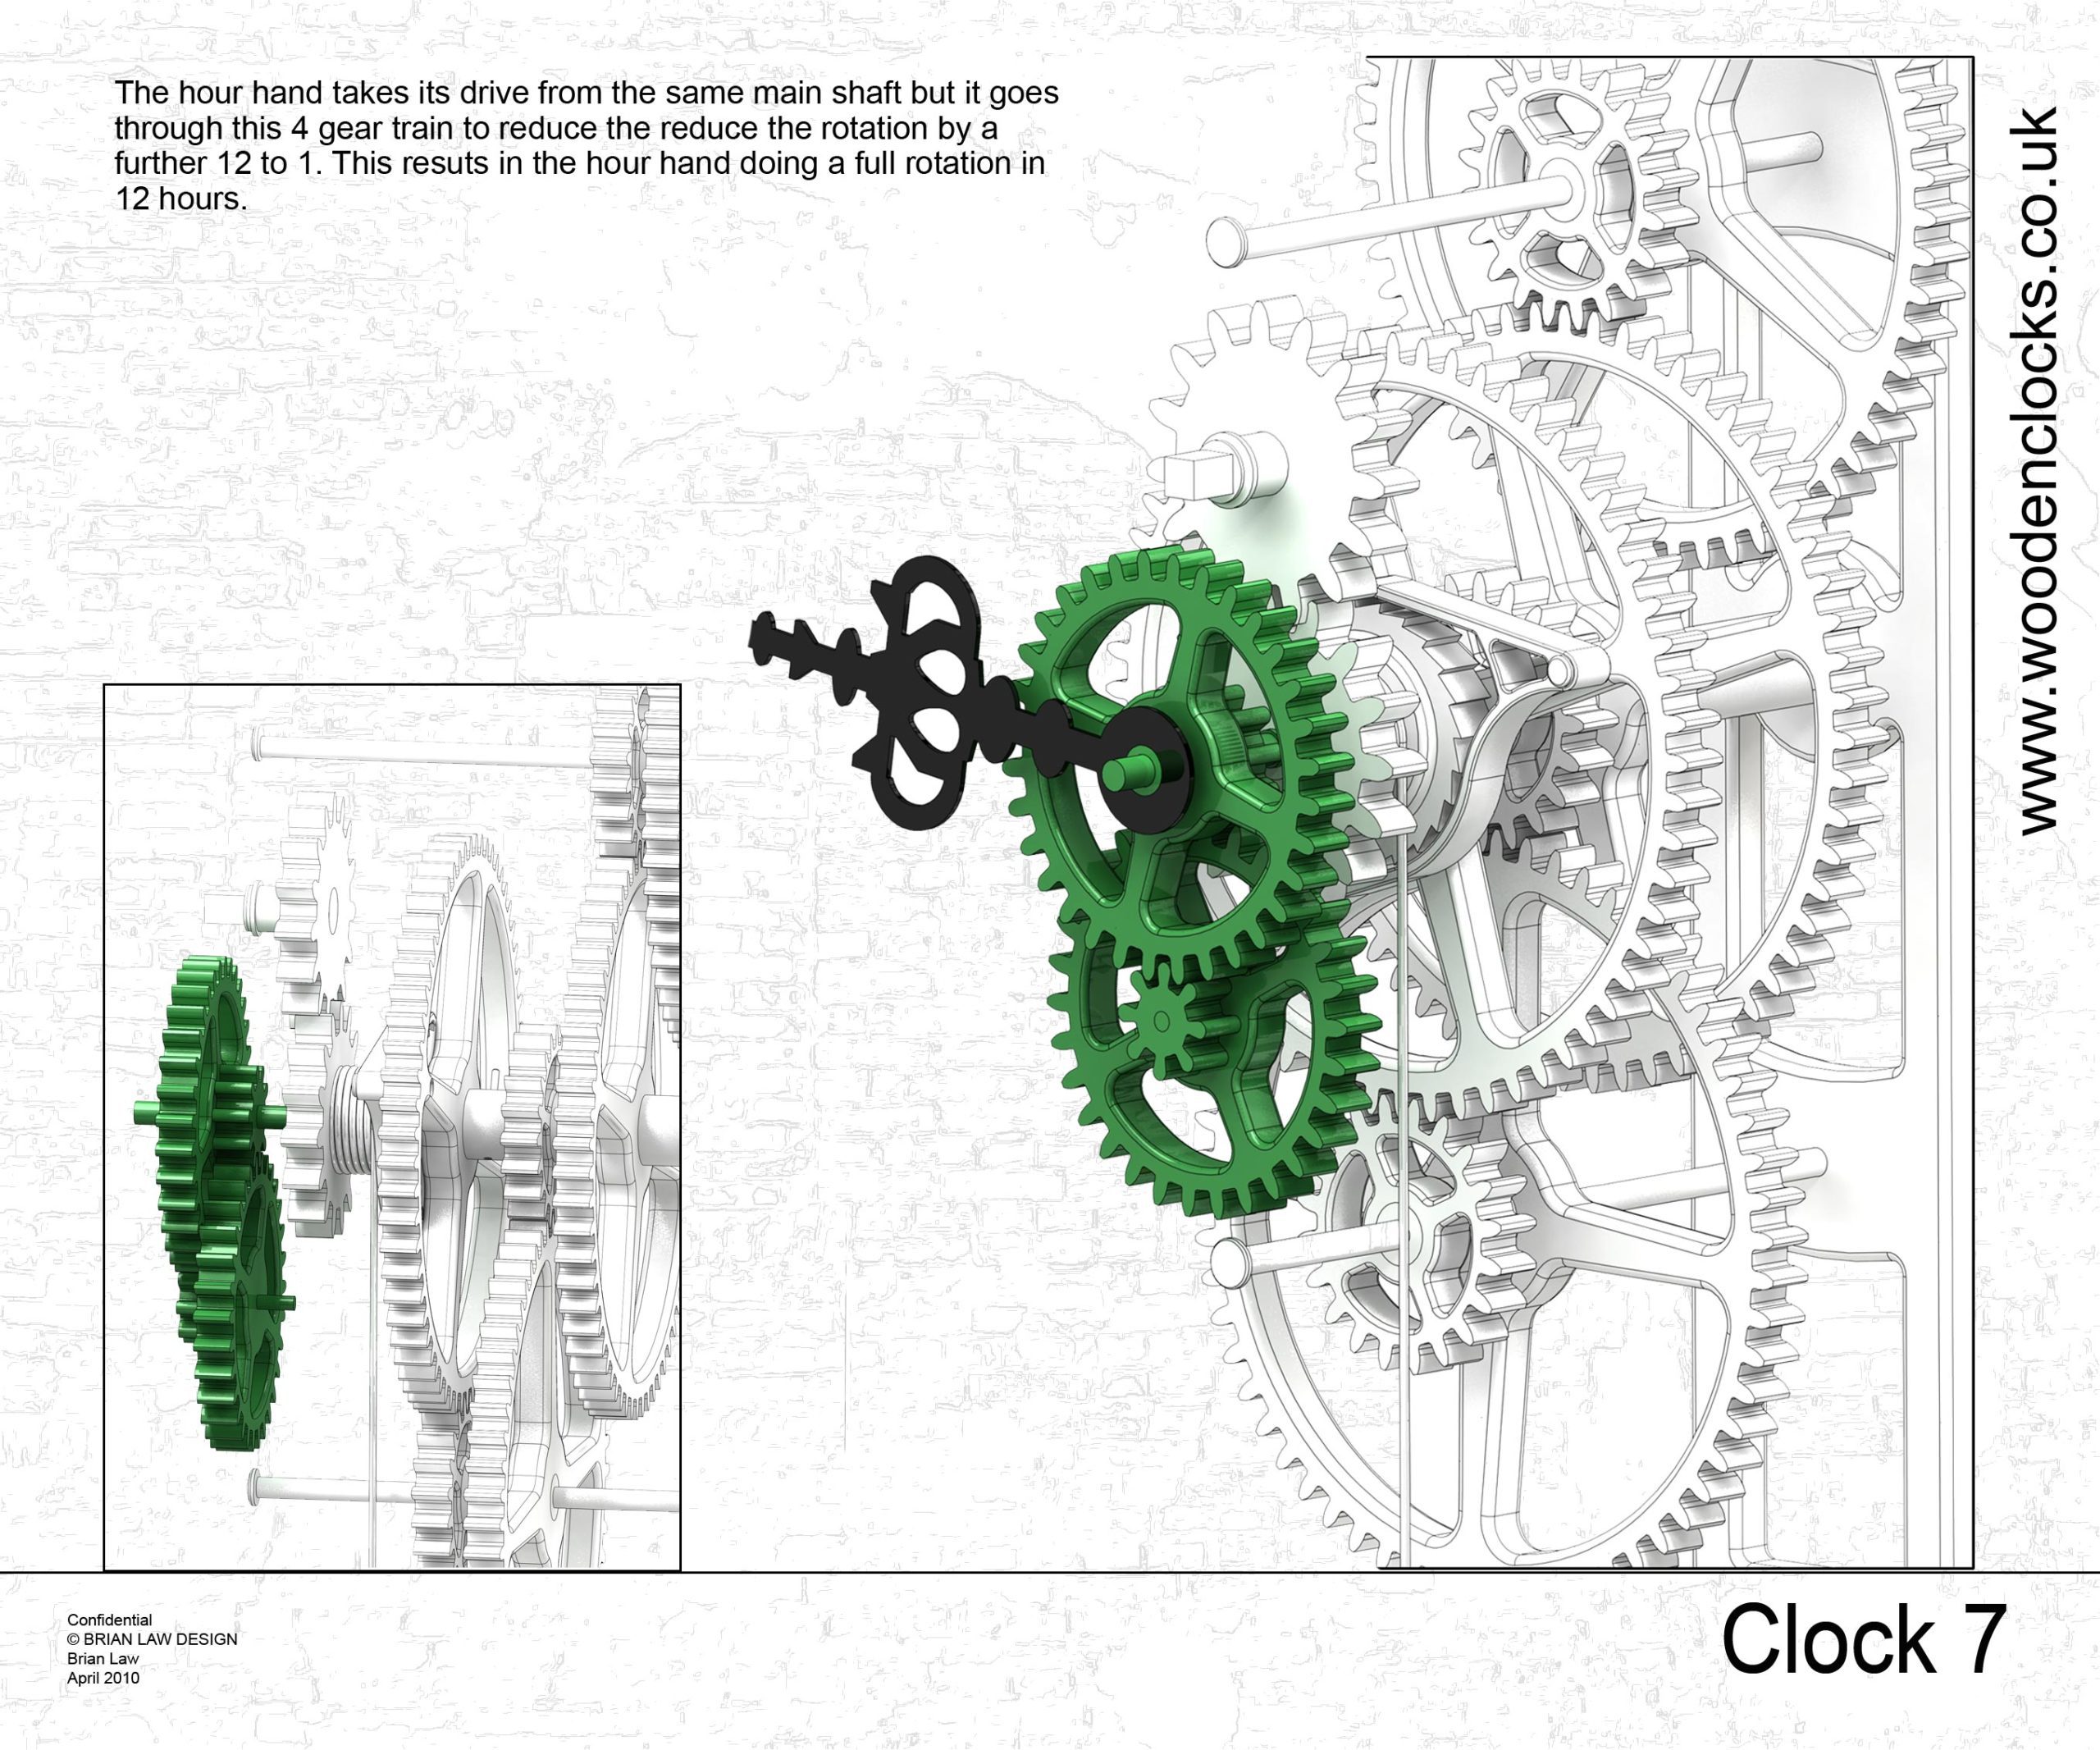
Like Clock 1 it is an in-line gear train that makes it easy to hang on a wall rather than have it shelf mounted.It also has an extra set of gears to get the second hand to run in the right direction, something I never fixed in Clock 1, but works well in this design as it fills out the interior of this larger format design.
The biggest change has been to design the Clock from the ground up in inch’s so all the shaft’s work out correctly for all those working in imperial measures. Gears never work out in round numbers though, no matter what unit of measure you use.
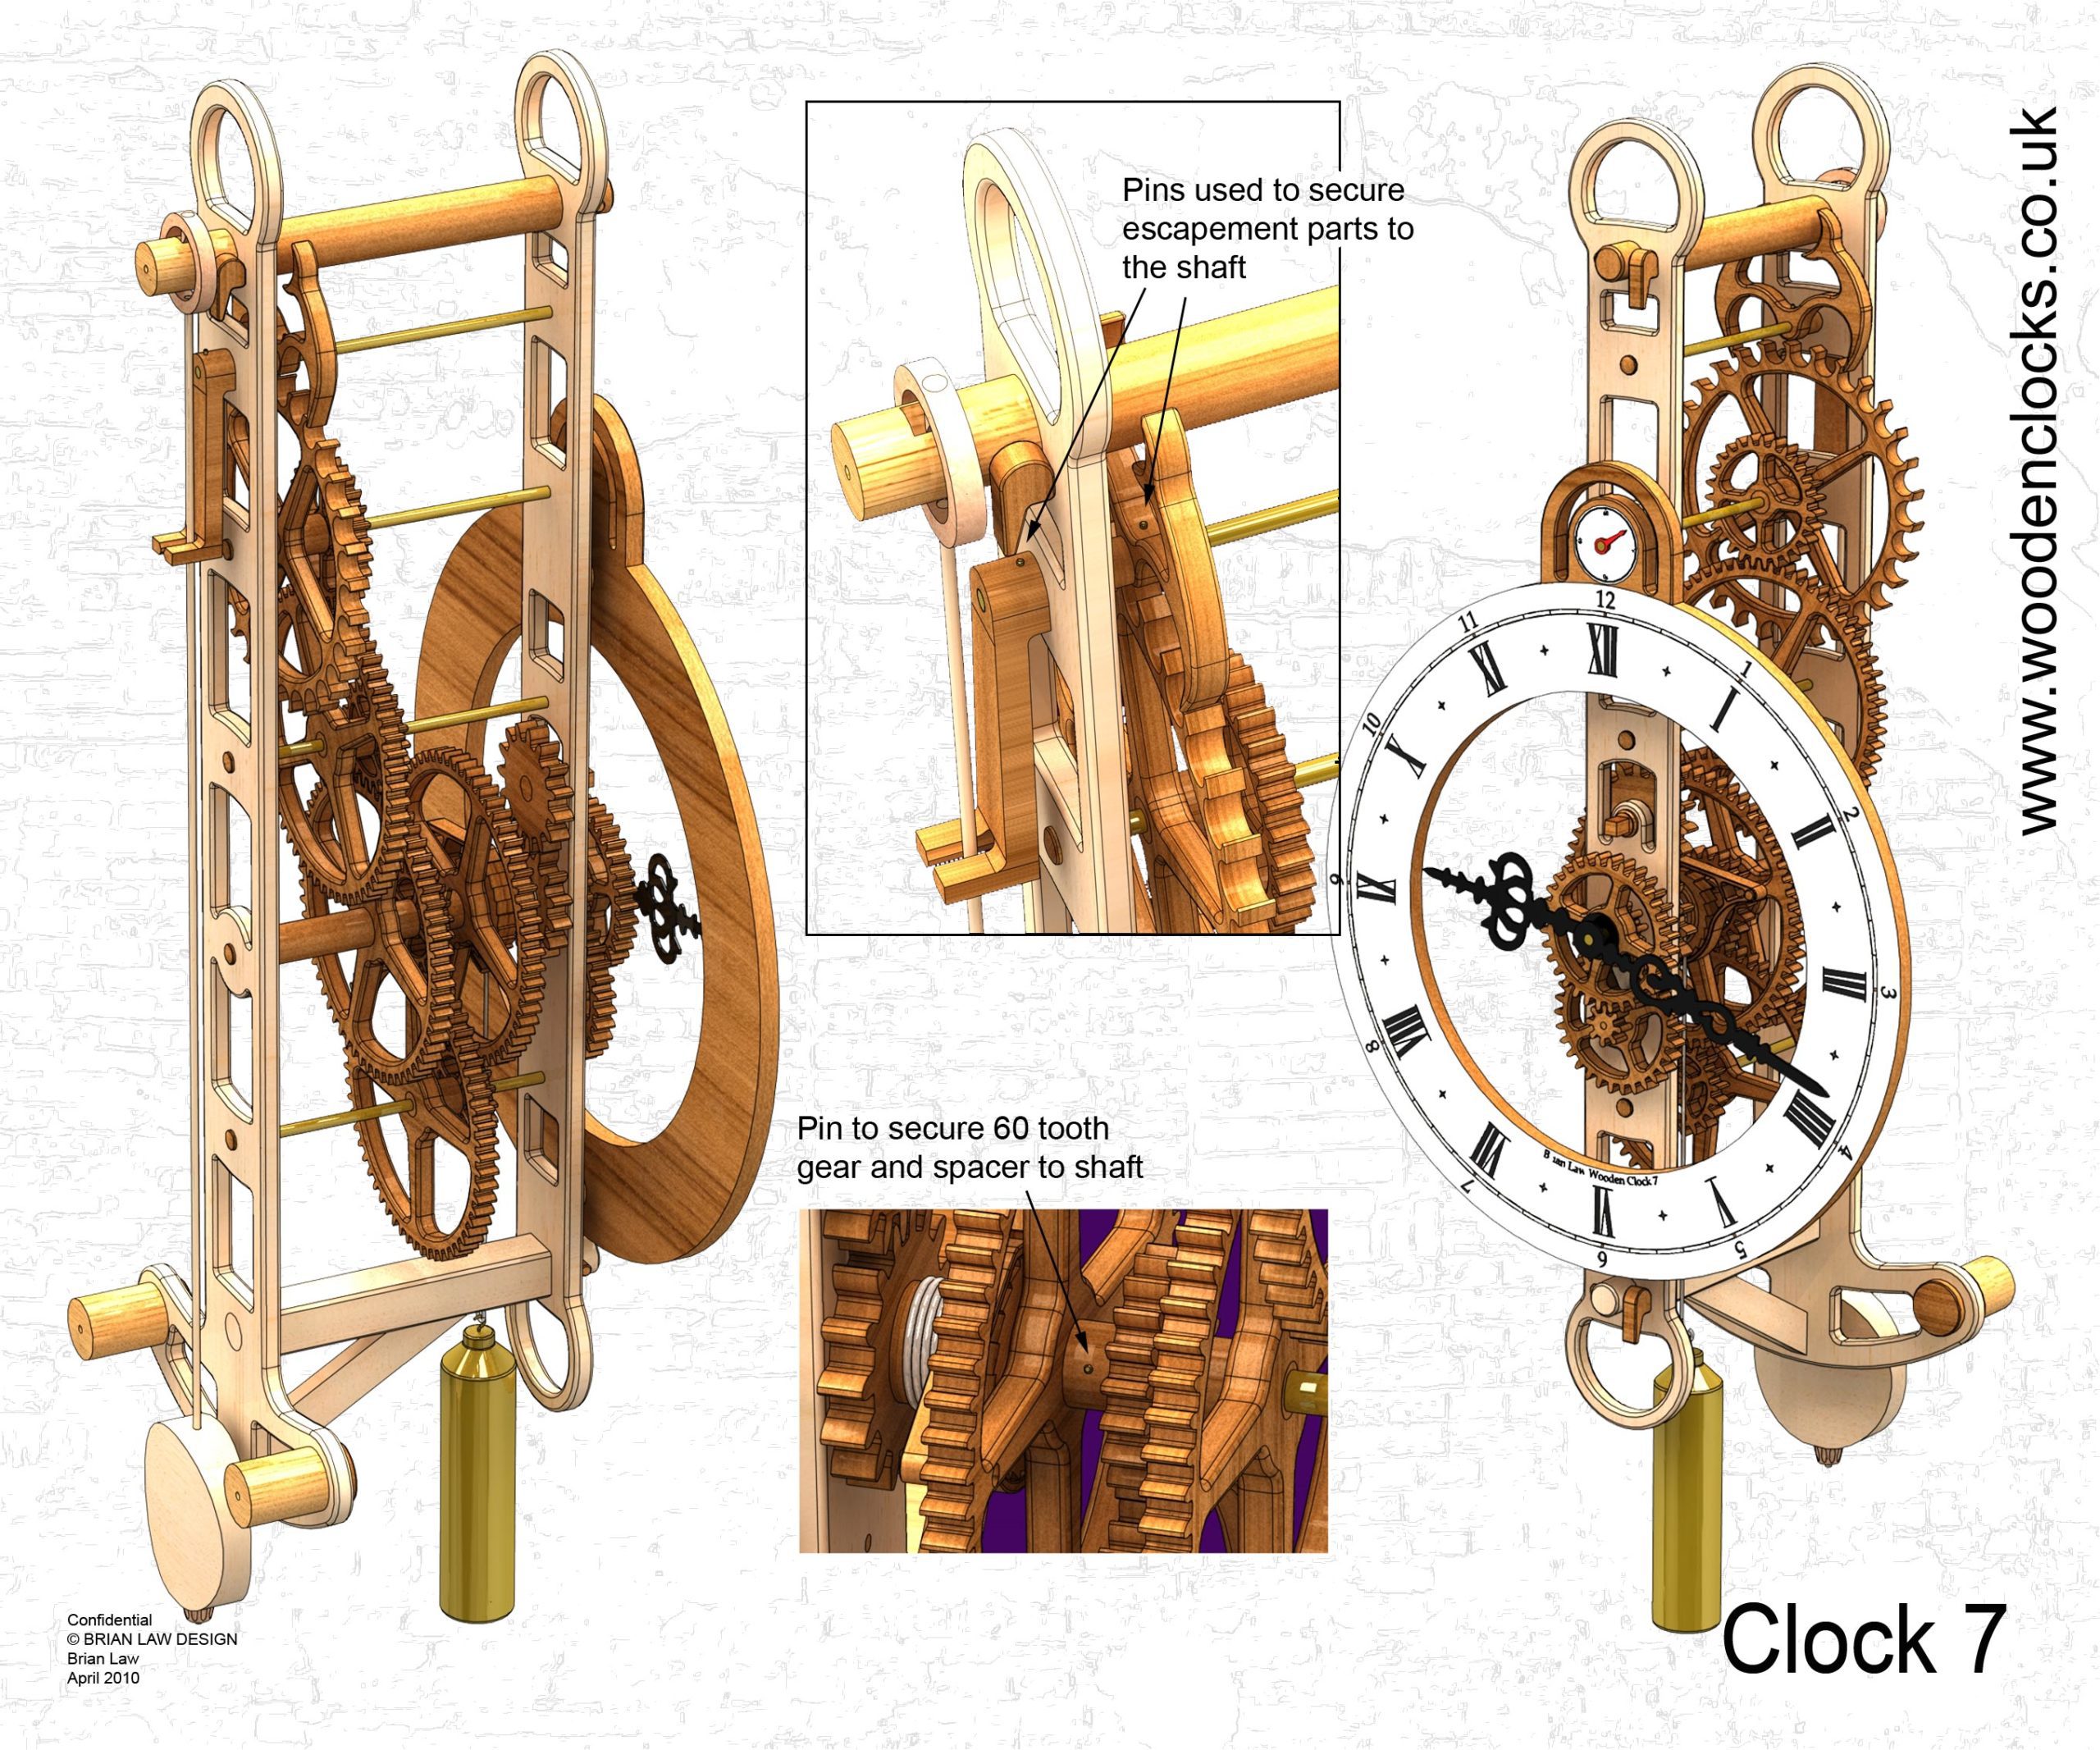
A completely new dial design has been made for this clock. It is a simpler design than clock 6 and has a much smaller files size for loading.
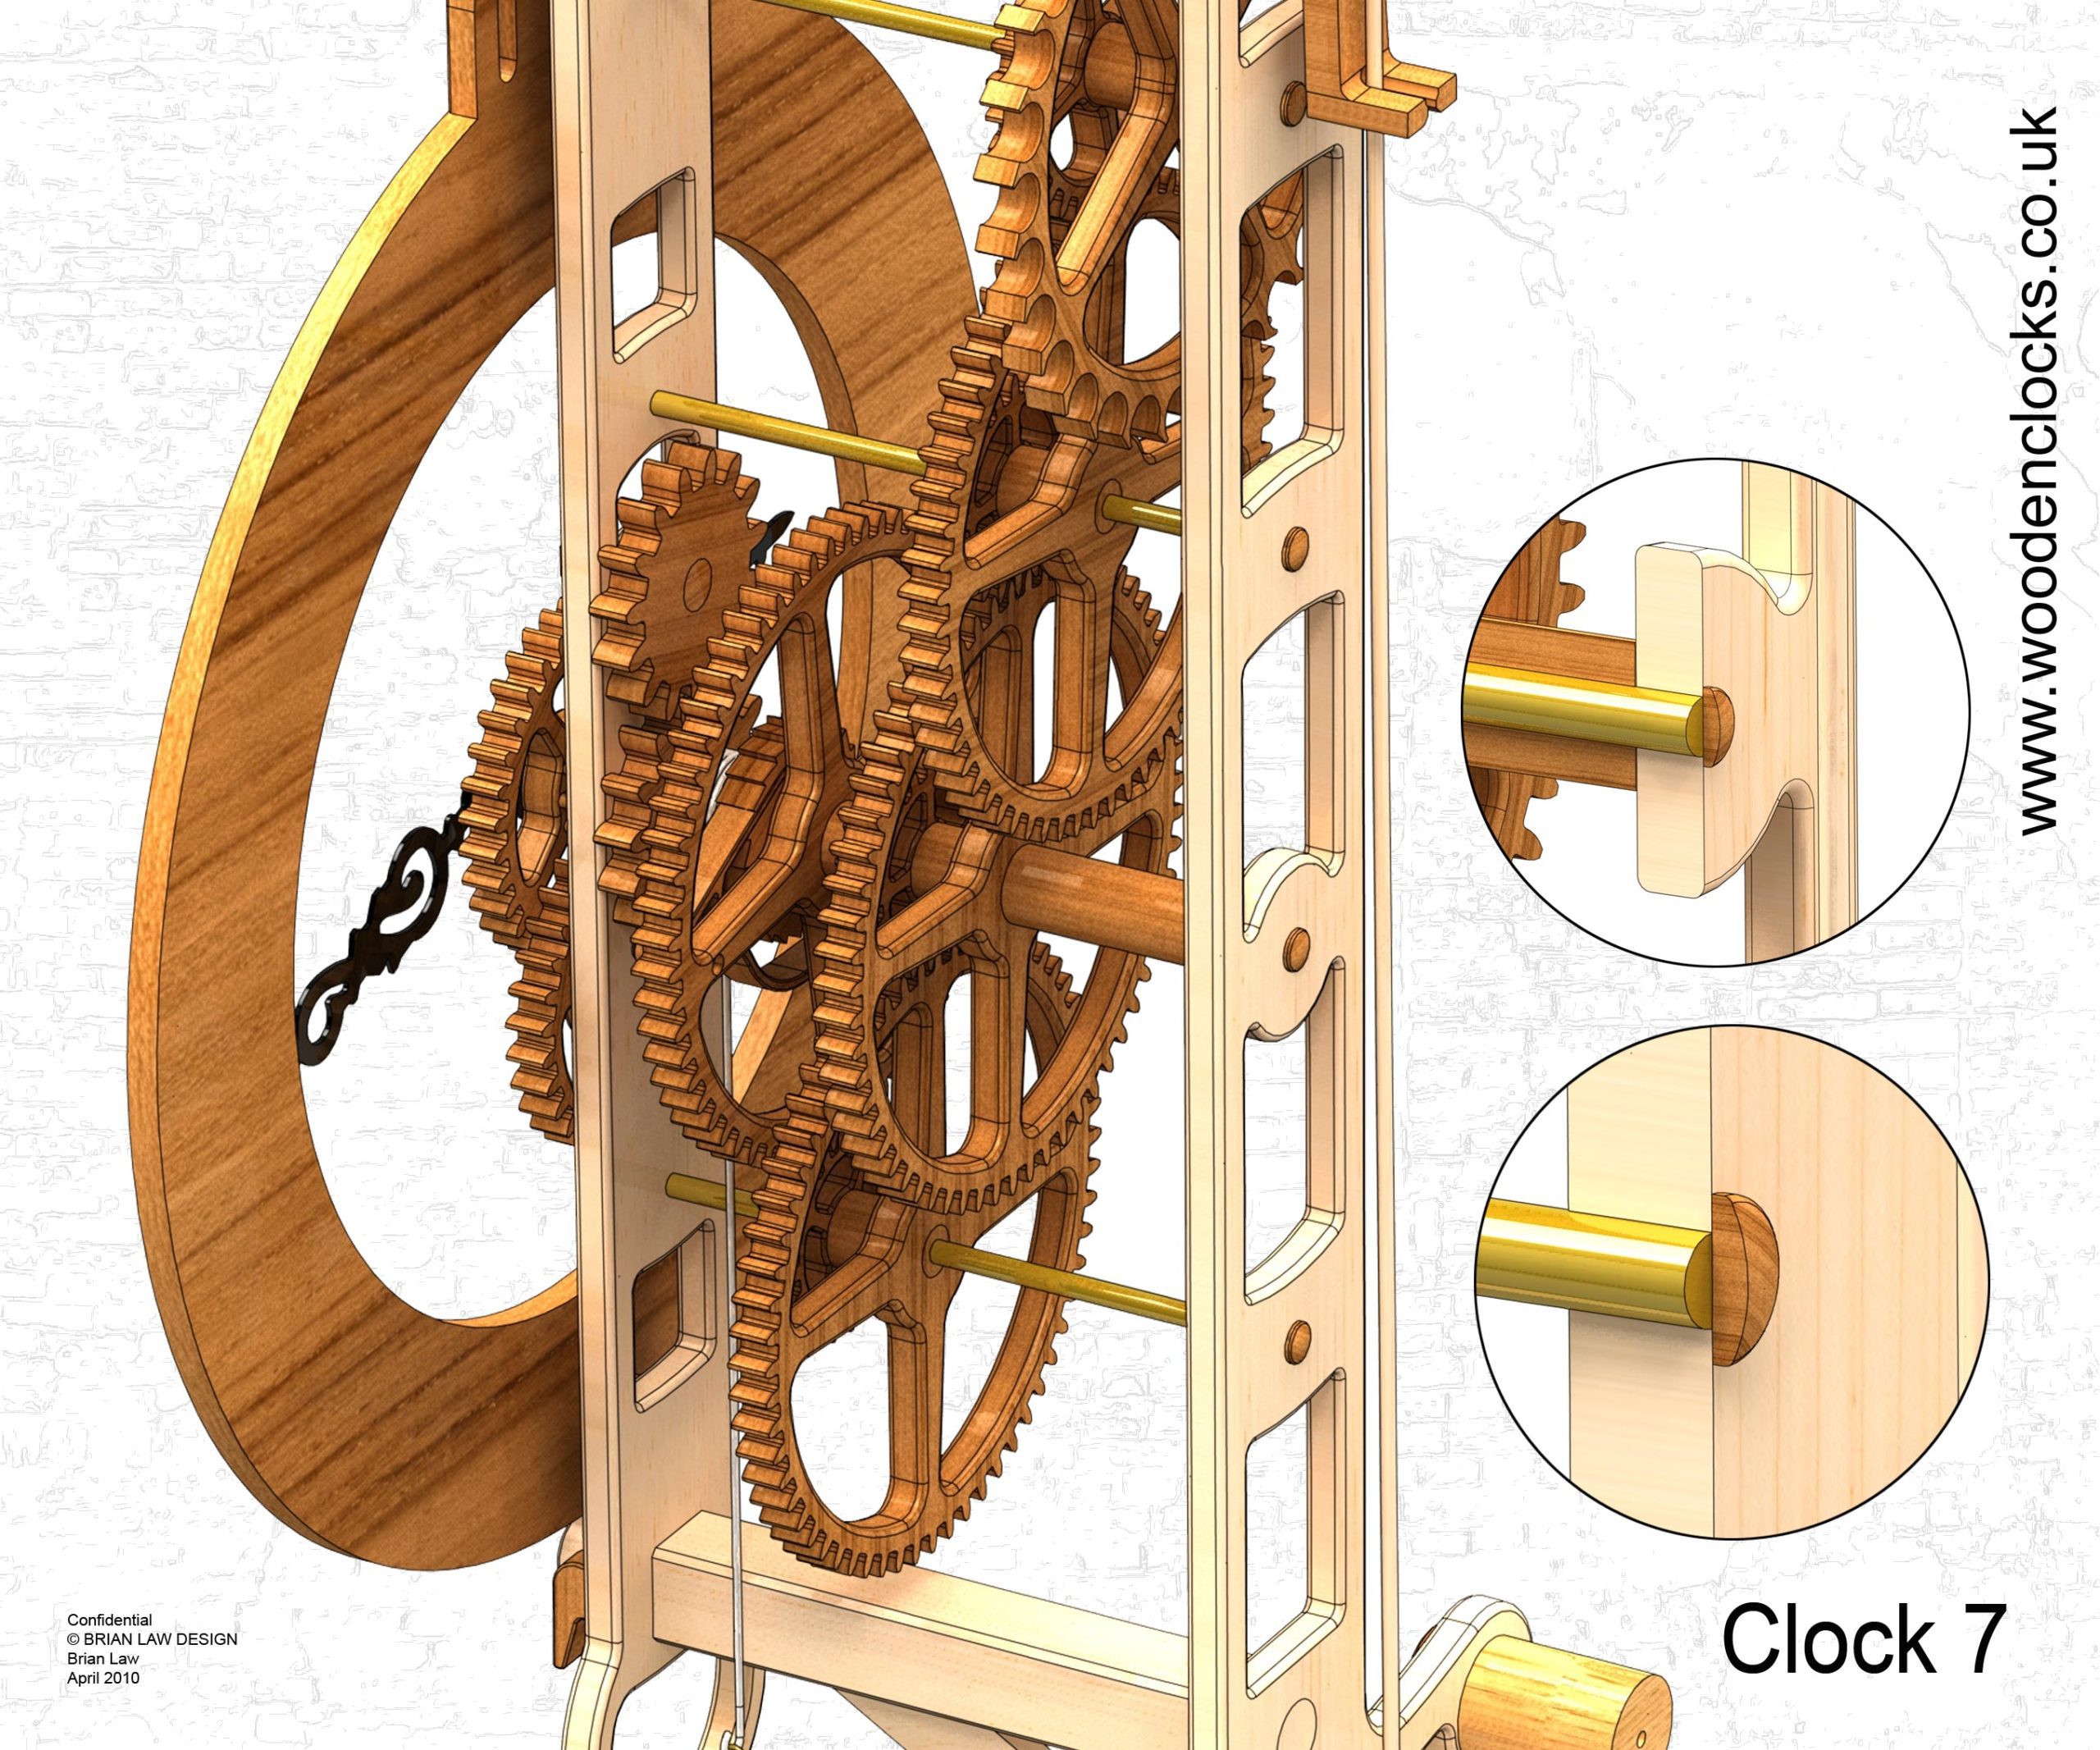
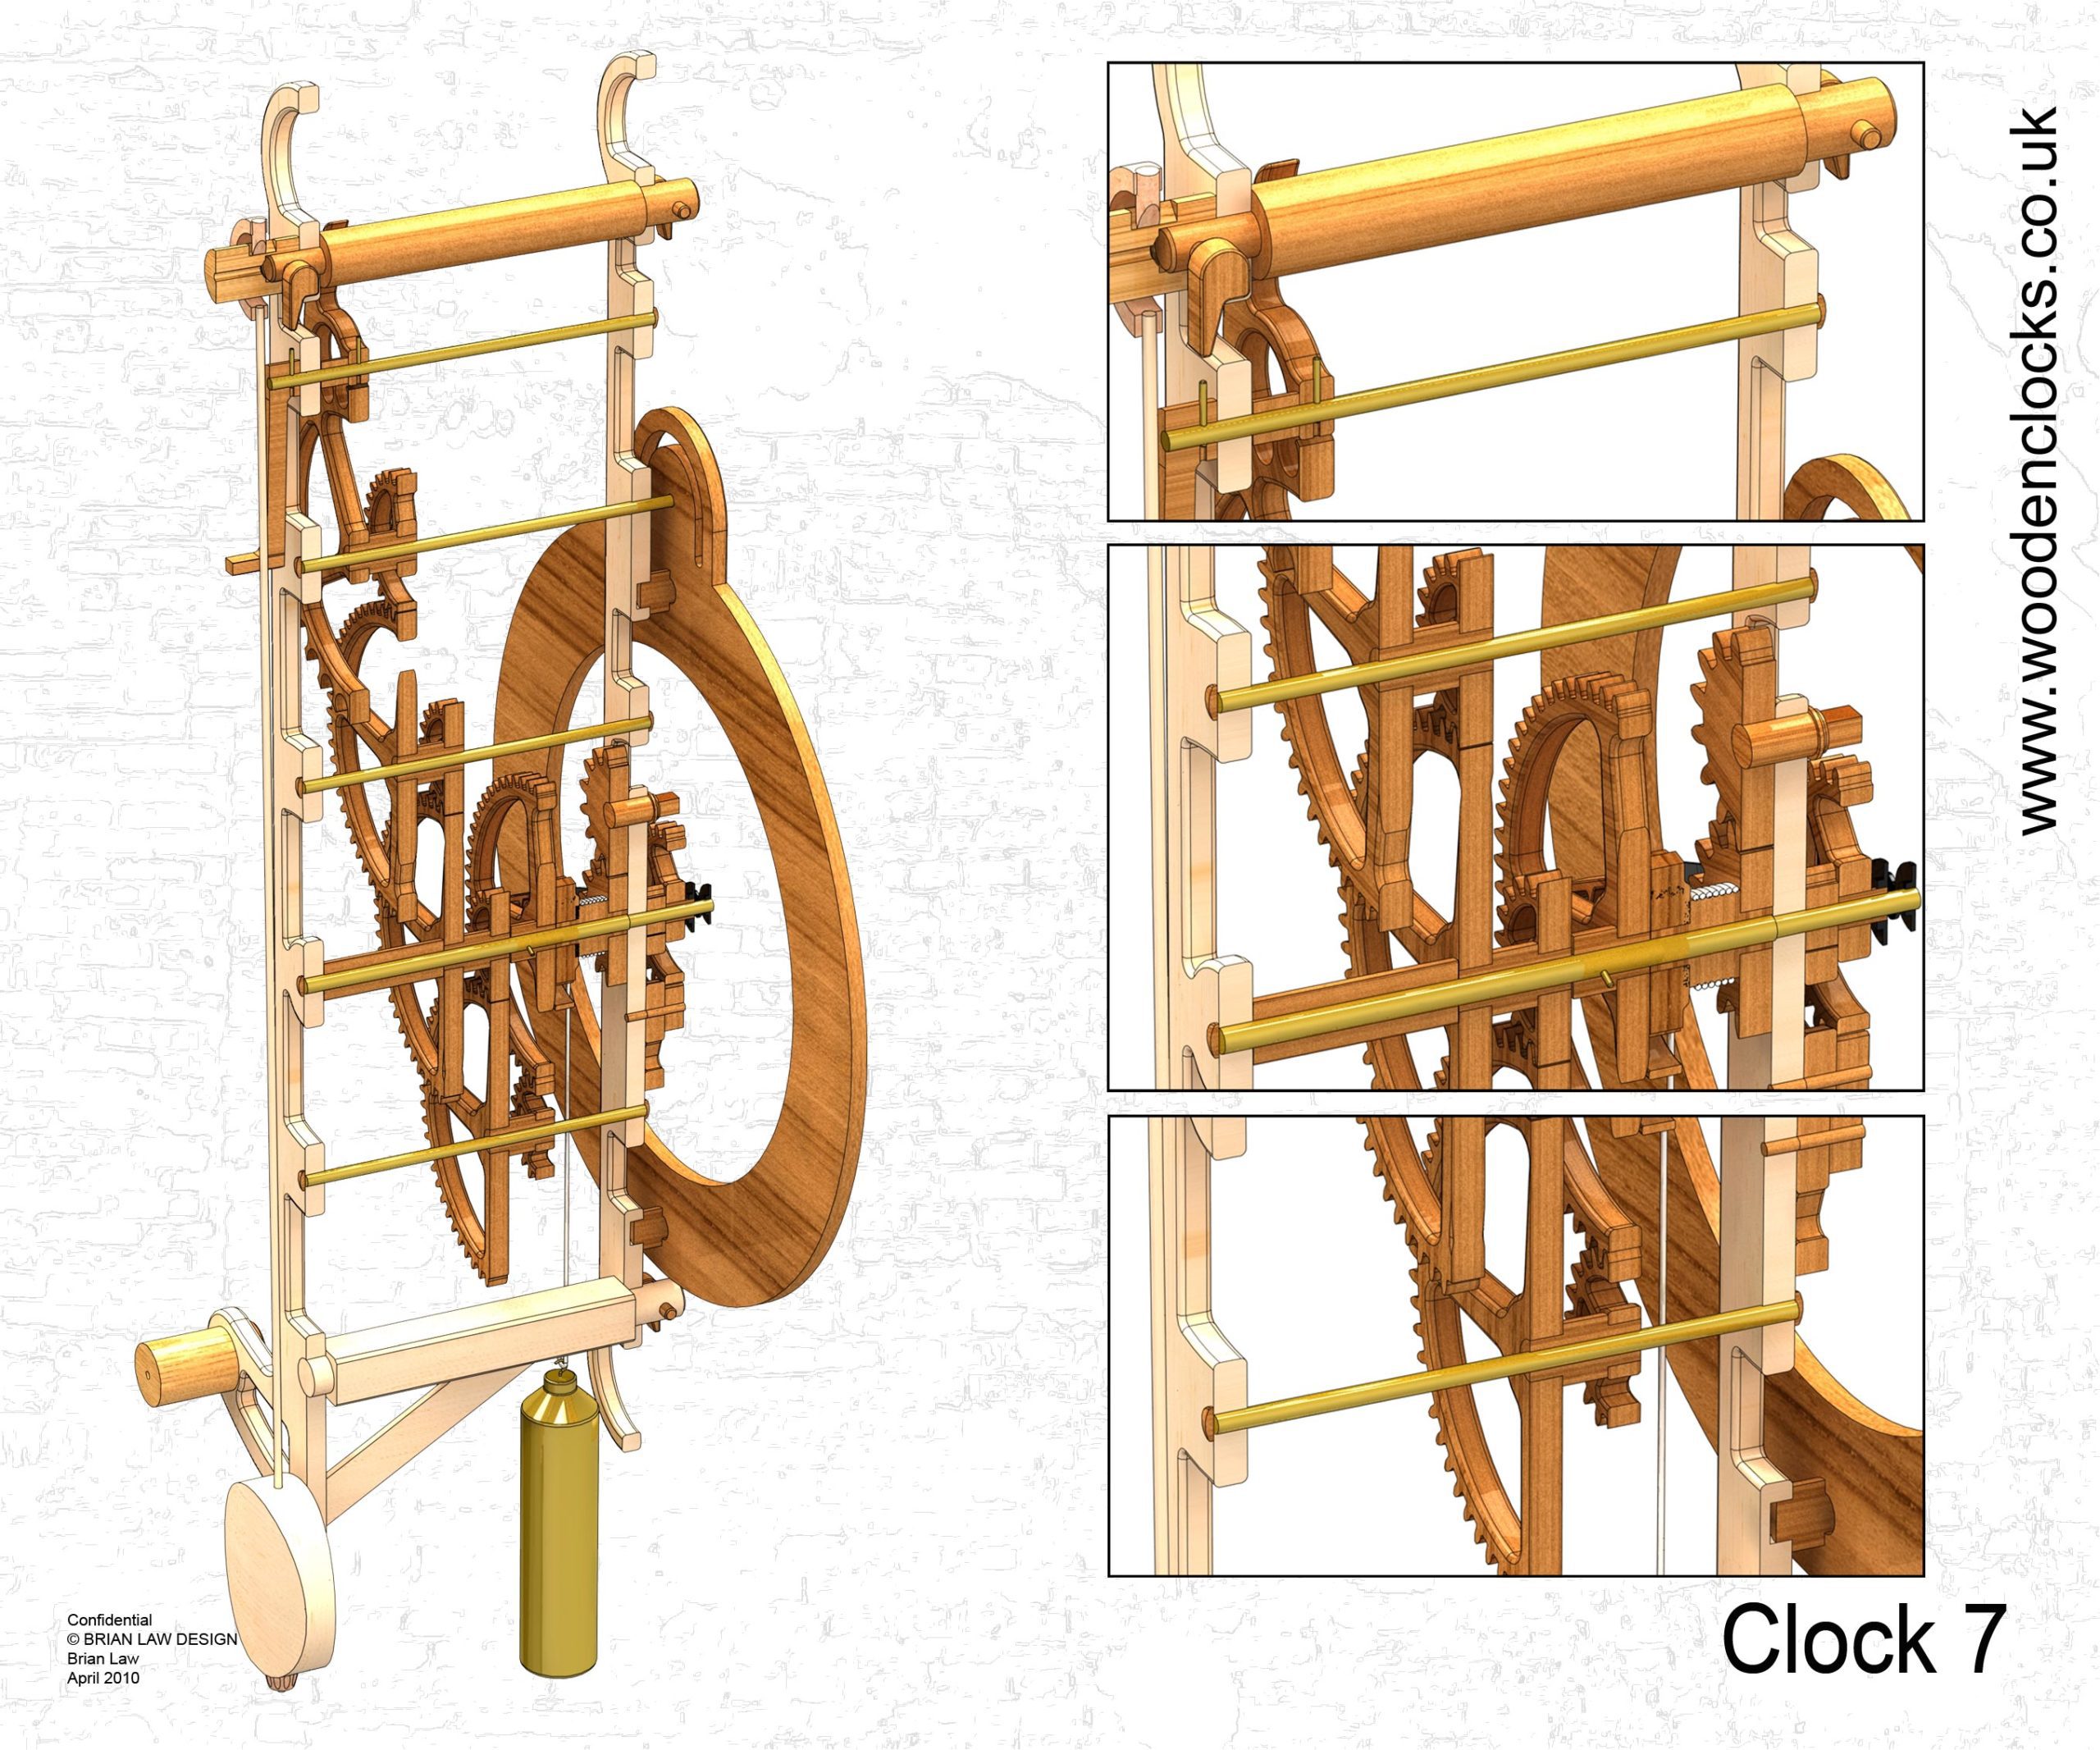
This Clock has been designed in inch’s so all the shaft’s work out correctly for all those working in imperial measures. Gears never work out in round numbers though, no matter what unit of measure you use.
DXF, DWG 2D files, and the IGS and STP files that can be used with your CNC machine can be downloaded here for $26. You also get the unrestricted version of the PDF files that can be printed at full size.
Special offer you can get all of the 2D files plus those for Clock 7 and Clock 3 as well for only $36.
Drawings for this clock in PDF format can be downloaded here. These free files are restricted so that you can only view them on screen but not print them. Clicking here will download the PDF file directly to your browser, may take a few moments so please be patient.
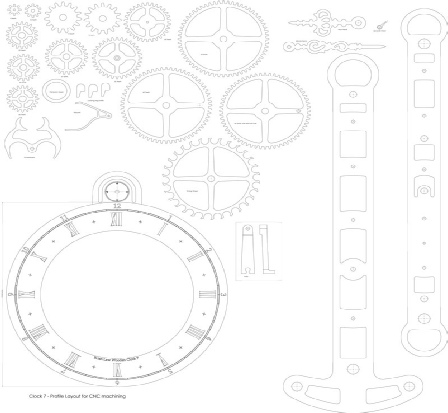
A sample from the DXF/DWG files is shown here. The actual files purchased above are included on one large sheet so that they may be directly loaded into your CAM program.
To print only a single item of the drawing to scale using Adobe Acrobat Reader, do the following:
Go to Edit, then click on Take a snapshot, move the cursor to the top left of the item you want to print and hold down the left mouse button whilst you drag a box around the item. The inside of the box turns blue and you can now go to File and then click on Print. This brings up the print dialogue, make sure Selected graphic is selected and that the Page scaling is set to None and the click on OK. As long as your printer is connected you will have printed the item at size. Do this for each item you want to cut out.