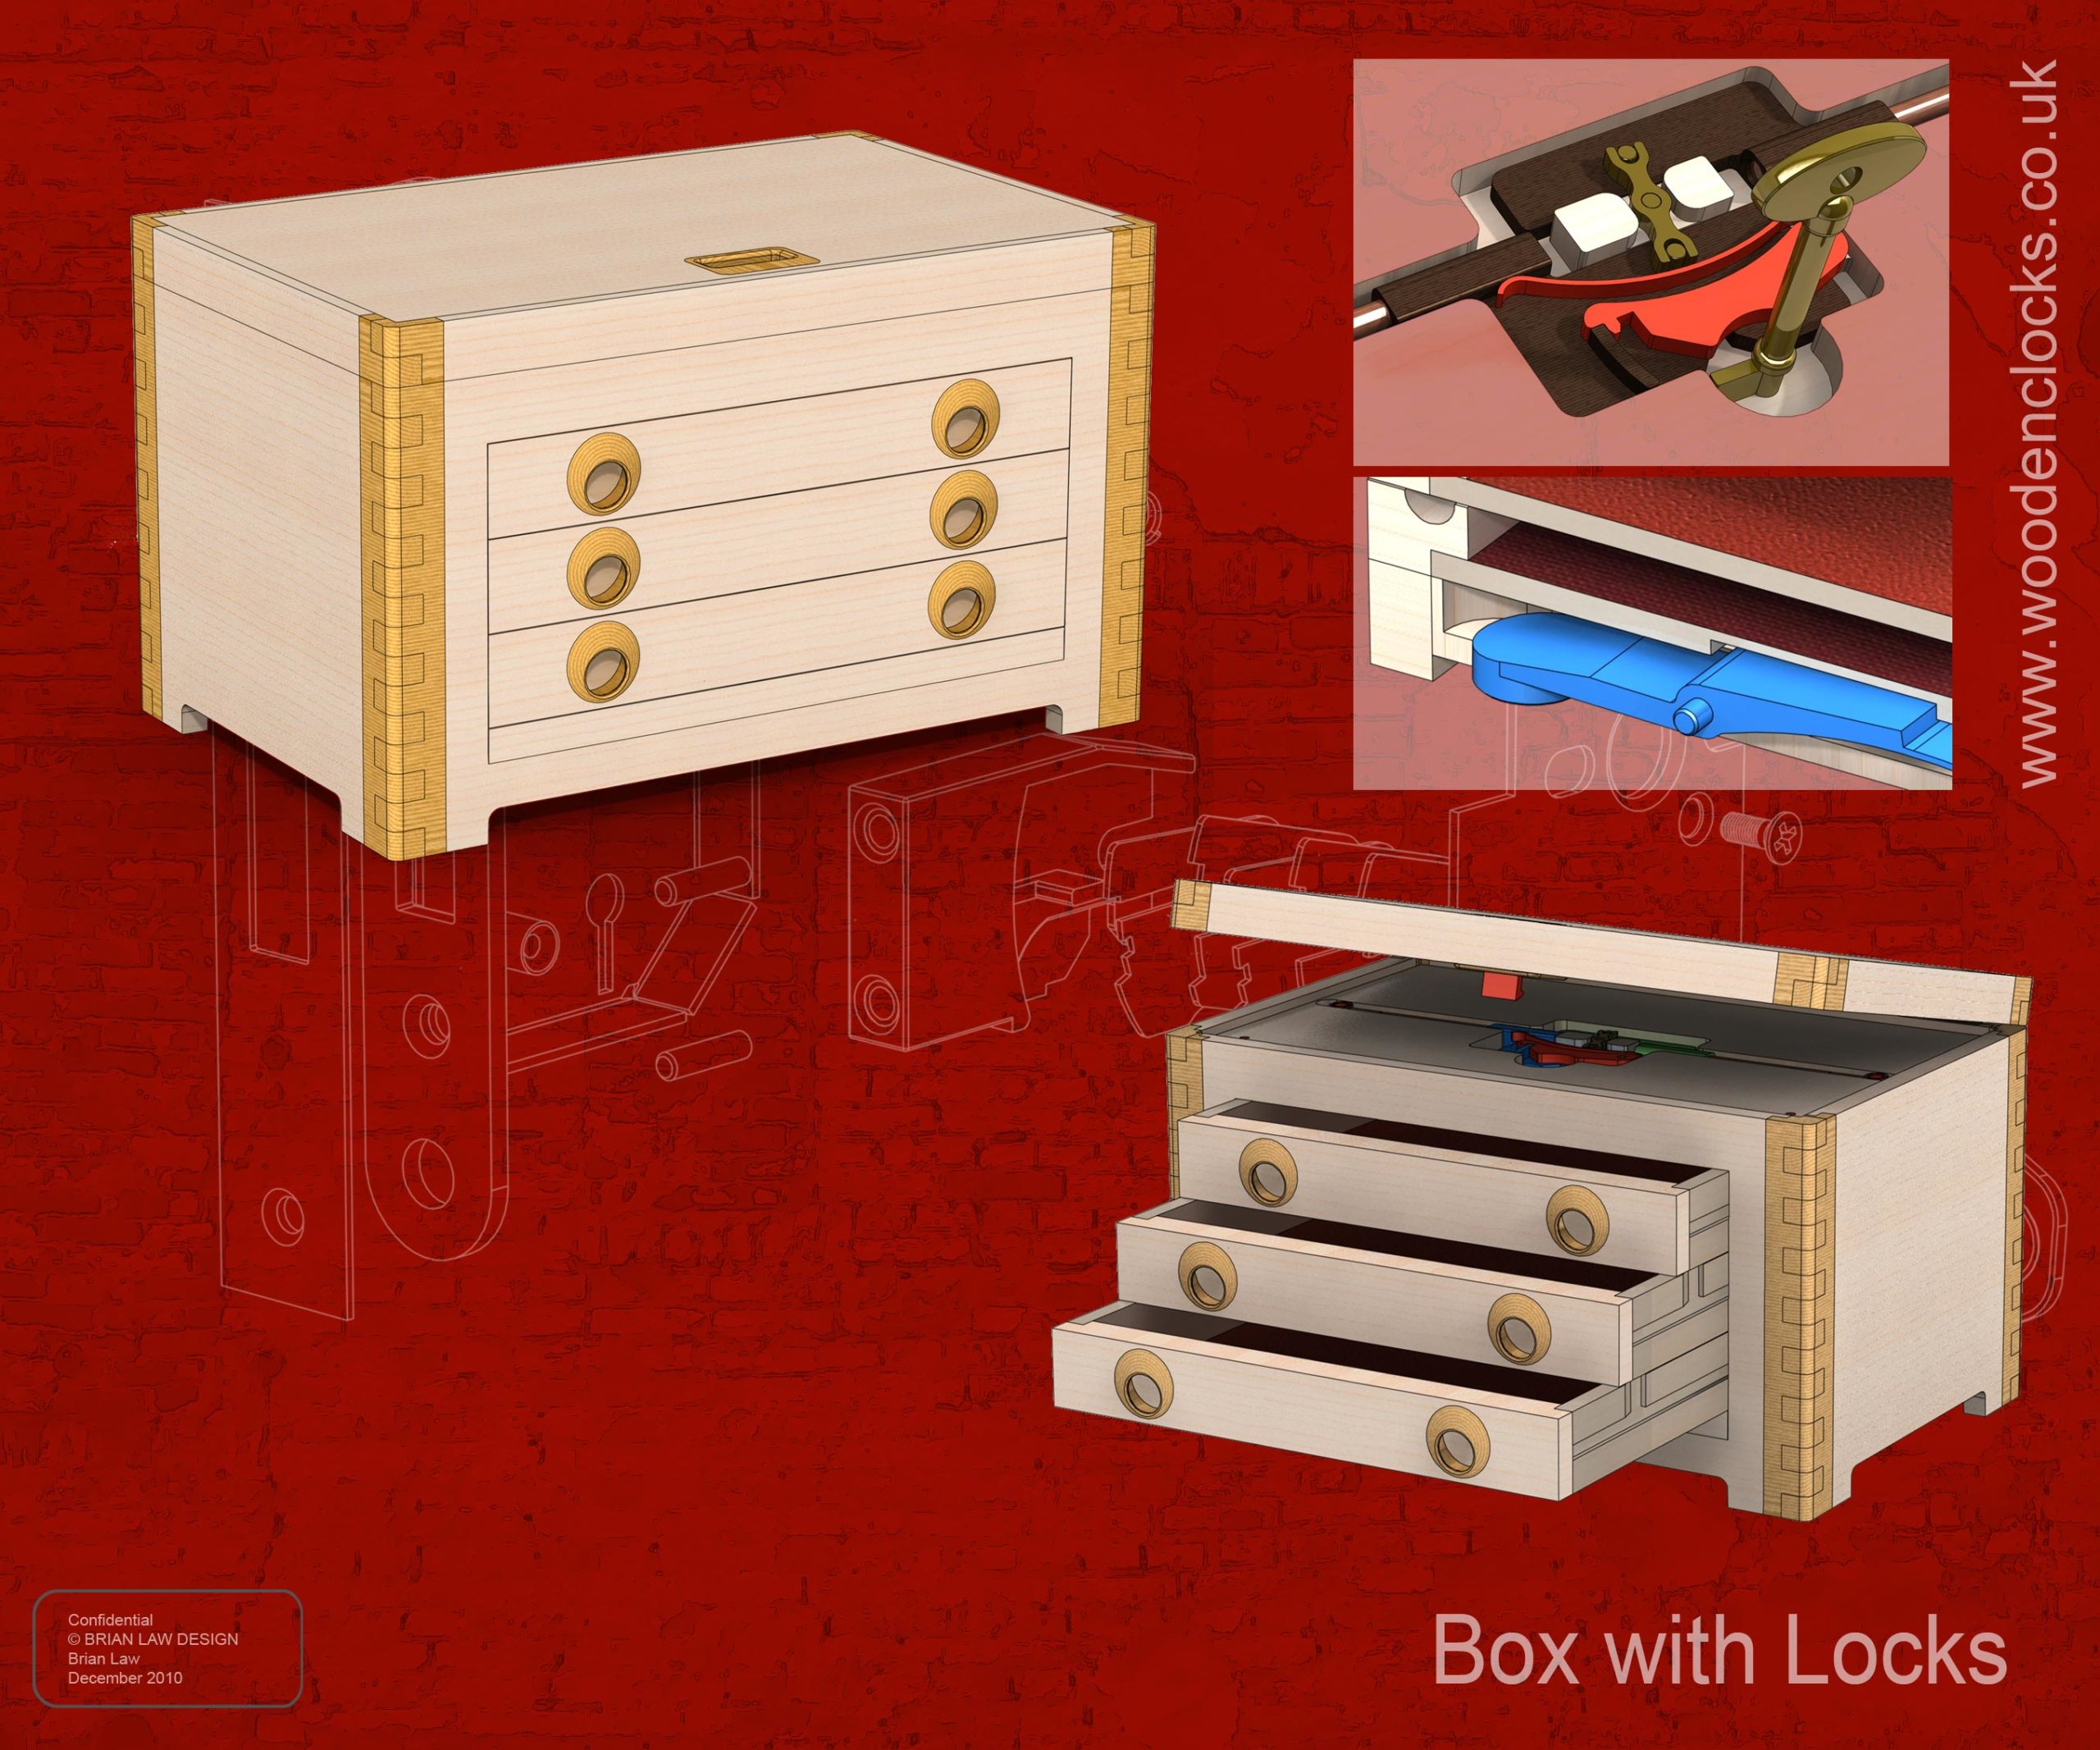
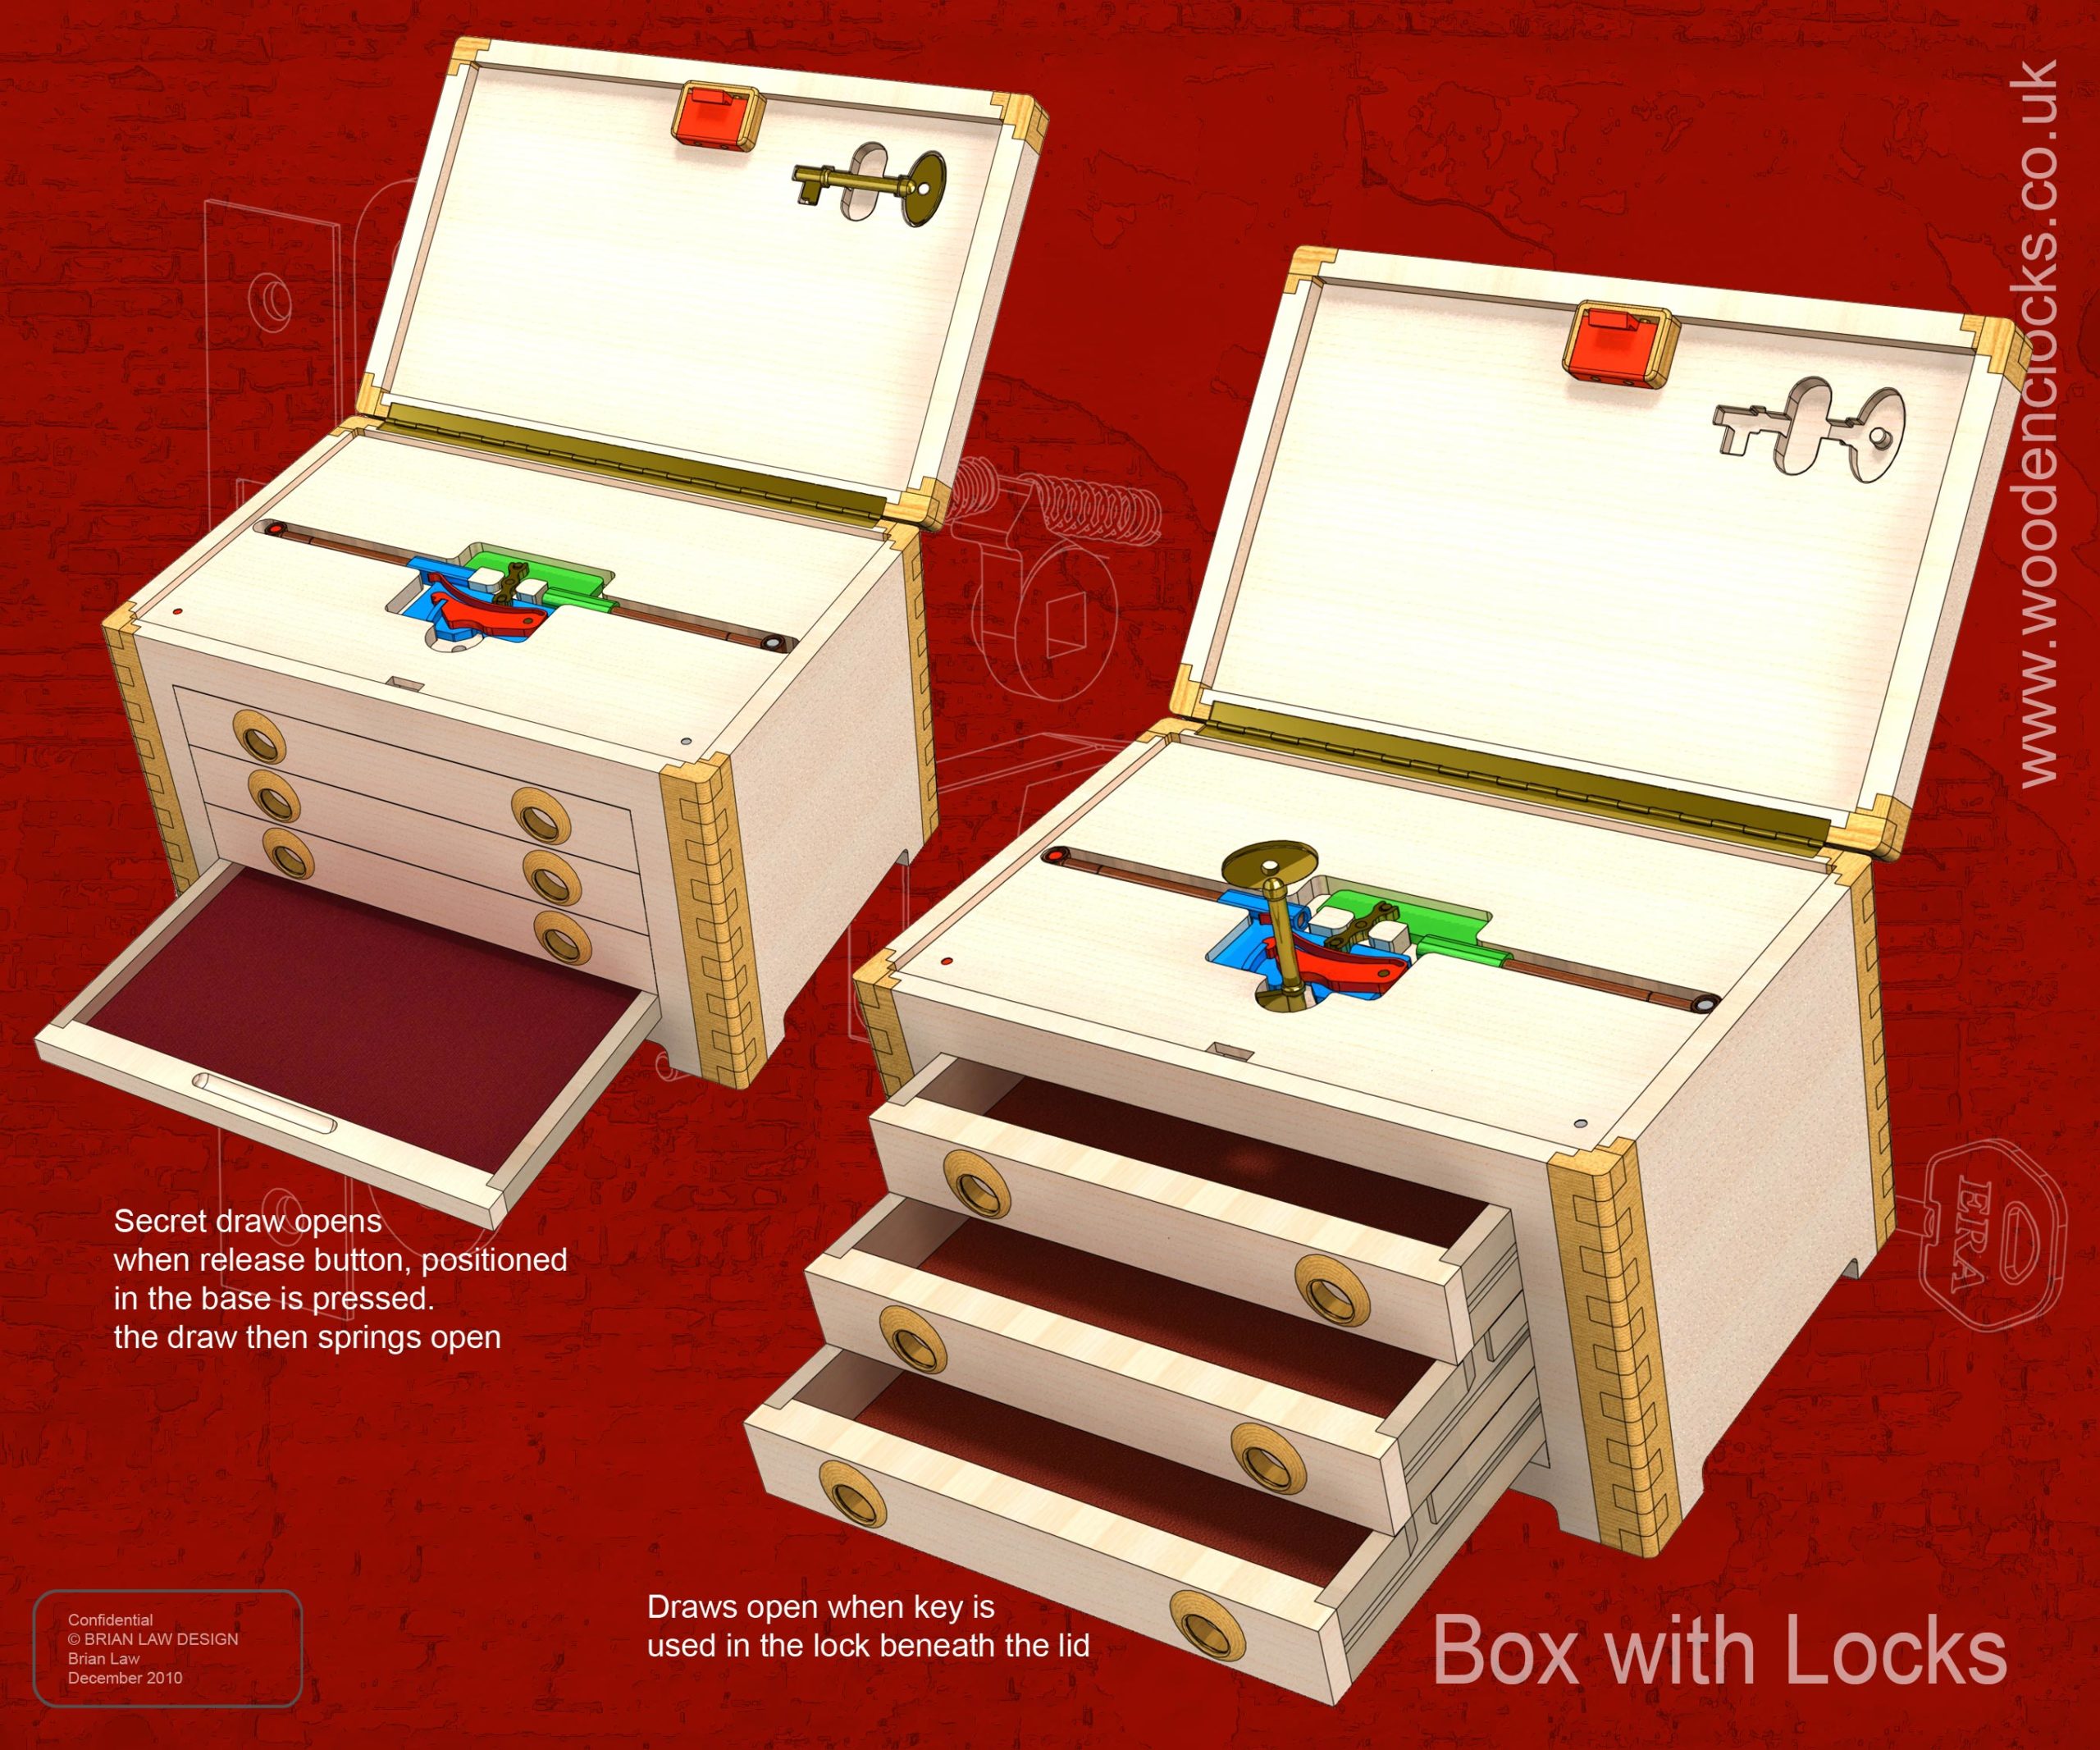
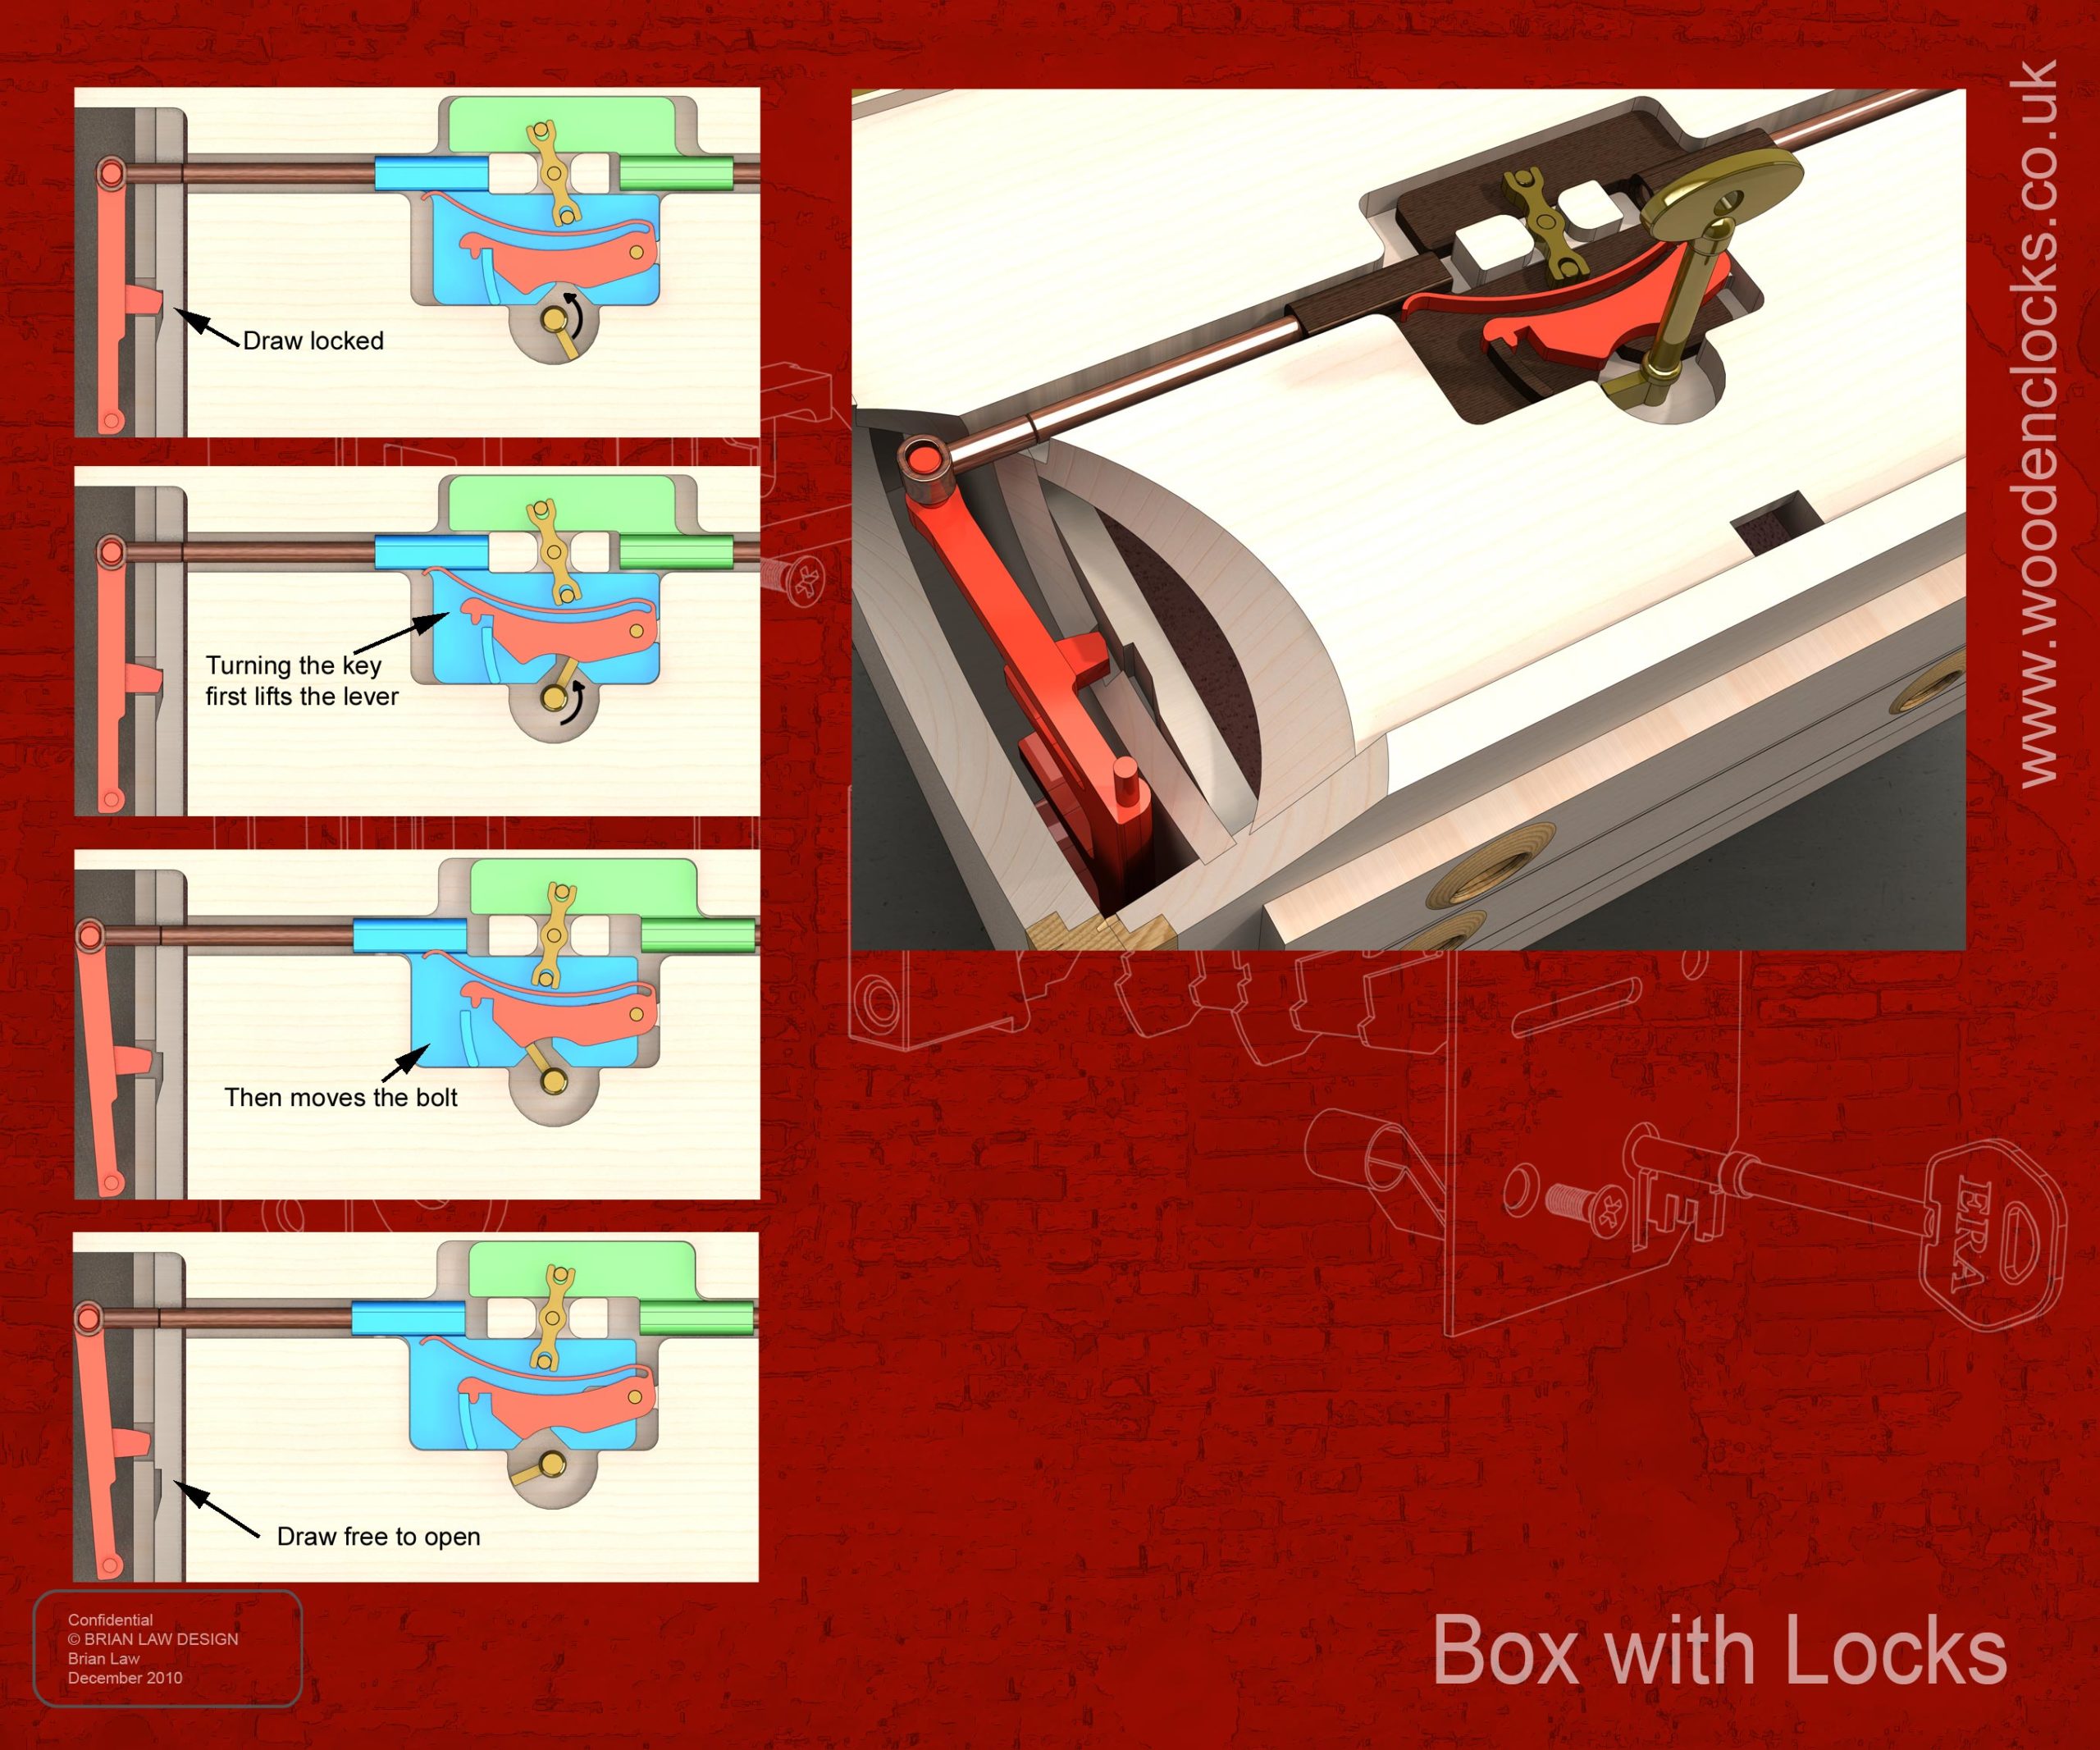
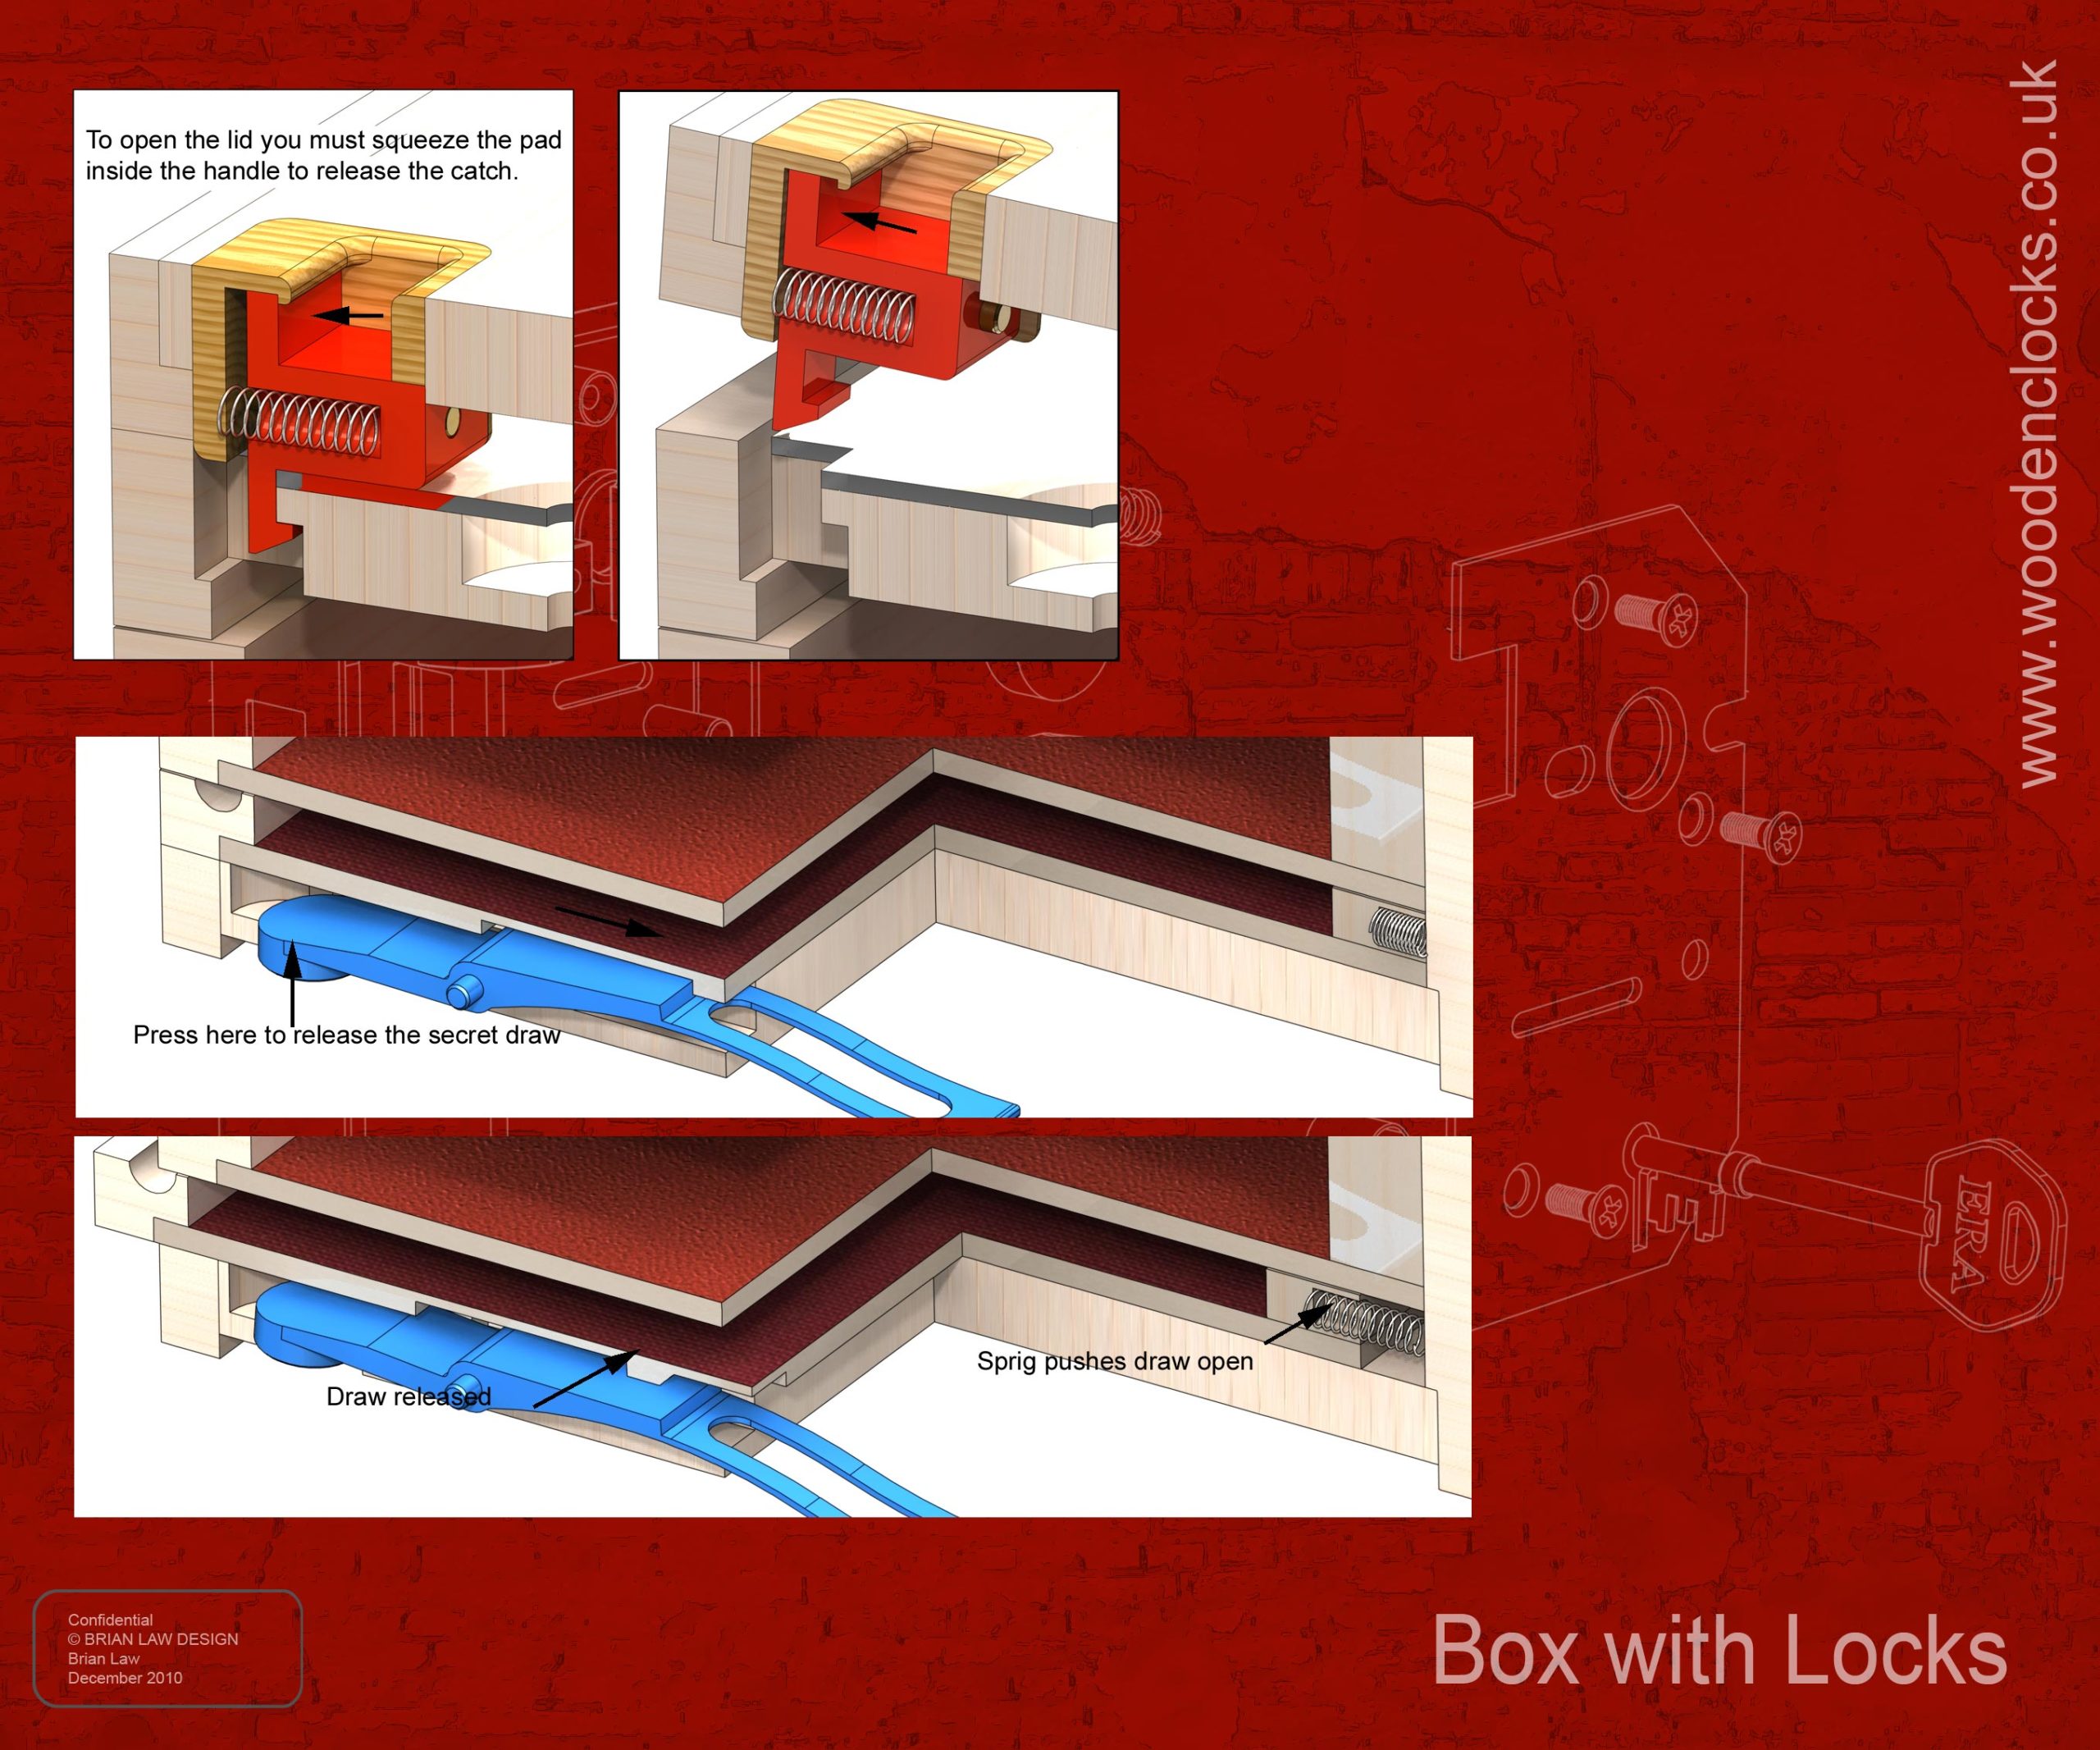
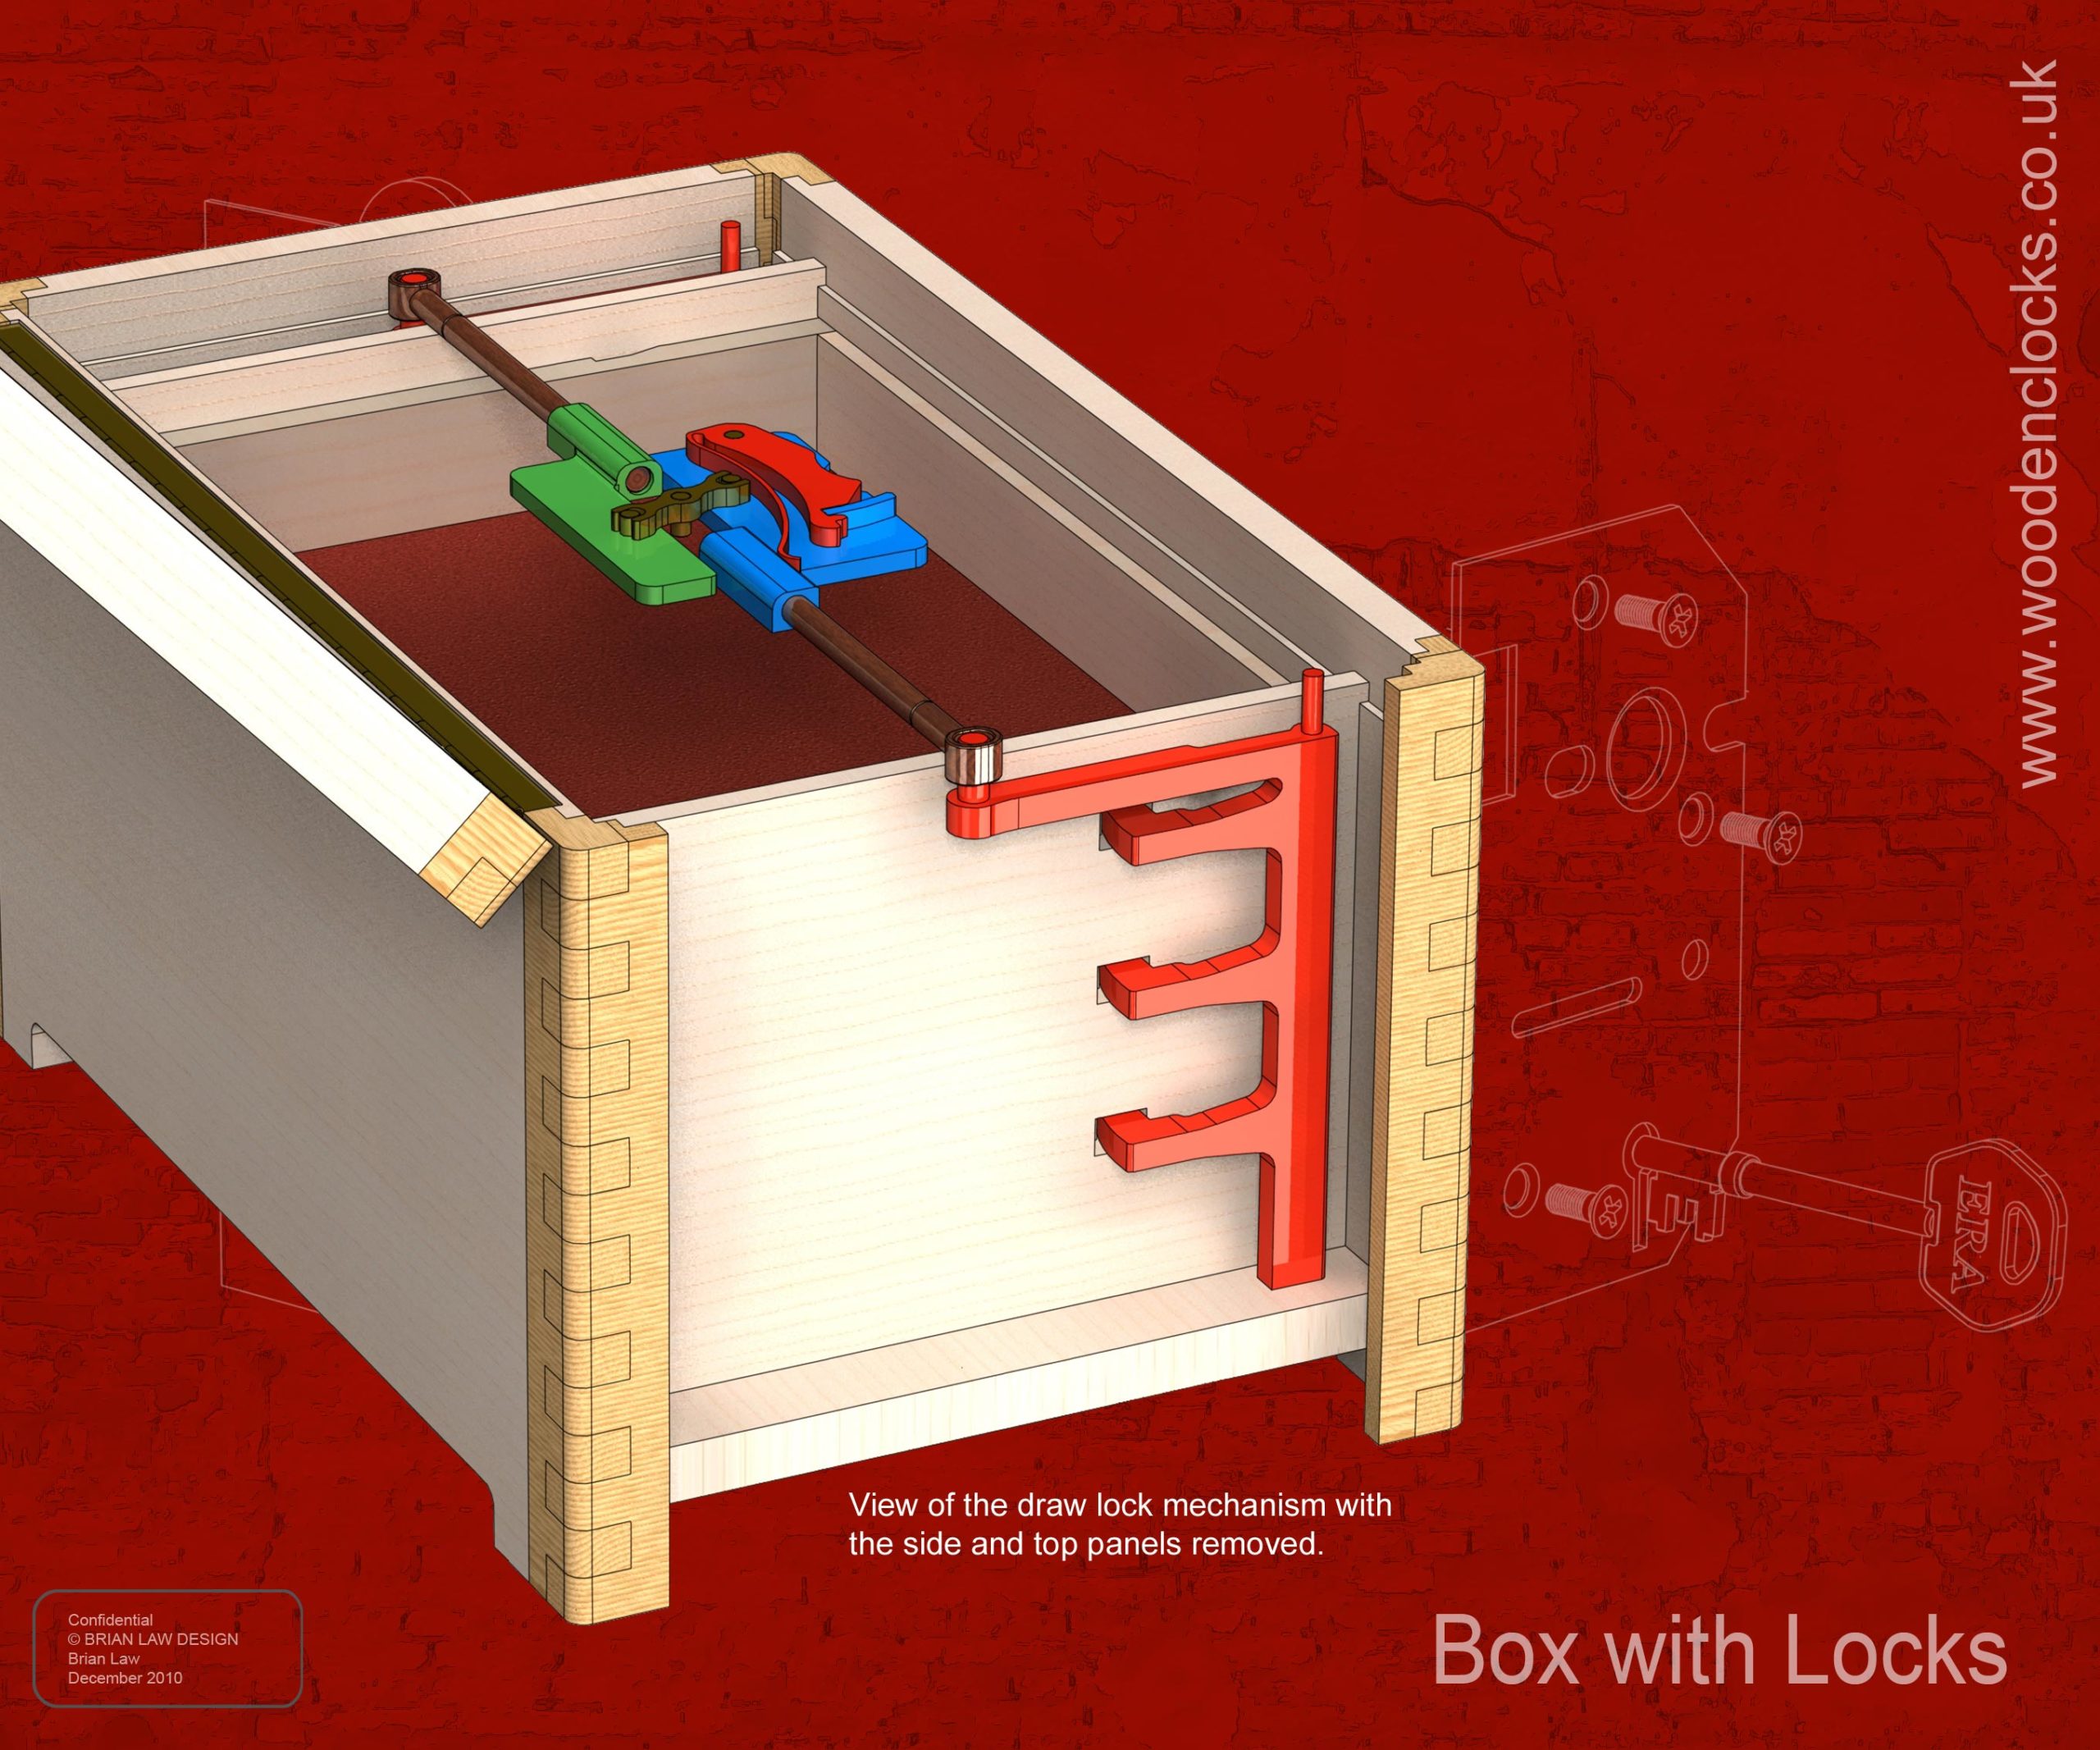
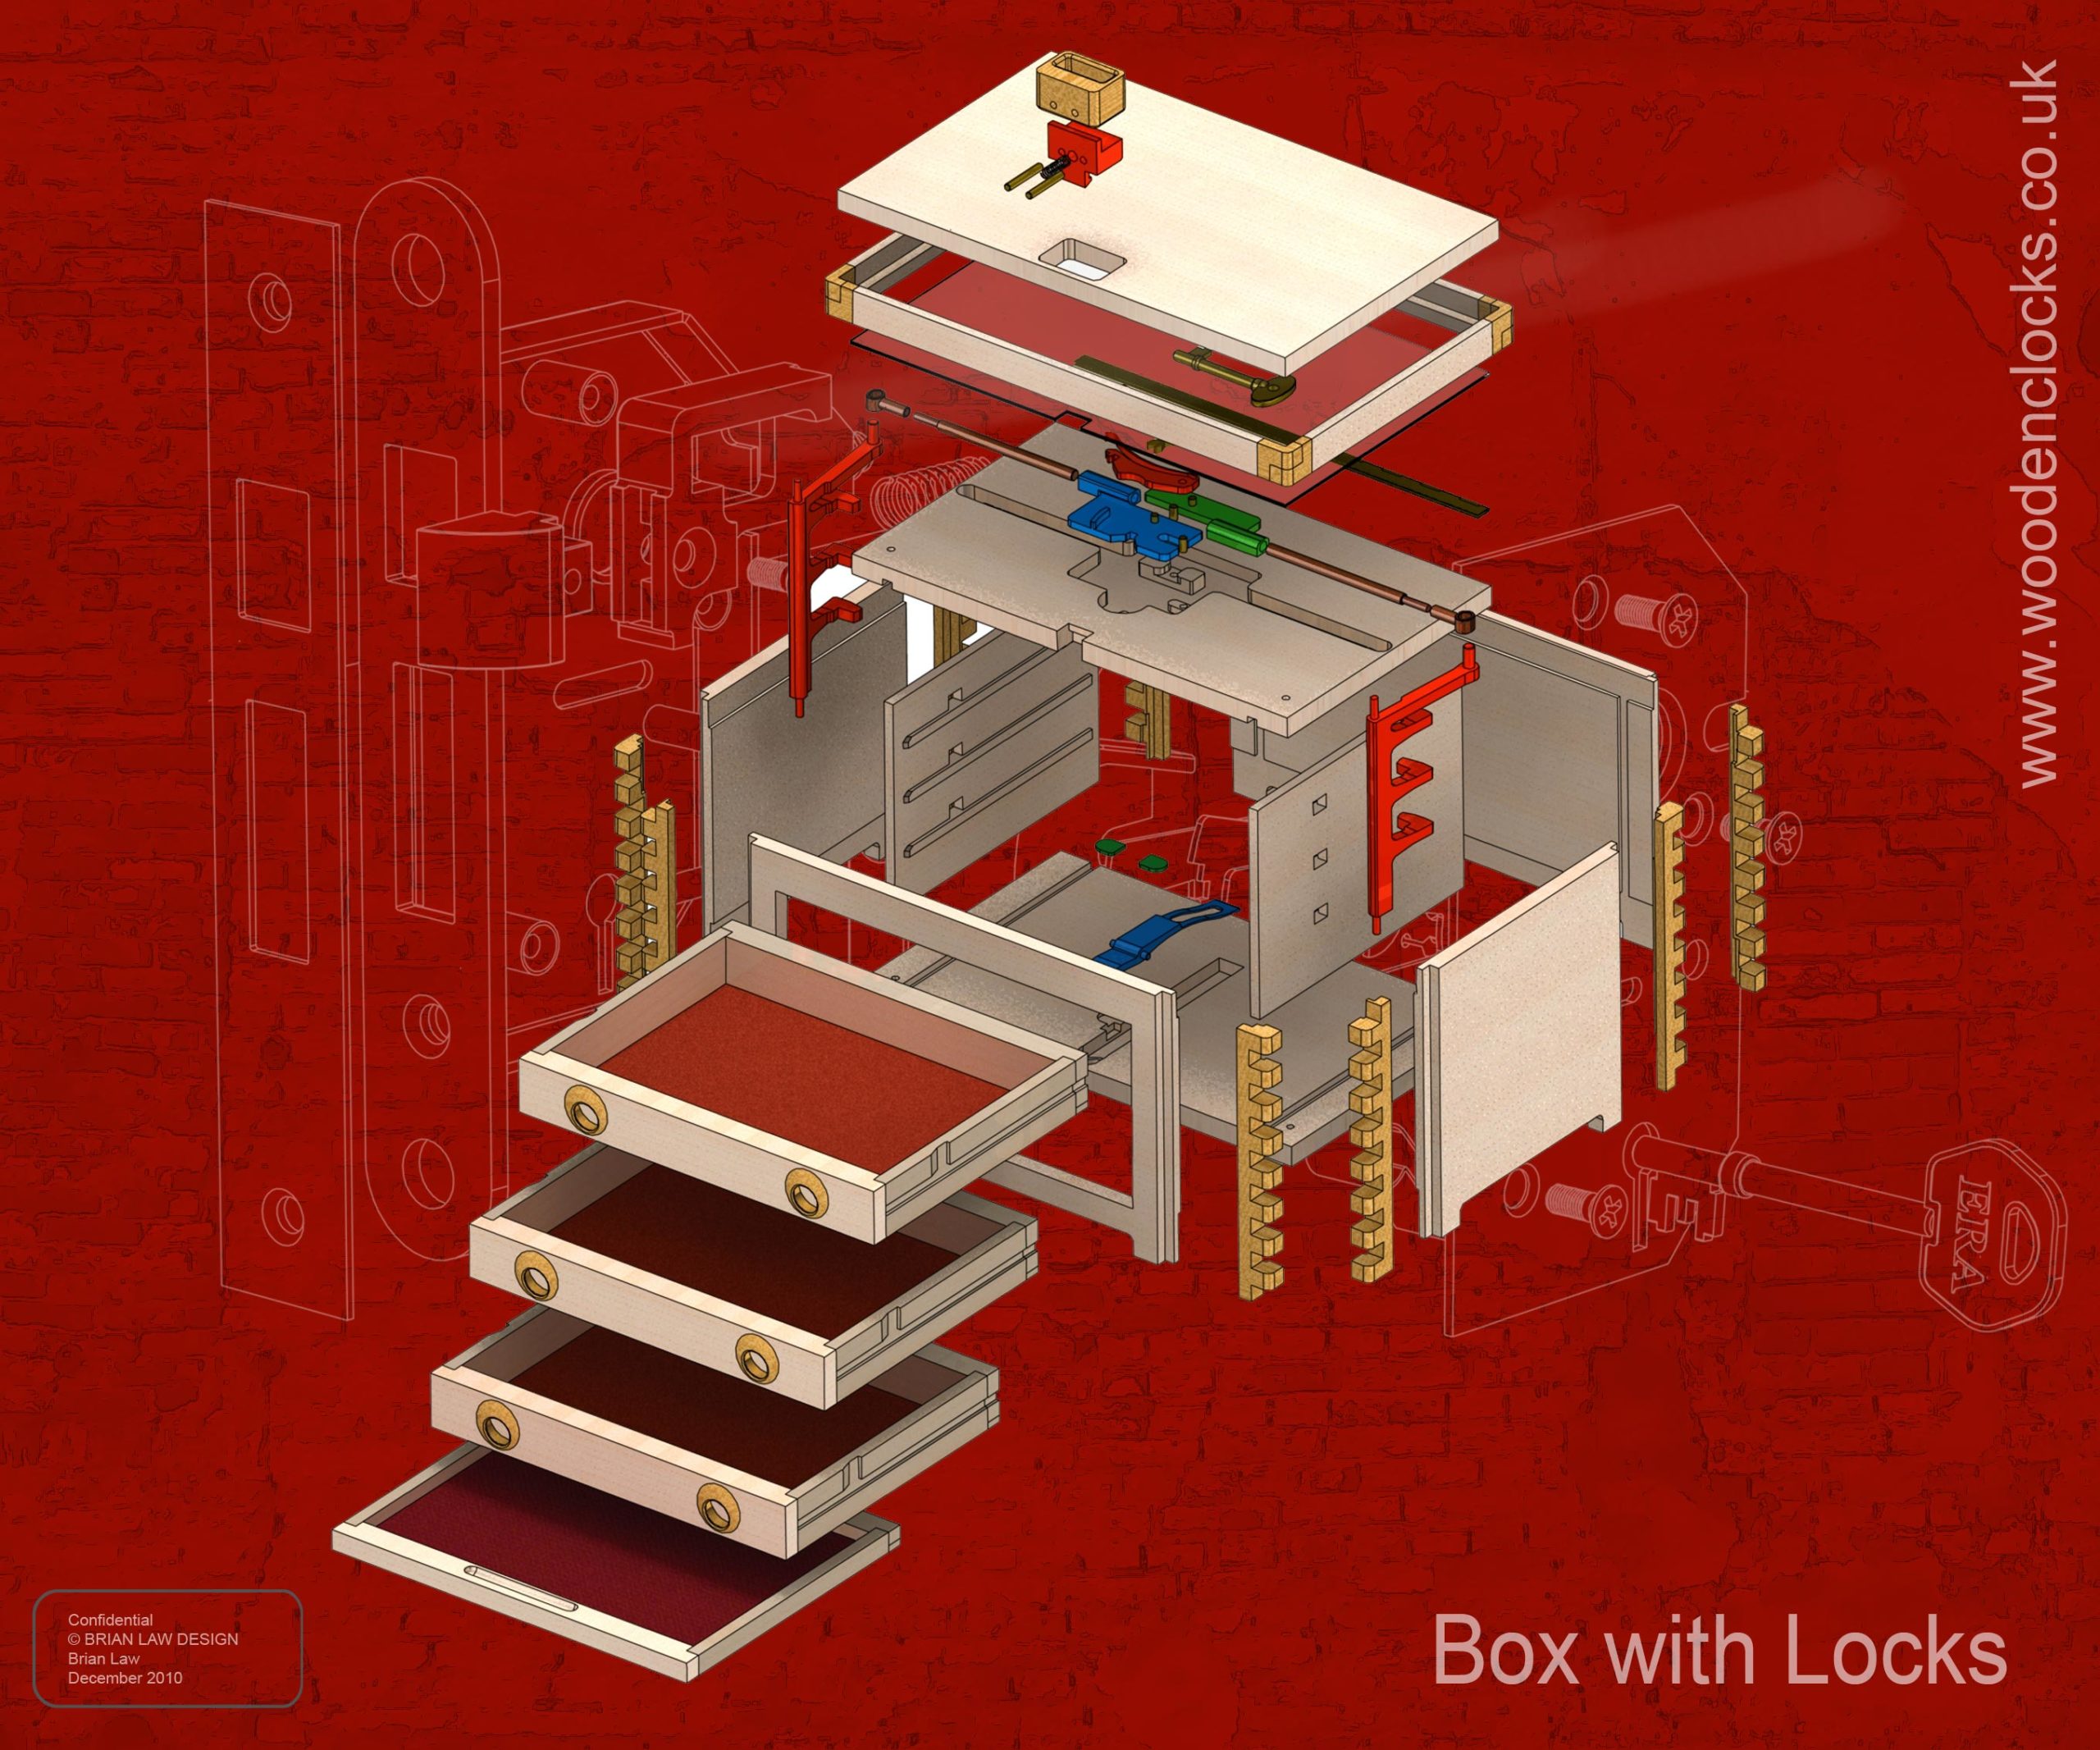
Box with Locks came about because I wanted to design a simple key operated lock that would be simple to construct and be educational in the process. I also had a bit of fun adding in a couple of secret catches so that the finished box has some added mystery. This construction uses mainly standard joinery skills with a bit of CNC thrown in for the more detailed joint and lock parts. I always had trouble making neat box comb joints by hand so I devised this way of constructing them using CNC machined ends that fit with a half lap joint to the main panels. A single end piece with the box combed end machined in repeated 8 times takes the hard work out of the construction. I had a similar box that I made some years ago to store all my drawing kit, pencils, pens etc, but it could be used for collections of special items, or tools or even jewellery. I think it would have special appeal in delighting the children as they struggle to find the secret locks.
DXF, DWG 2D files, and the IGS and STP files that can be used with your CNC machine can be downloaded here for $26. You also get the unrestricted version of the PDF files that can be printed at full size.
Drawings for this clock in PDF format can be downloaded here. These free files are restricted so that you can only view them on screen but not print them. Clicking to the left here will download the PDF file directly to your browser, may take a few moments so please be patient.
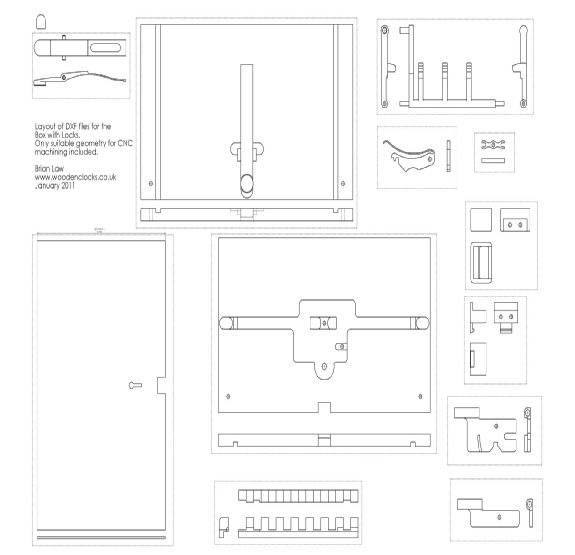
A sample from the DXF/DWG files is shown here. The actual files purchased above are included on one large sheet so that they may be directly loaded into your CAM program.
To print only a single item of the drawing to scale using Adobe Acrobat Reader, do the following:
Go to Edit, then click on Take a snapshot, move the cursor to the top left of the item you want to print and hold down the left mouse button whilst you drag a box around the item. The inside of the box turns blue and you can now go to File and then click on Print. This brings up the print dialogue, make sure Selected graphic is selected and that the Page scaling is set to None and the click on OK. As long as your printer is connected you will have printed the item at size. Do this for each item you want to cut out.
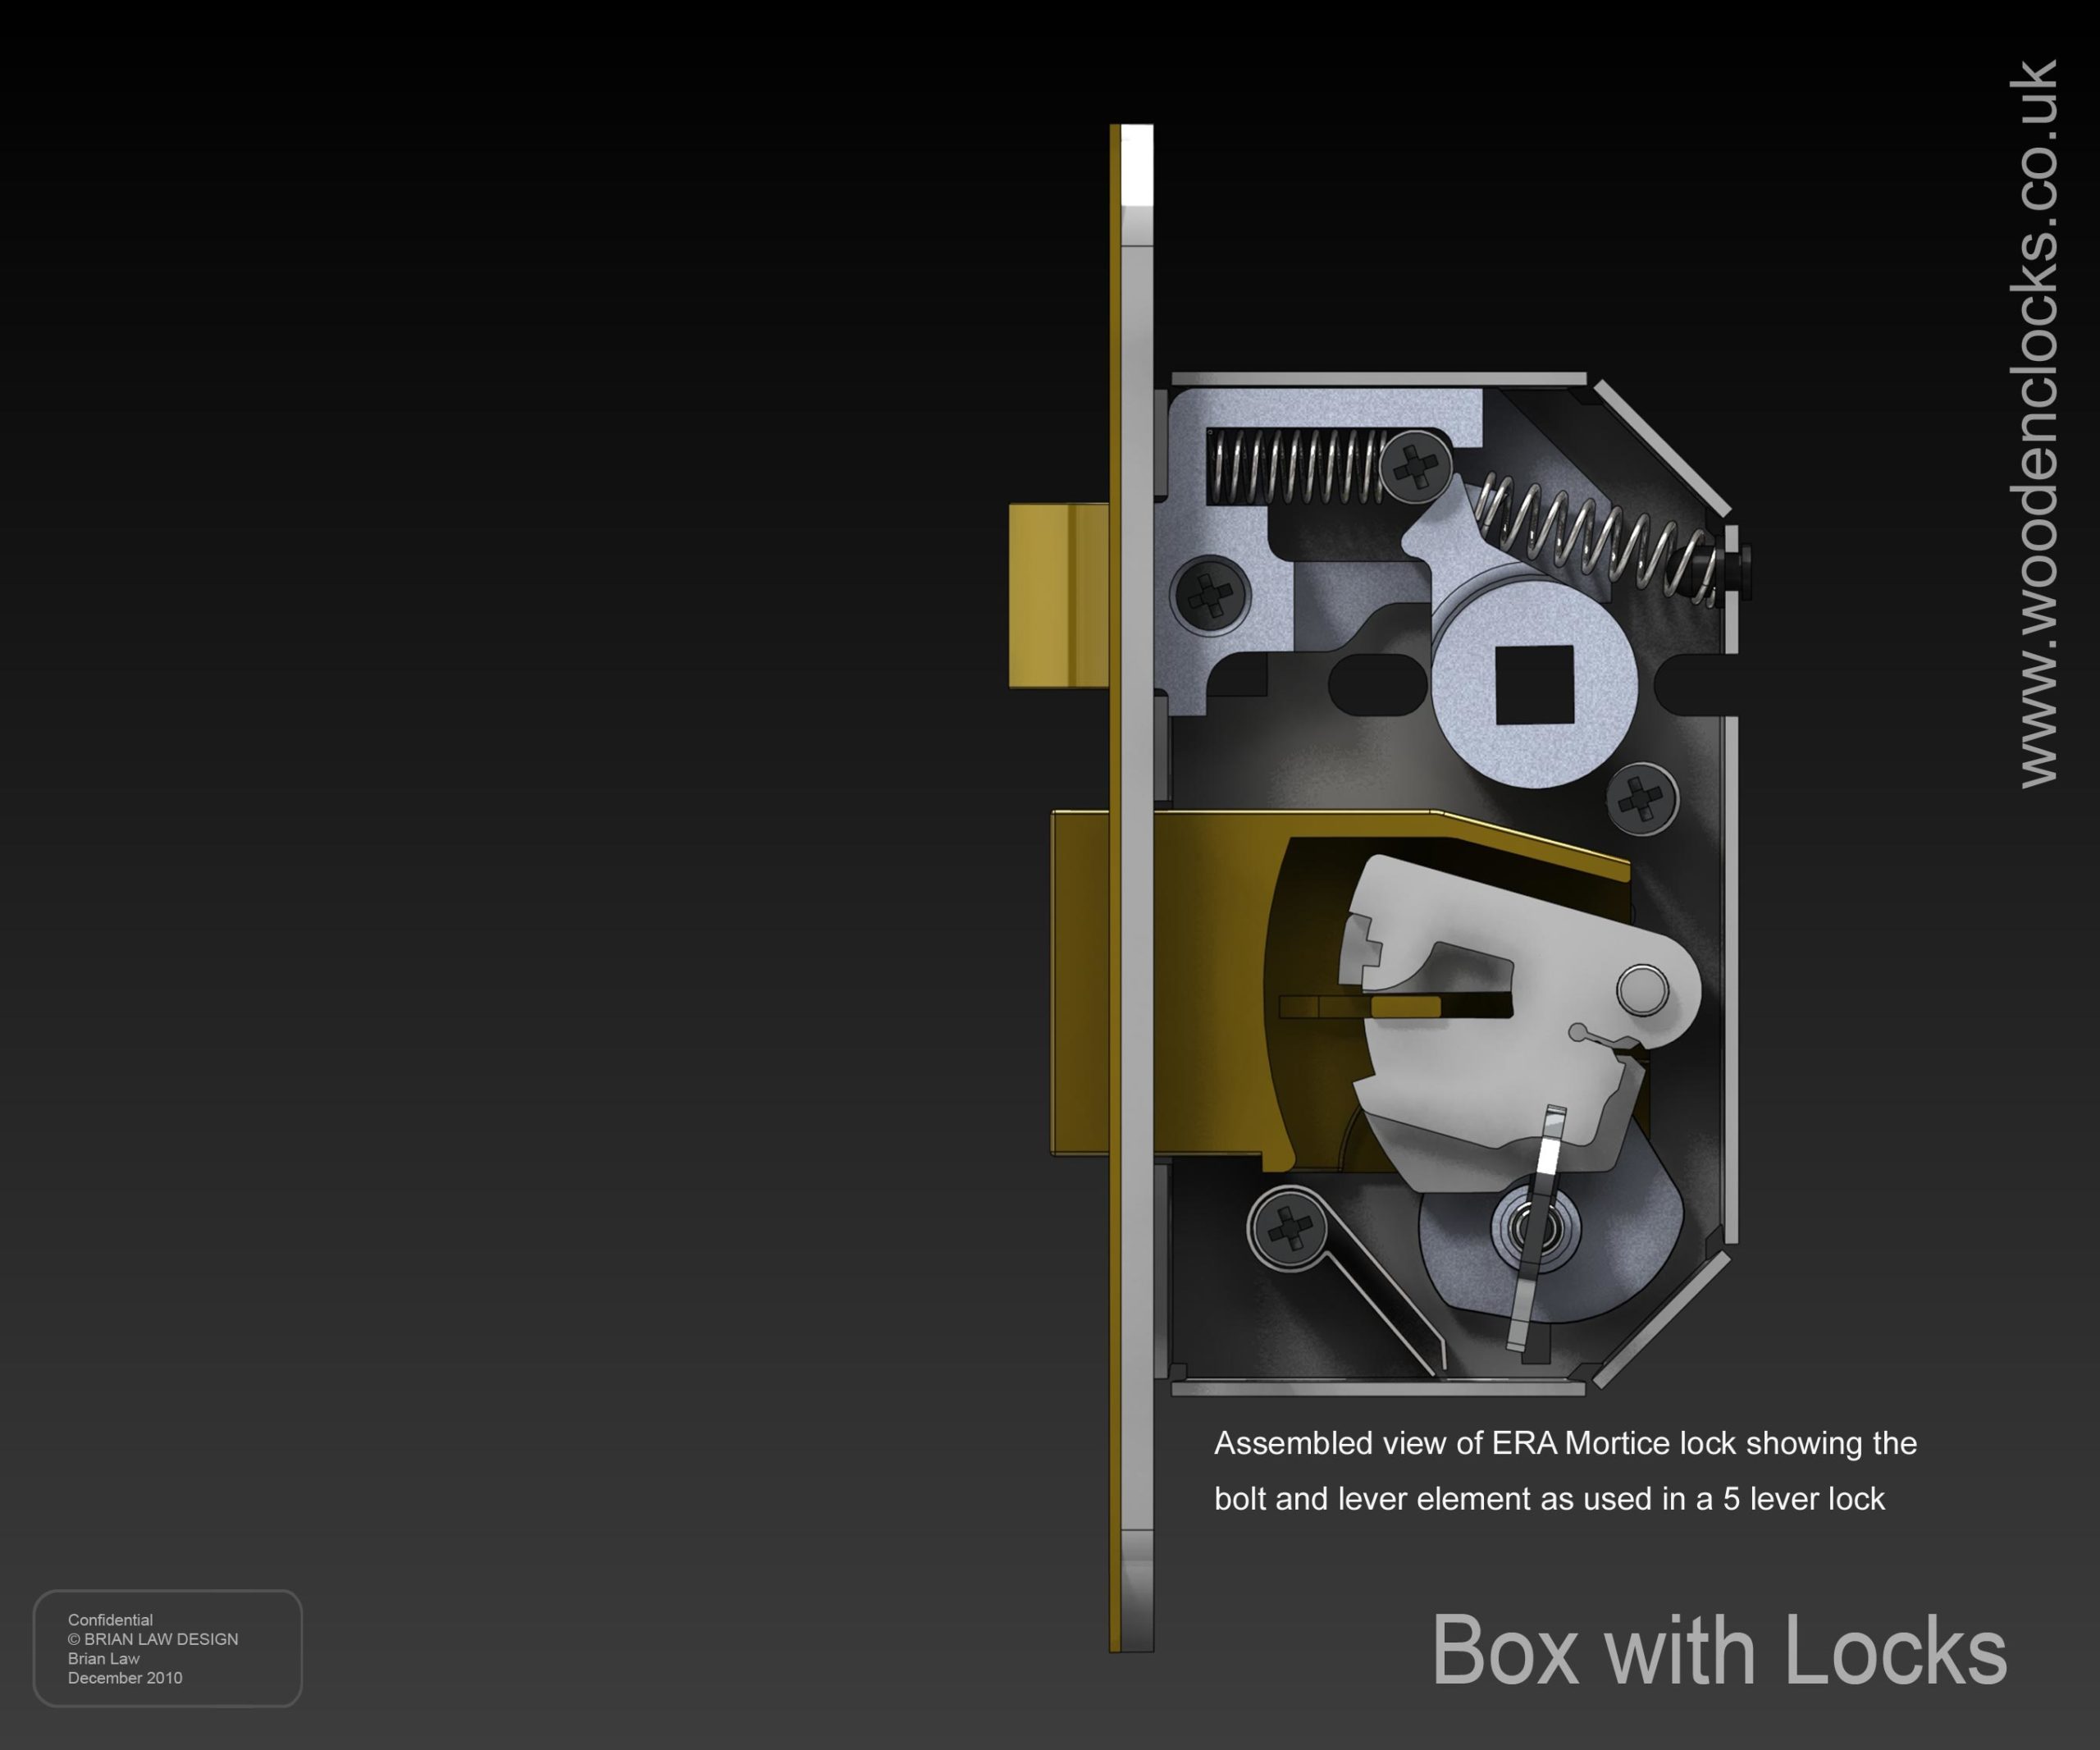
A Couple of rendered views of the ERA mortise lock that partly inspired this project.